How to install WordPress in wamp server
How to install WordPress in wamp server
Question arise by most of beginners who wants to use WordPress as blog publishing tool for own use. So, we decided to write a very simple tutorial about “How to install WordPress on Wamp Server?” with some visual snapshots. We are covering each and every point step by step to install WordPress on Wamp Server on localhost (local computer machine). Ghostwriter Deutschland uses WordPress to create its research project and can customize colors, fonts, headers, footers, layout, columns and other design elements, as well as content and images.
We are assuming that Wamp Server is already installed on our local computer machine. And for this tutorial I have installed my Wamp Server in E Drive of my local machine.
So, let’s start from here:
First download WordPress, using following download link http://wordpress.org/download/ download the latest version of WordPress zip/tar package on your local system hard drive.
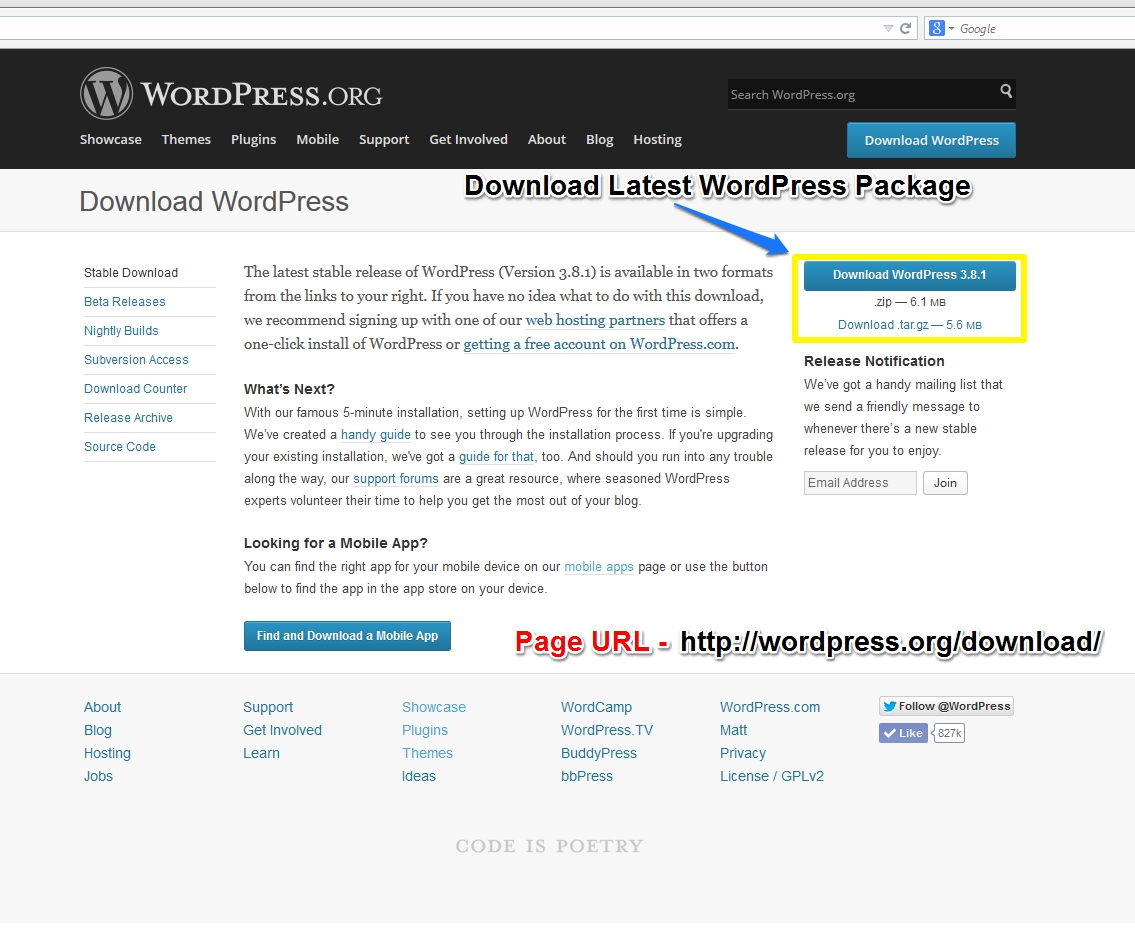
Download WordPress
After click on download link, WordPress installation package has been downloaded.
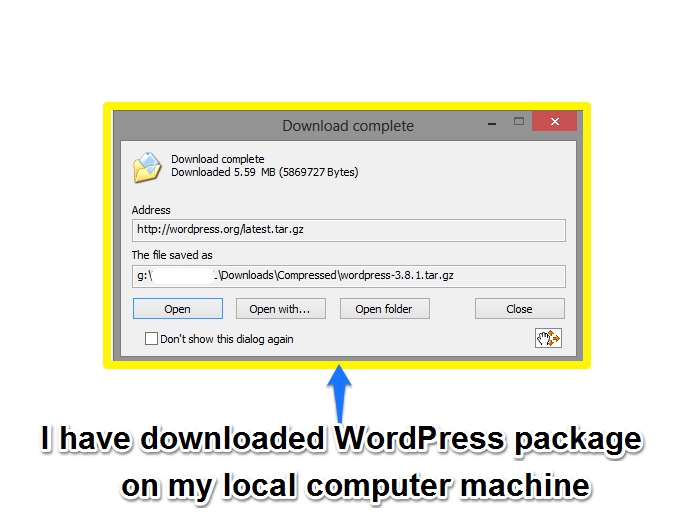
WordPress- Package Downloaded
So, I am going to move the downloaded WordPress package in Wamp Server’s E:\wamp\www\ directory.
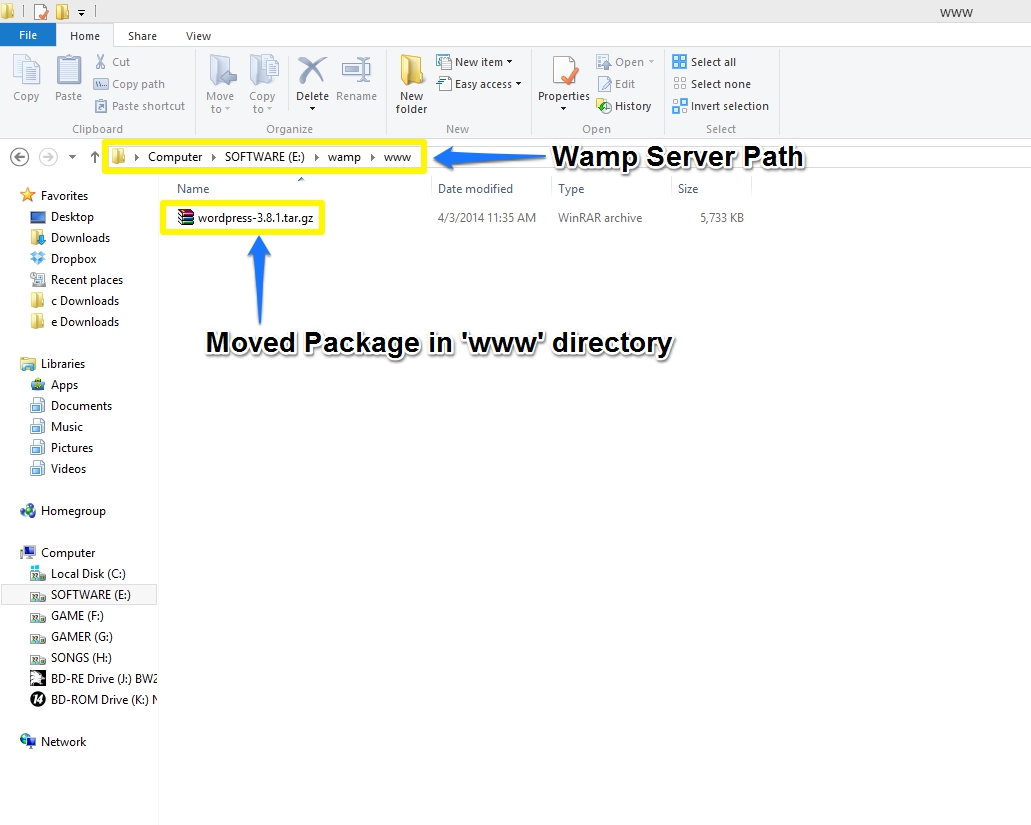
WordPress- Package moved in Wamp ‘WWW’ Directory
Now unzip package by right click on it, and select list option ‘Extract Here’ same as below snapshot.
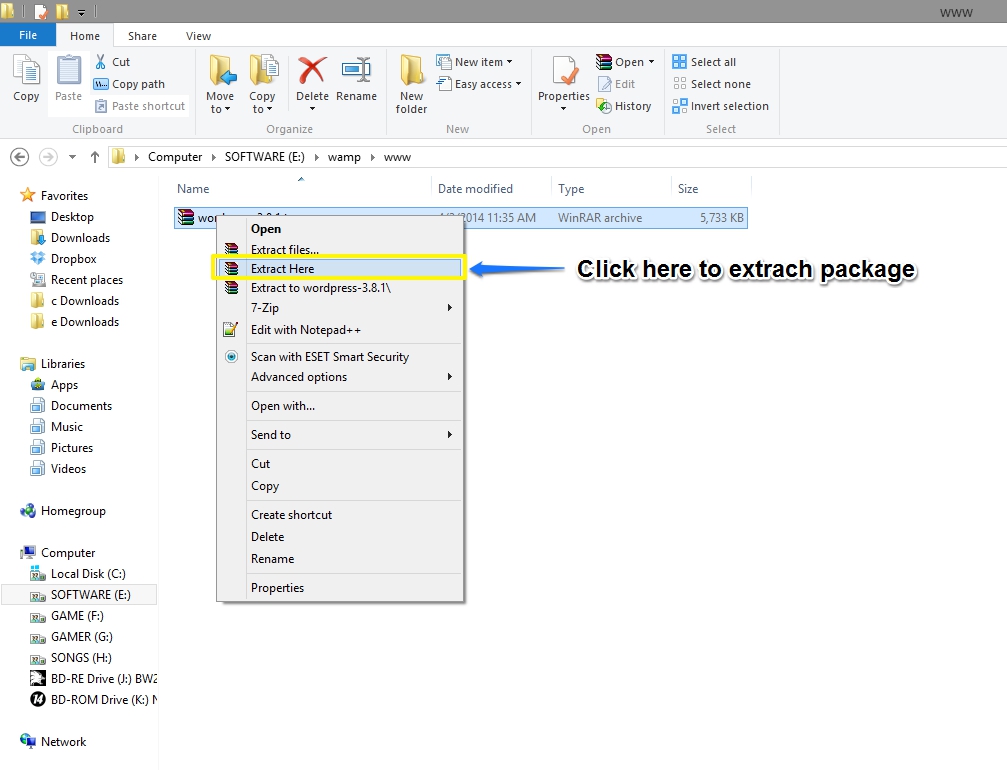
Unzip WordPress Package
Now go to phpmyadmin to setup a database for our WordPress installation.
Type following URL – http://localhost/phpmyadmin/ in any your favorite browser to reach phpmyadmin administrator dashboard.
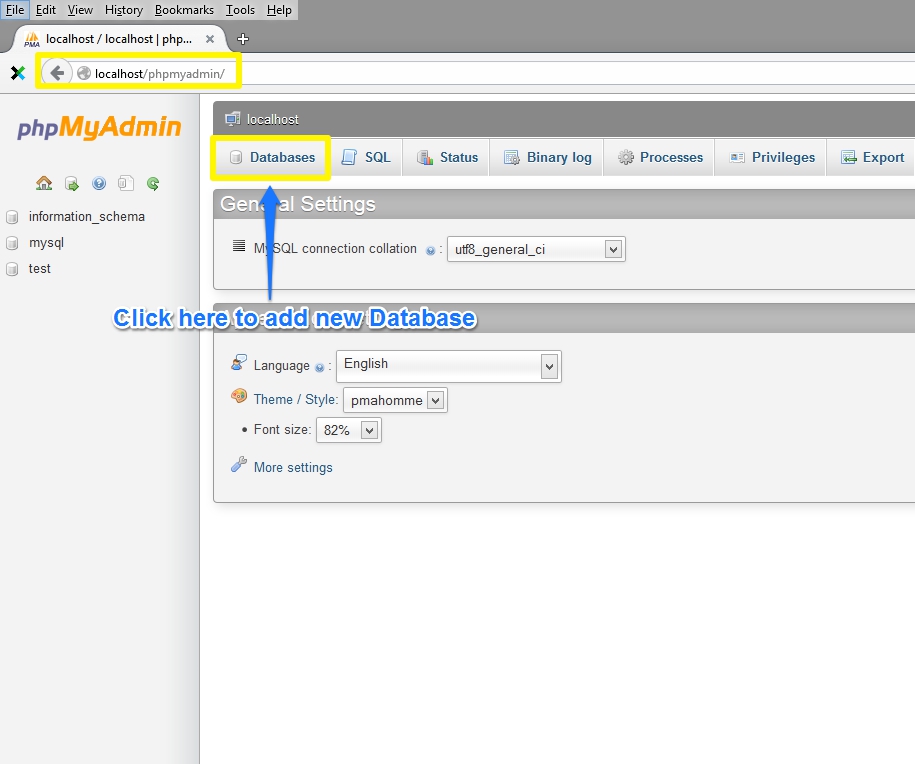
Phpmyadmin Administrator Dashboard
New, we are adding a new database “wordpress-db” for our new WordPress blog installation, follow snapshot instructions.
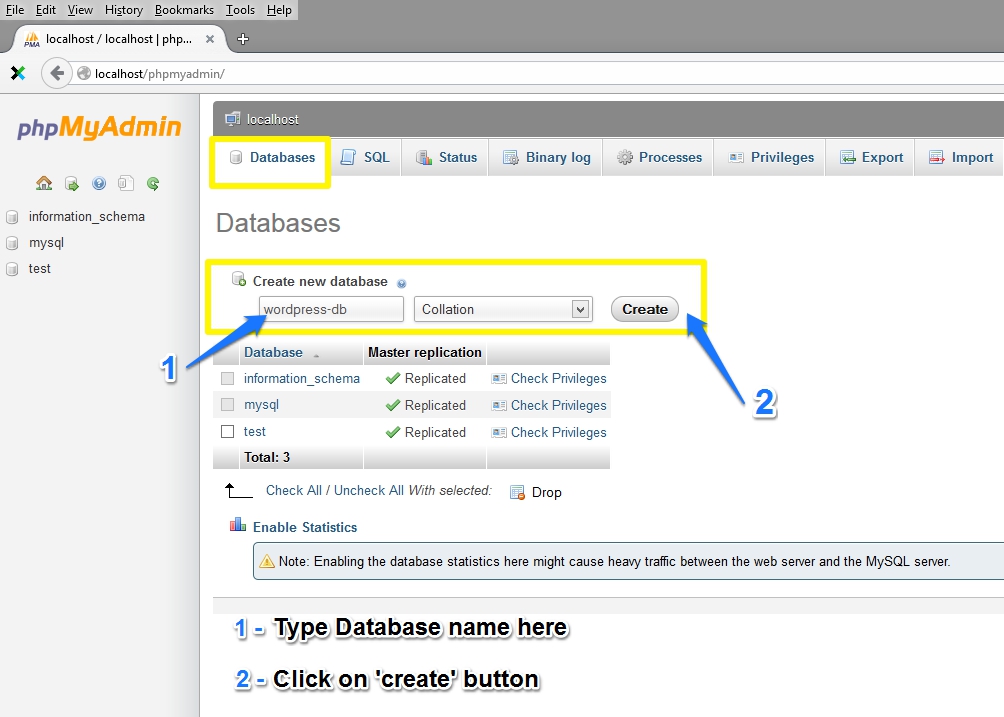
Create New Database – “wordpress-db”
We has created a new database named with “wordpress-db”. Now select created database from left side database list.
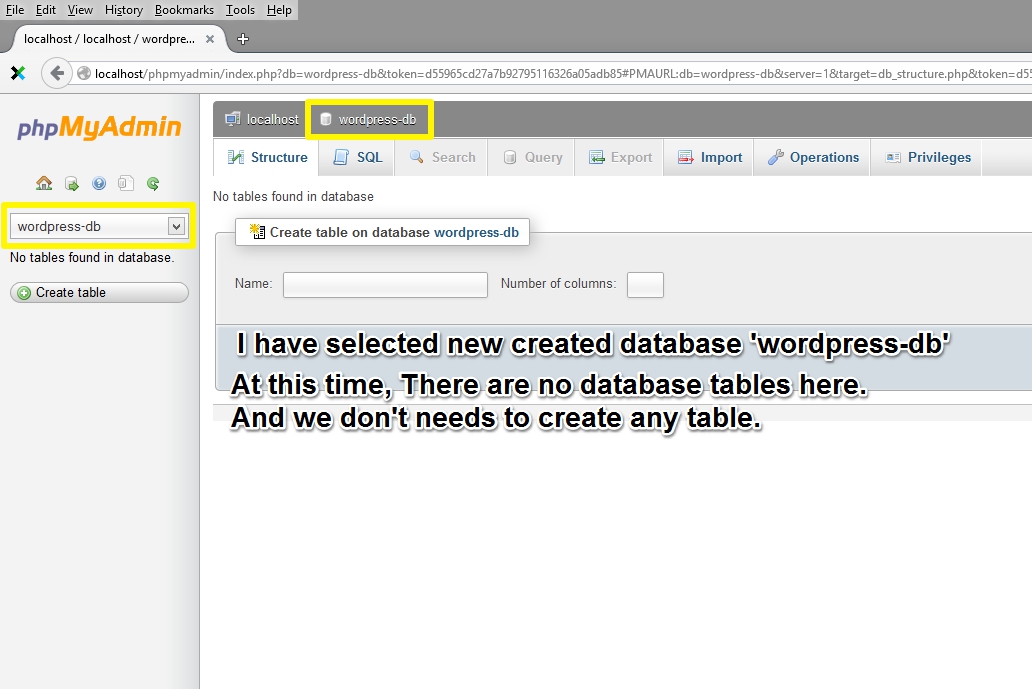
Select Database “wordpress-db”
Now type the following URL in your favorite web browser http://localhost/wordpress/ and hit enter key.
This is first WordPress Installation screen displaying and asking for creating “wp-config” file. Wp-config is default configuration & setting file used to setup WordPress default settings and values for initial blog.
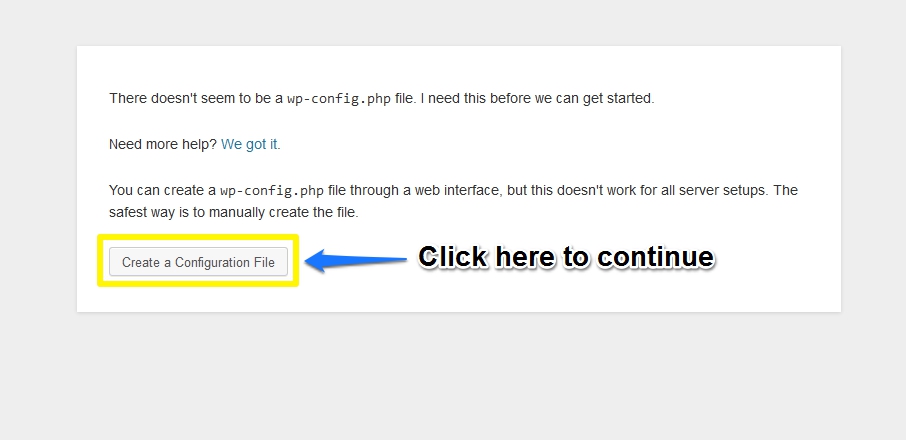
First Screen of WordPress Installation
Now, below second screen prompting for 4 required things for WordPress installation, like:
- Database Name – We already created a new database “wordpress-db” for new WordPress Installation
- Database Username – As we installing WordPress on local machine then default Database Username “root” is used by phpmyadmin.
- Database Password – By default phpmyadmin usage no password, so keep it blank as of now. But you can change it by visiting phpmyadmin admin dashboard, then open privileges tab and edit the default record and set a password.
- Database Host – Use “localhost” for database host because we are working on local computer machine.
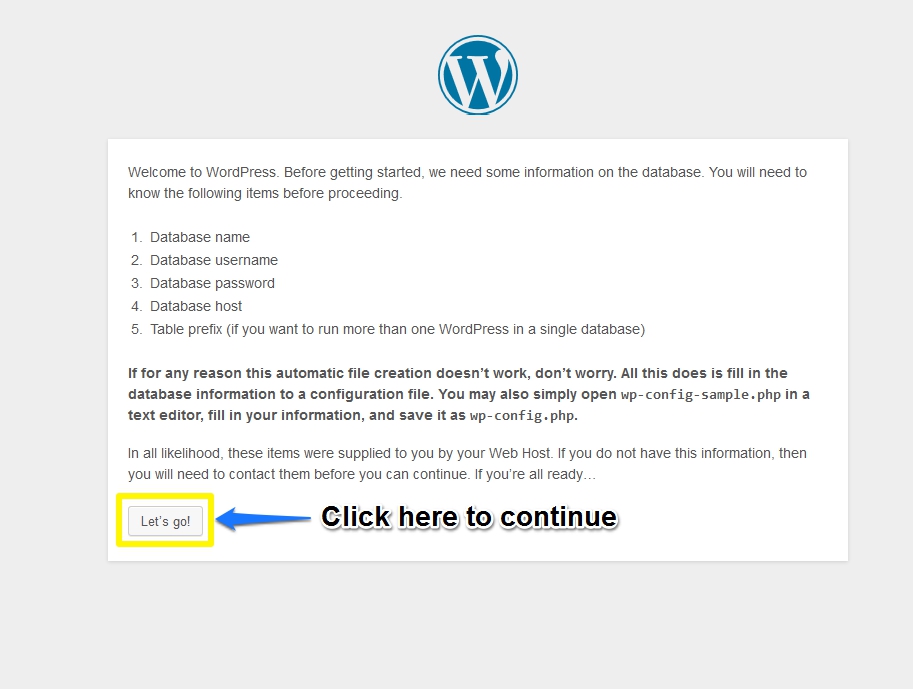
Second Screen of WordPress Installation
Put all correct fields values for installation.
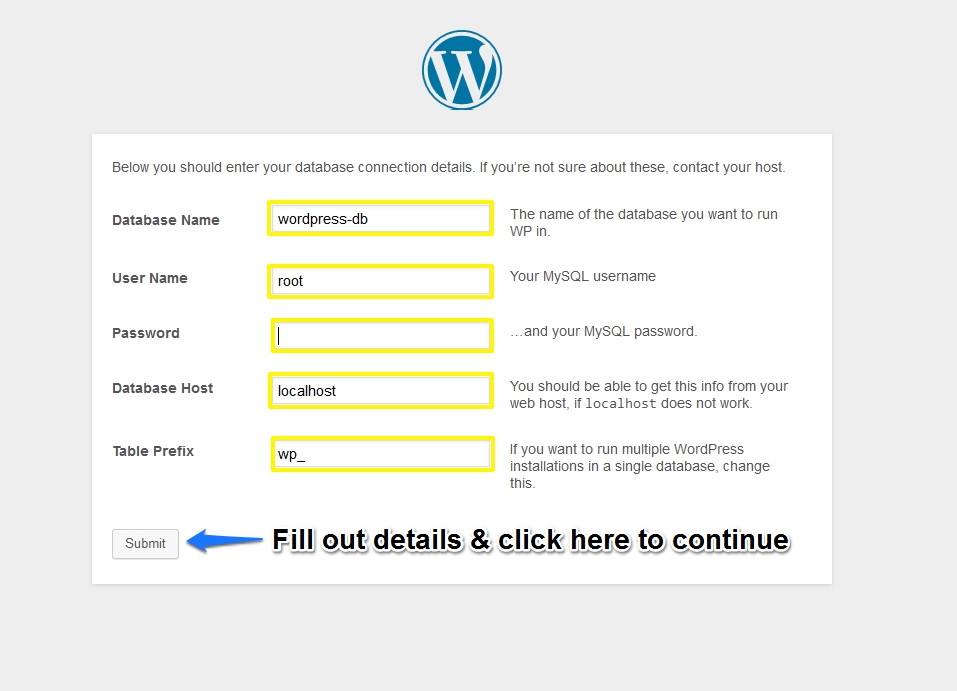
Third Screen of WordPress Installation
Now run the Run the WordPress installation by pressing “Run the Install” button on below screen.

Forth Screen of WordPress Installation
Now, at the final step WordPress installation asking to setup administrator account and blog title.
Set a unique WordPress Blog Title, and choose a strong Username & Password for administrator account. Username & Password will be used later for log-in into your WordPress admin dashboard.
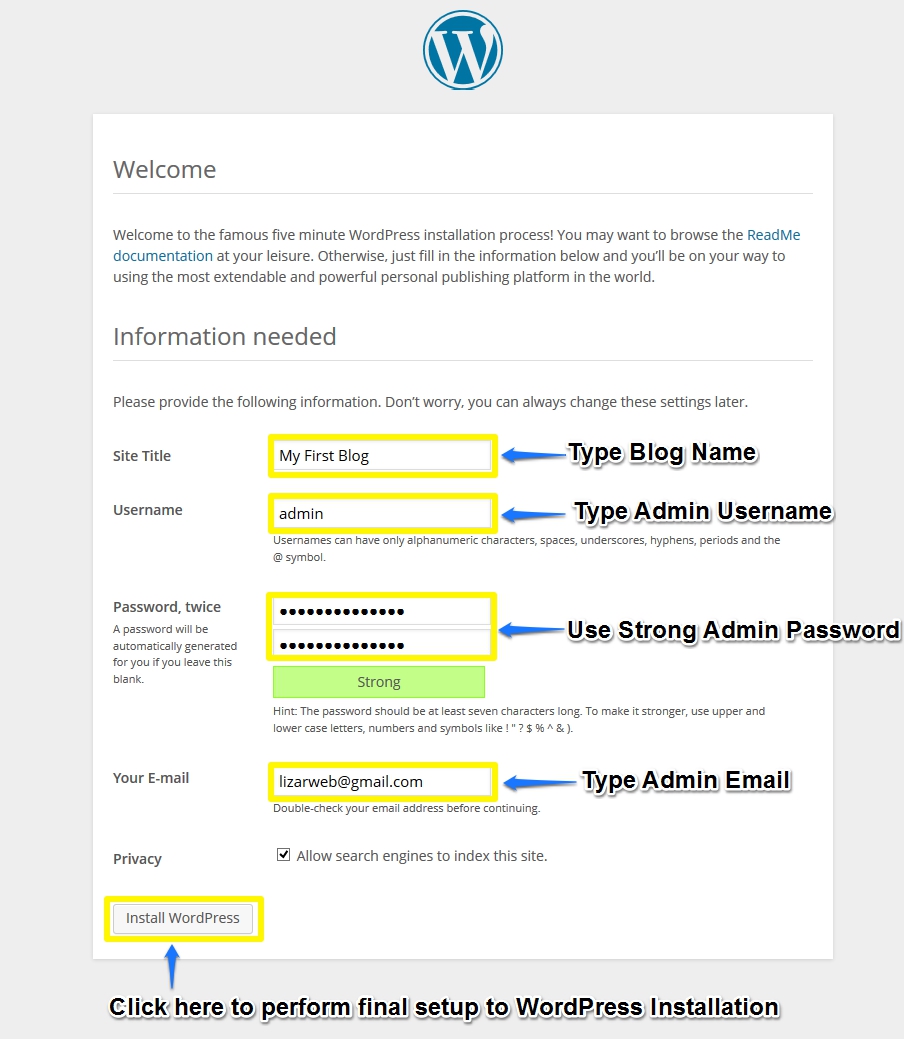
Fifth Screen of WordPress Installation
Below screen showing your WordPress installation has been successfully completed. Now you can login by using previously created Username & password.
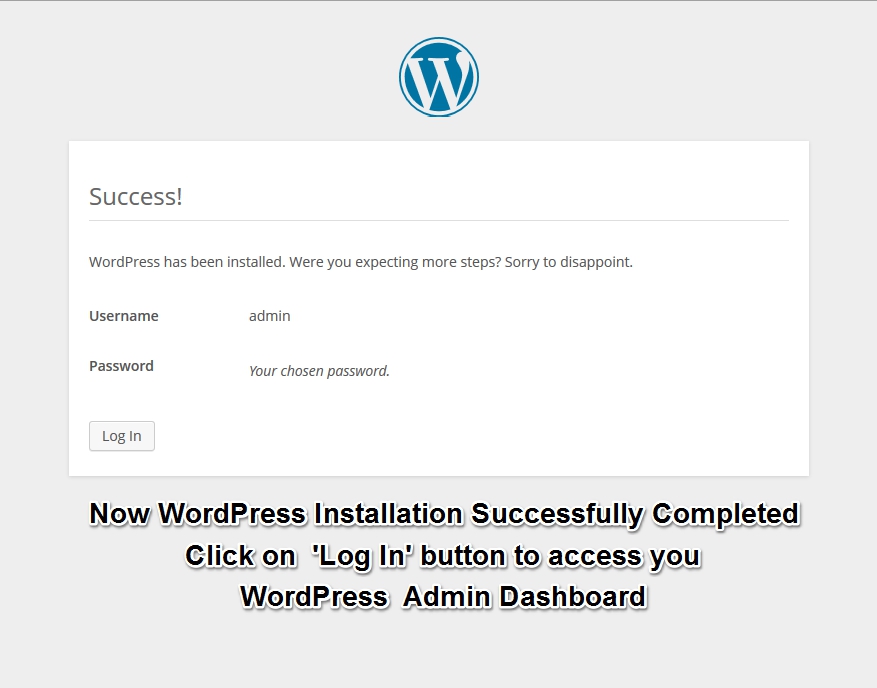
WordPress Installation Completed Successfully
Use your WordPress login credential here to logged in your WordPress admin dashboard
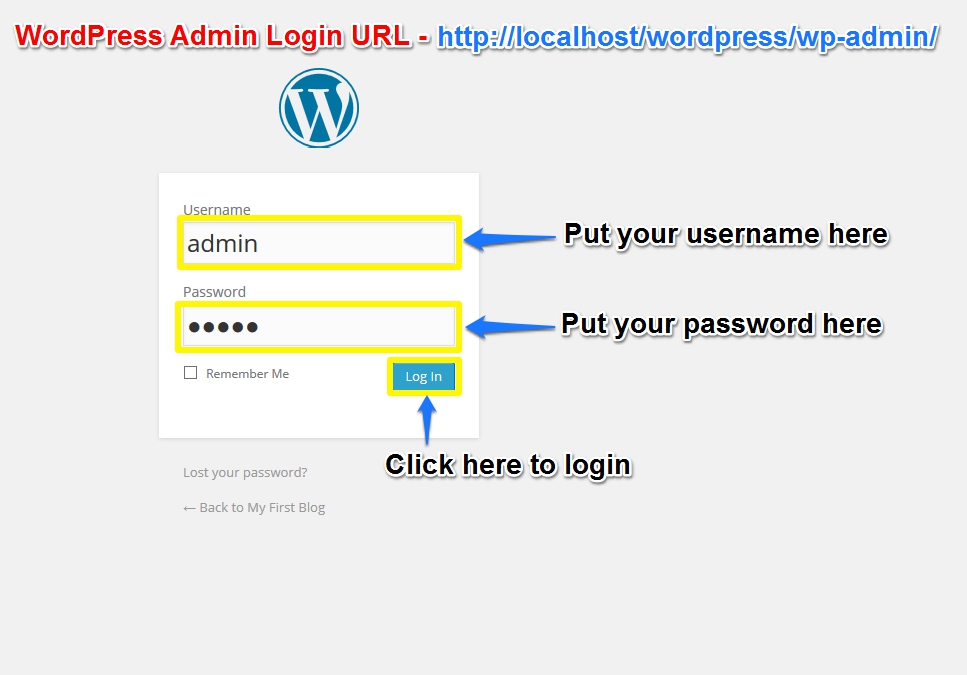
Log in to WordPress Admin Dashboard
Now you are logged in WordPress admin dashboard.
Start creating new WordPress:
– Posts
– Pages
– Setup your settings using Settings page in Admin menu
– Manage & download new blog themes via Themes page in Appearance menu
– Mange & install new plugins via Plugins page in Admin menu
– Manage widgets via Widgets page in Appearance menu
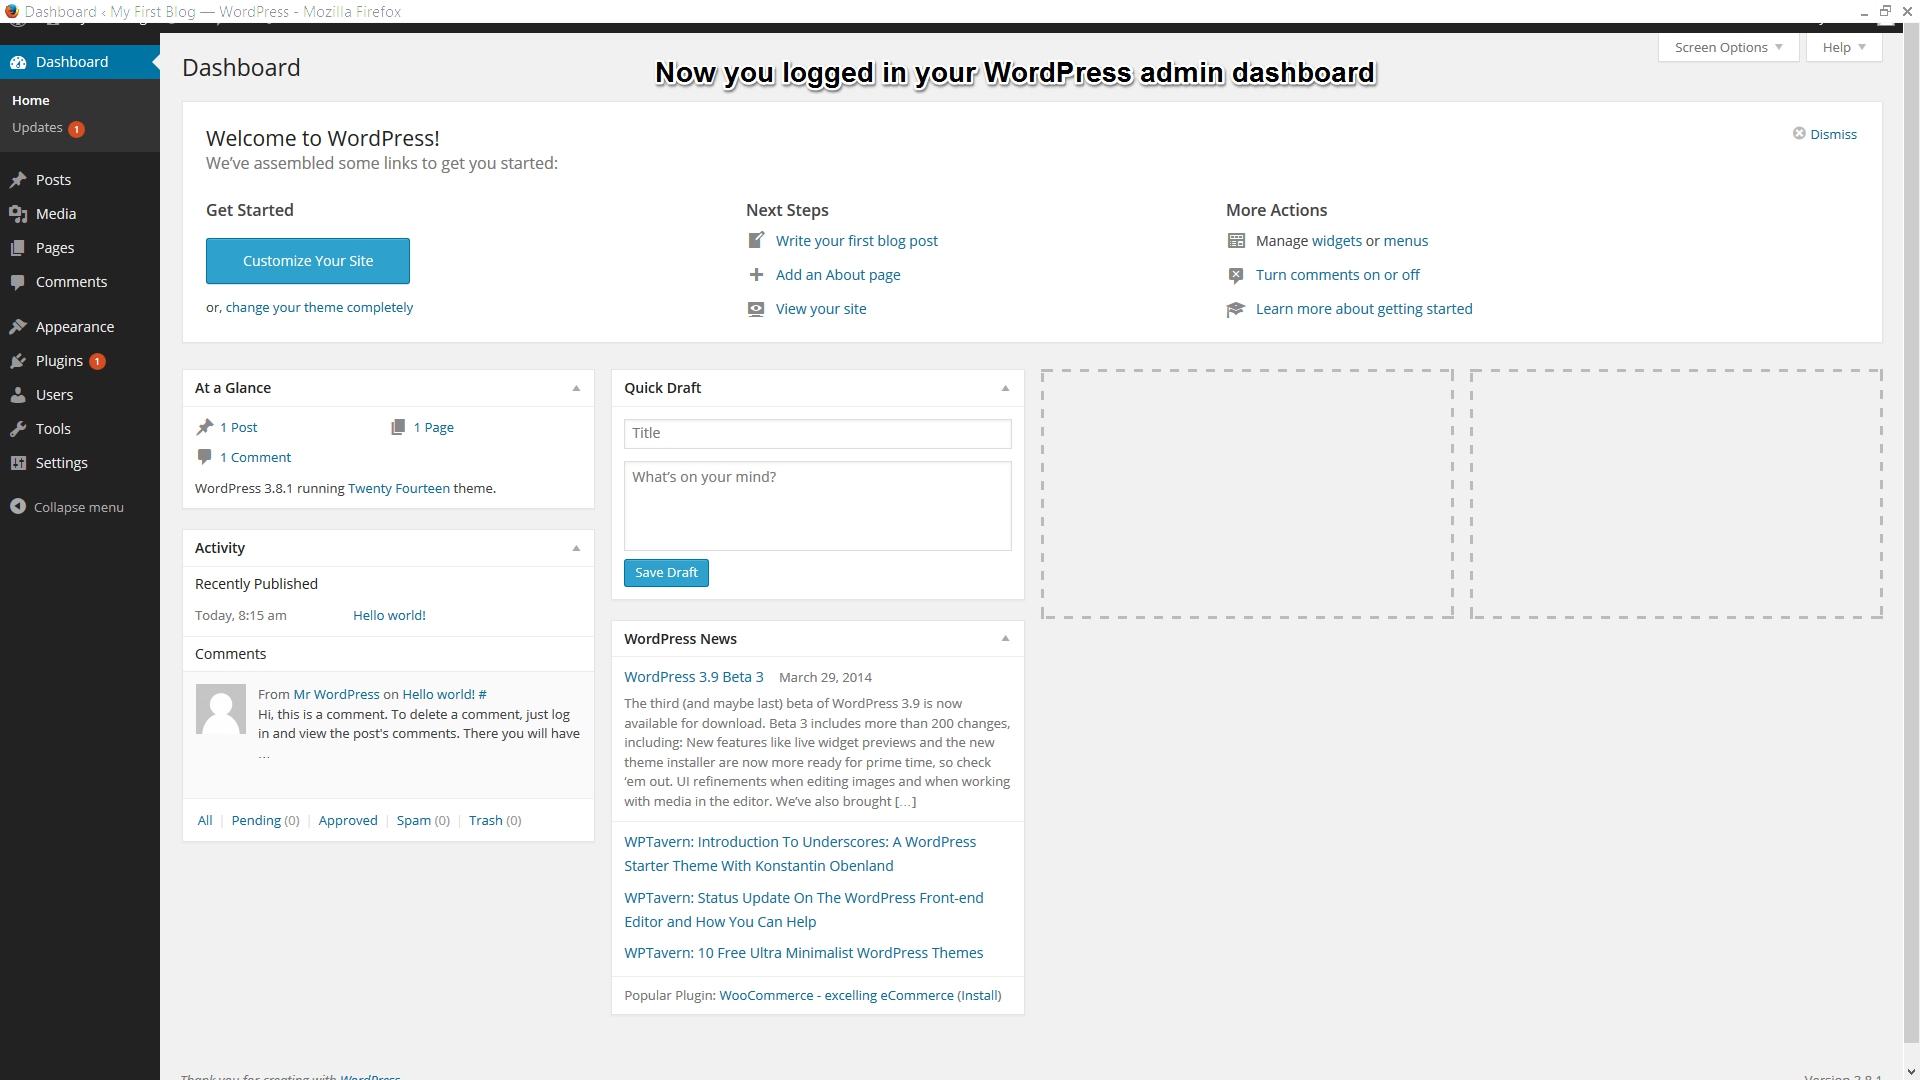
WordPress Admin Dashboard
You can visit your blog home page following below snapshot.
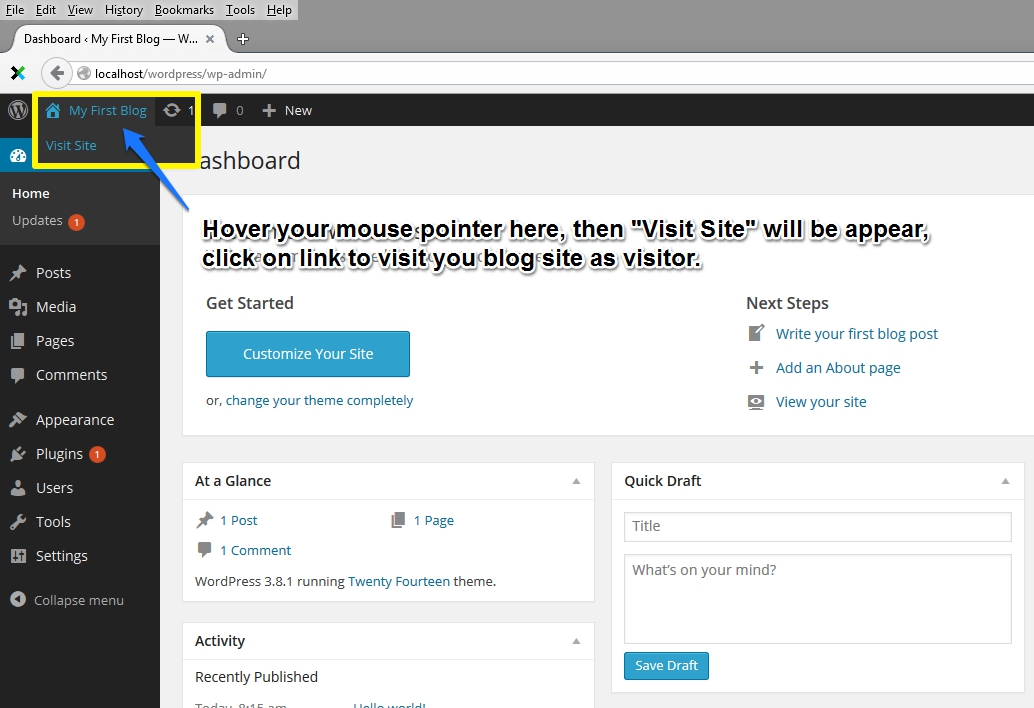
Visit WordPress Blog as Visitor
Here your first WordPress blog home page look likes:
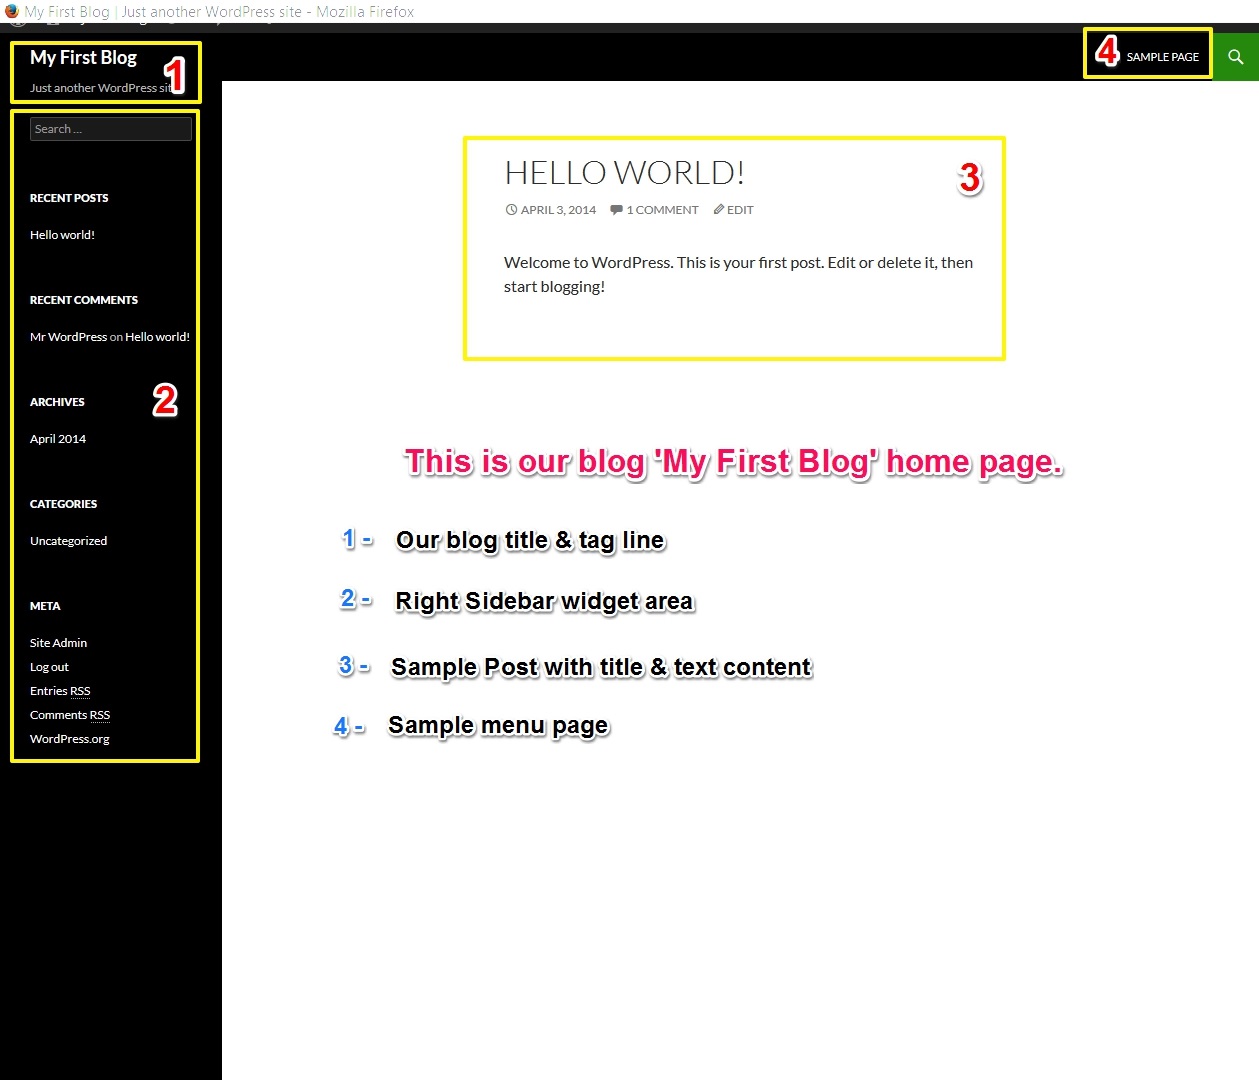
WordPress Bog Home Page
We hope our tutorial on WordPress installation in Wamp Server is really useful for every WordPress beginner and appreciate to each & every visitor reading & learning this article.
Please provide your feedback about this article in below comment box..
Thanks You!
Weblizar
Leave a Reply
You must be logged in to post a comment.