


You can get your Google Calendar API keys using your Google account by authorizing It. To get your own Google Calendar API Credential you need to follow step by step guide explained below:
Step 1 – Open to Google APIs Console using this link- https://console.developers.google.com/apis
Step 2 – Login to Google API Console using your Google account
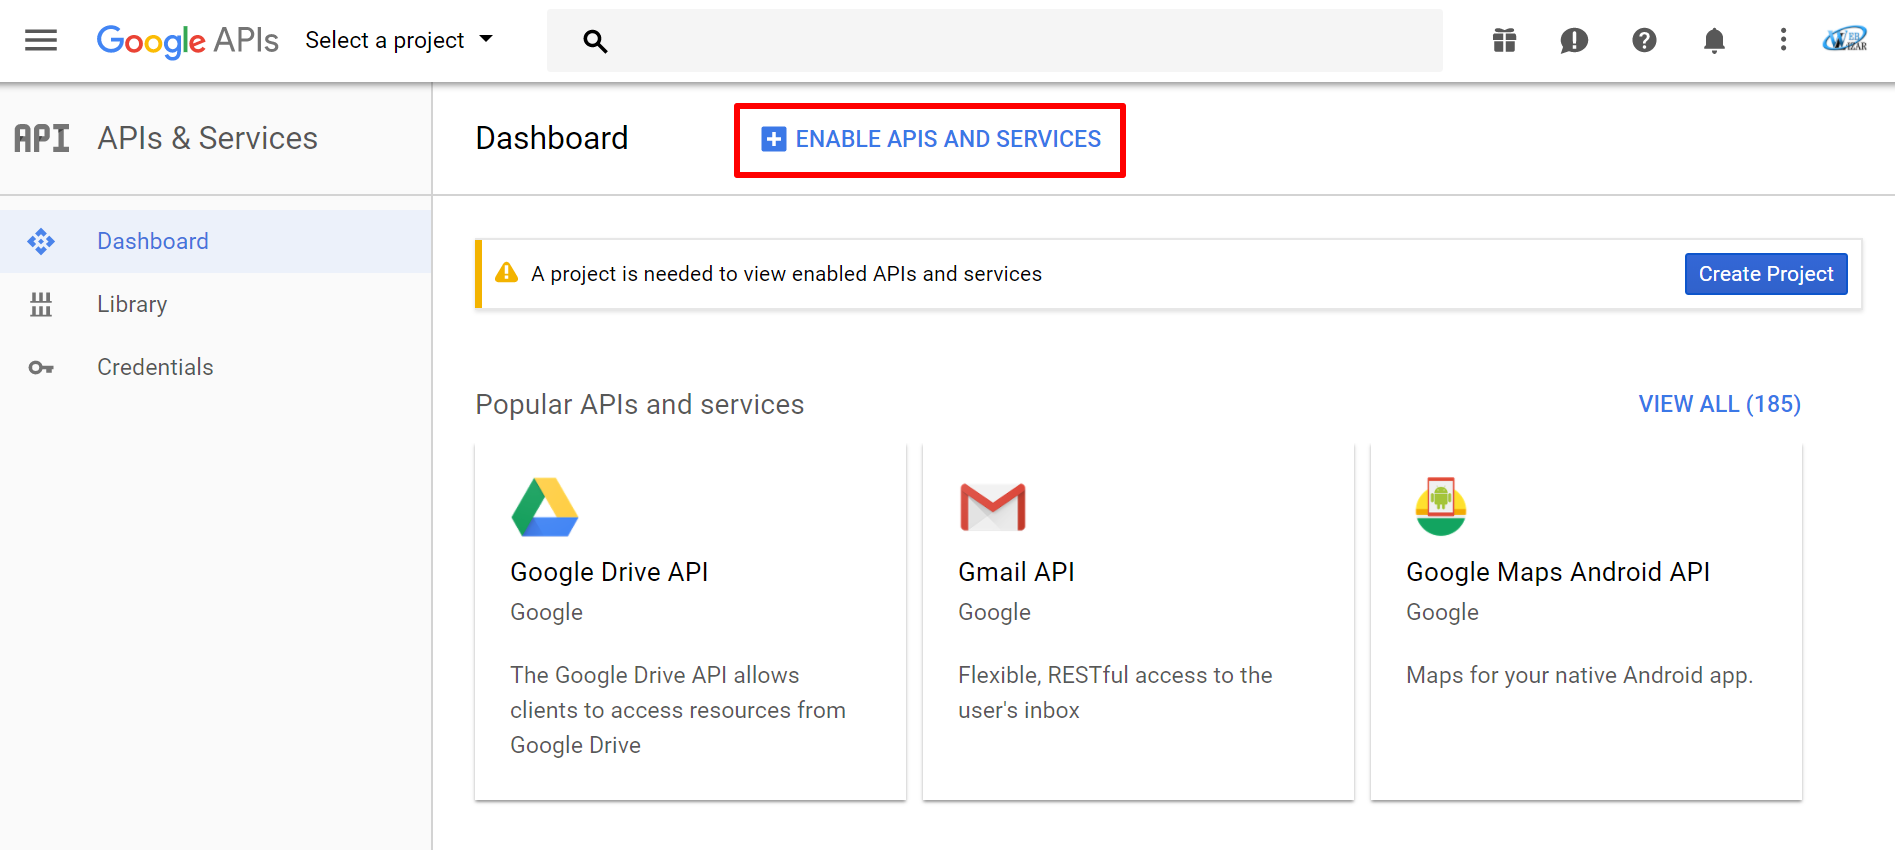
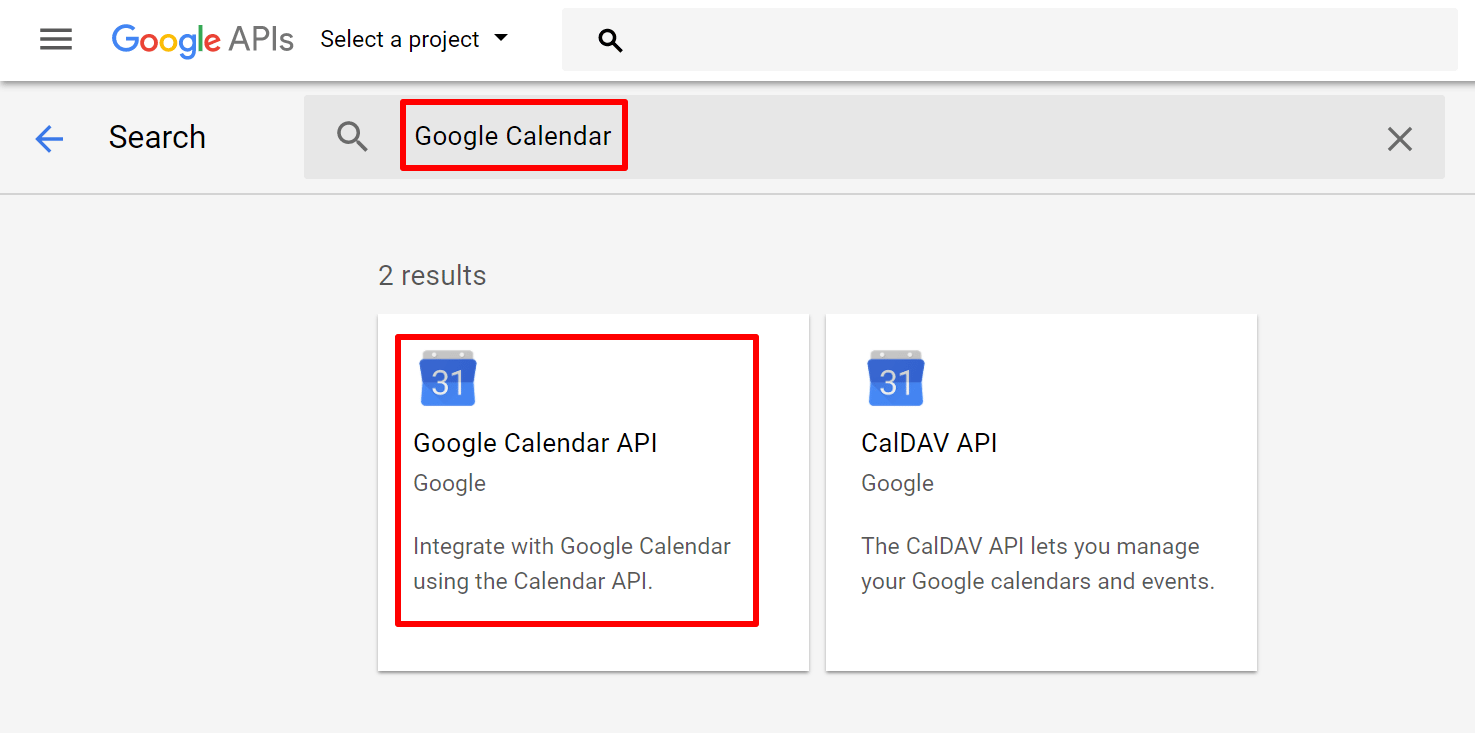
Step 3 – After login, you are redirected to Google APIs Dashboard. Here you need to enable Google Calendar API. Click on the “ENABLE API AND SERVICES” link to enable it. This will redirect you to all Google APIs list pages. Here in the search bar, type the “Google Calendar. It will filter or search the results as below screenshot. Click on the first result item which is Google Calendar API.
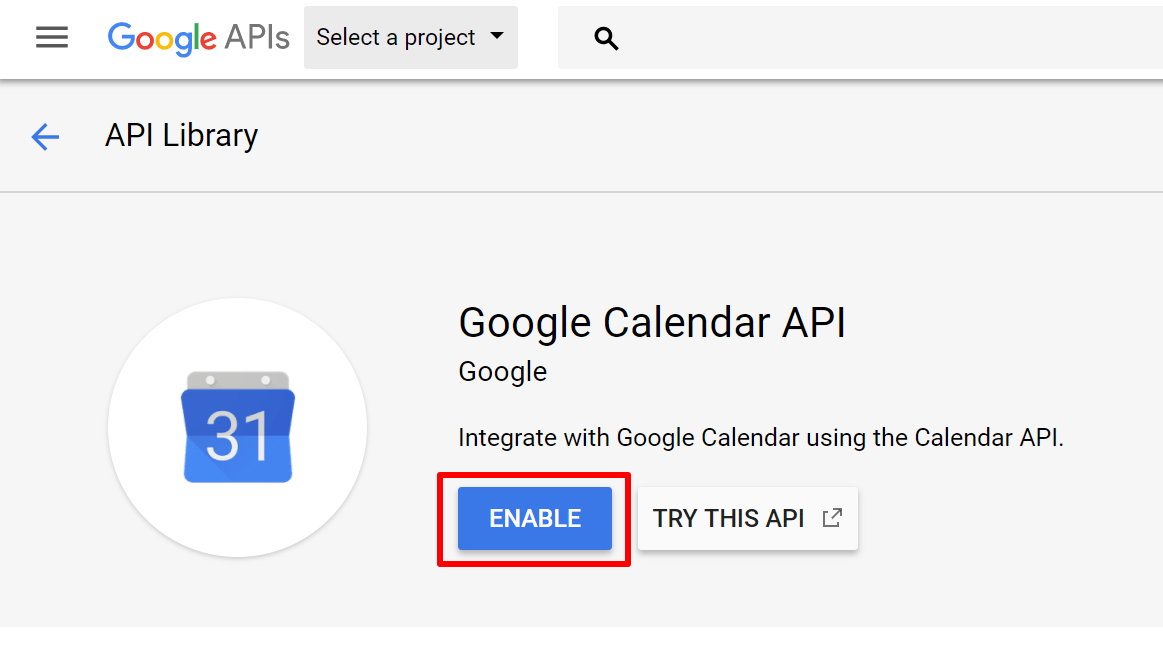
Step 4 – After selecting the API result this will show a button to enable it to hit that button.
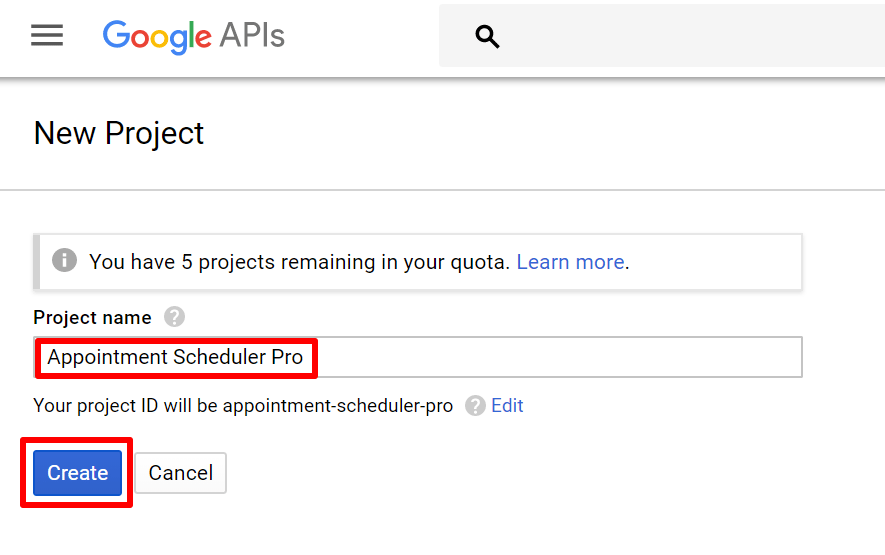
Step 5 – You need to create a project to use or enable any Google APIs. It will redirect you to the project creation page, where you need to create a project. Click on the “Create” button.

Provide a Project Name like – Appointment Scheduler Pro same as the below screenshot, you can specify the project name on your own. We are creating this client ID and secret key to use for the Appointment Scheduler Pro plugin that’s why we named the project with the same name as the plugin.
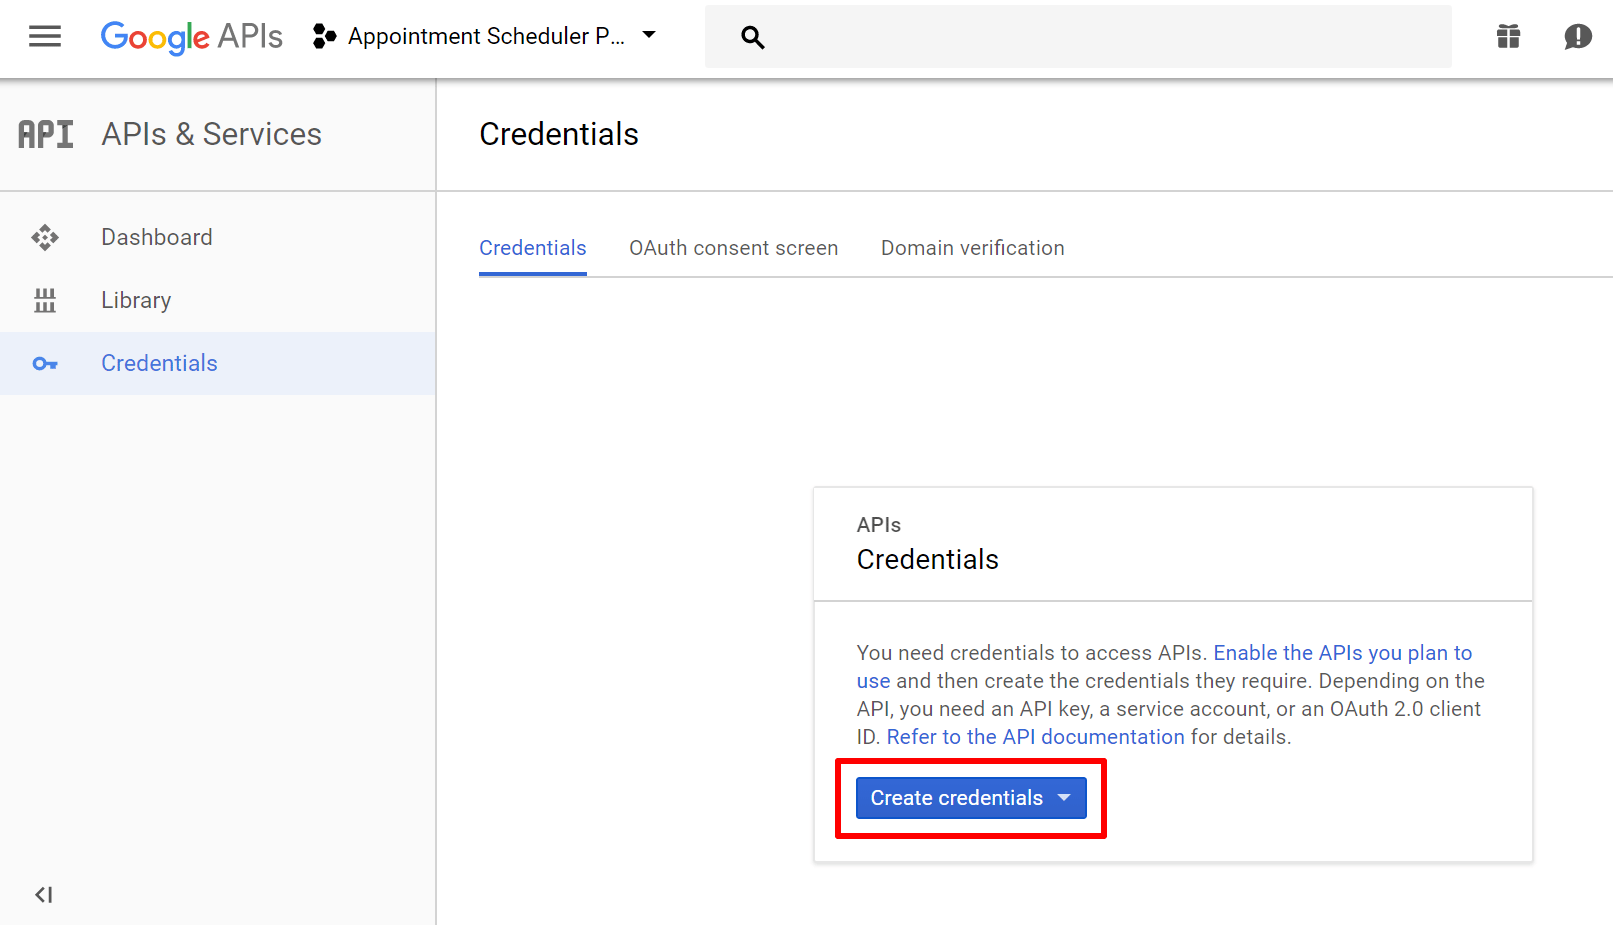
Now, after the project is created successfully, you can enable Google Calendar API.
Step 6 – Now, we will generate the API credentials. Click on the Credentials link or after enabling calendar API you will automatically be redirected to the credential page. Follow the below screenshots.
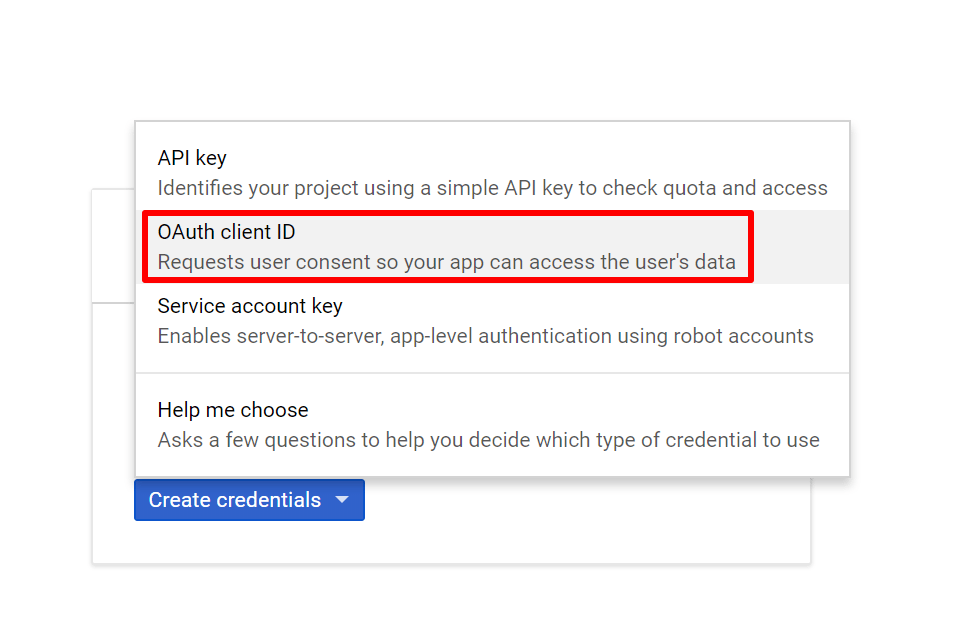
Select OAuth Client ID for access type
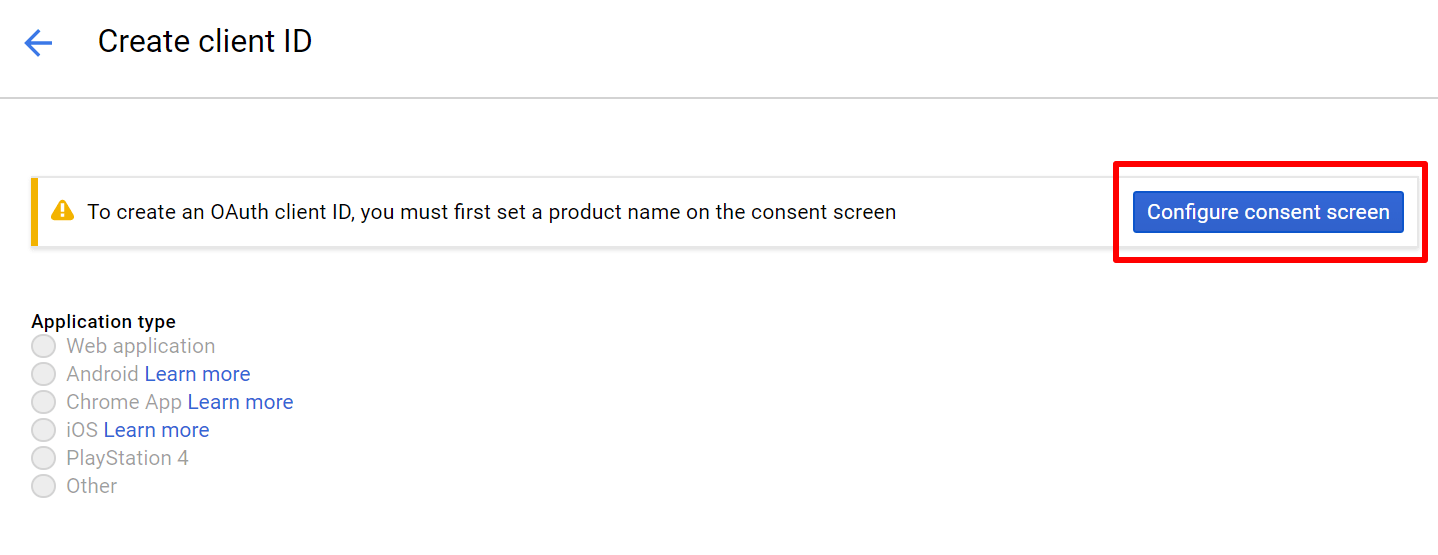
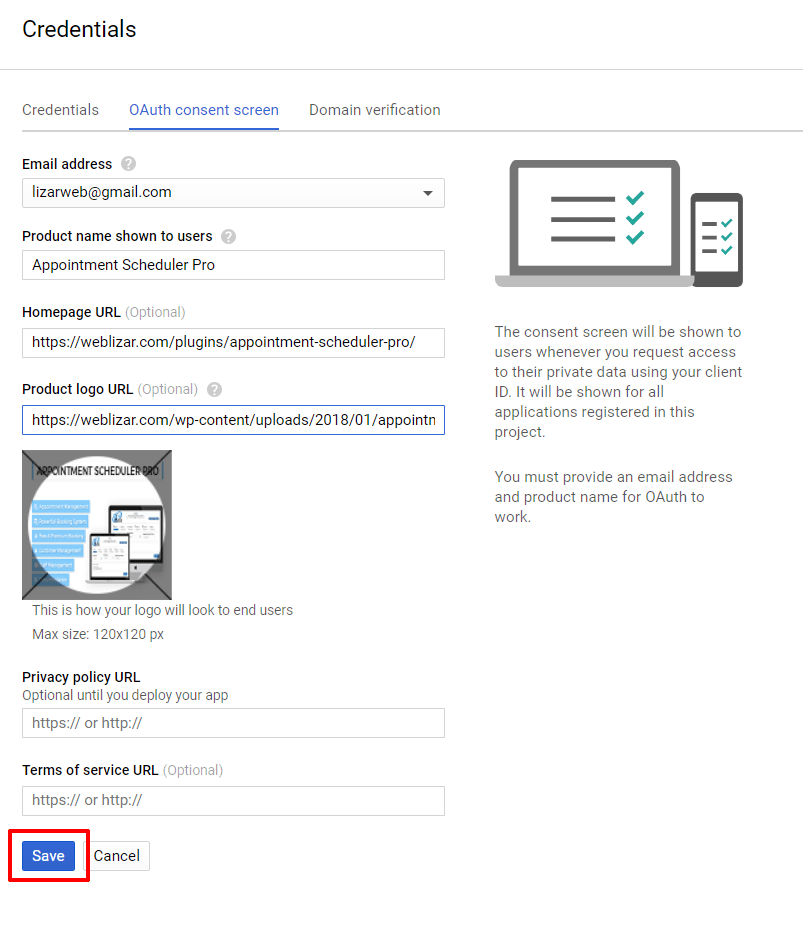
To get the OAuth Client ID you need to set up a consent screen, this screen will be displayed at the time when you will be authorized to Google Calendar API using Client ID and Client Secret. Click on the “Configure Consent Screen” button to set up.
Here we set the content screen for the Appointment Scheduler Pro project using the screenshot.
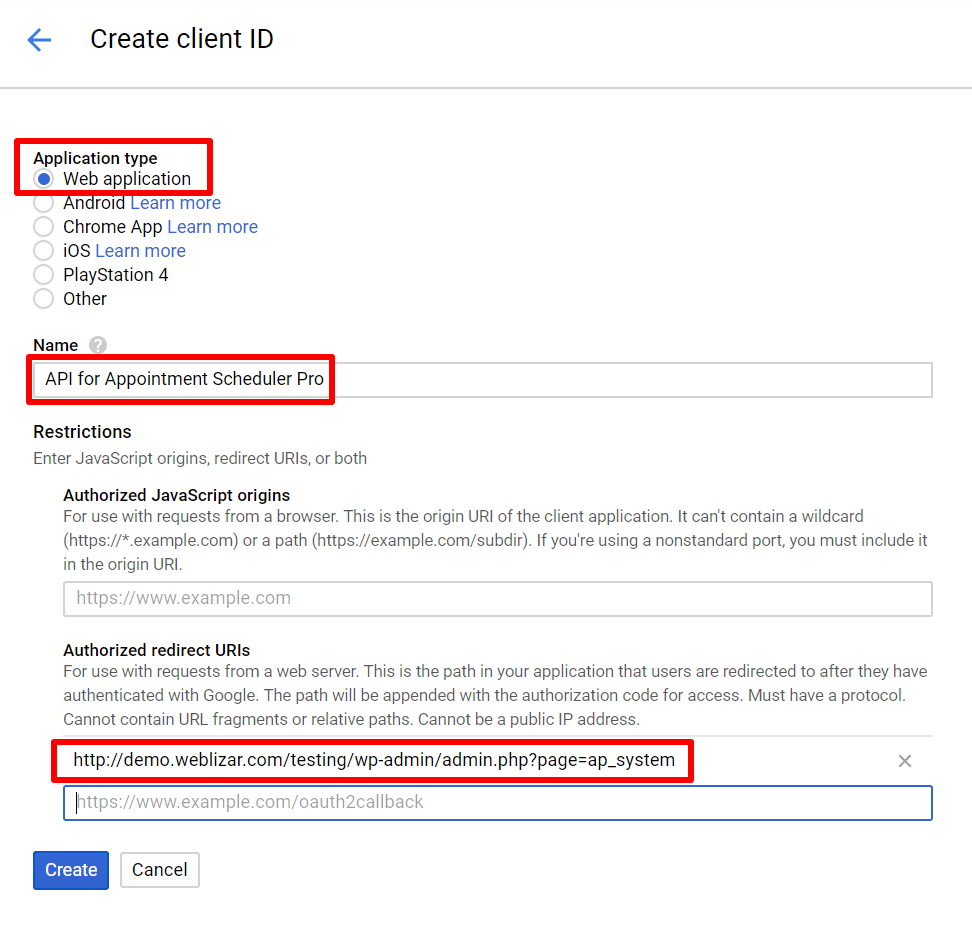
After setting up the consent screen, select the “Web Application” option from the given list of application types. Fill the form as screenshot added below
a) Type – Web Application
b) Name – Appointment Scheduler Pro (you can add your application name here for which you generate the API keys)
c) Redirect URIs – http://localhost/premium/wp-admin/admin.php?page=ap_system (you will find this URL in your application dashboard where you fill in the client id and secret ID)
Hit the Create button and you will find your Google Calendar client id and client secret in pop-up windows.
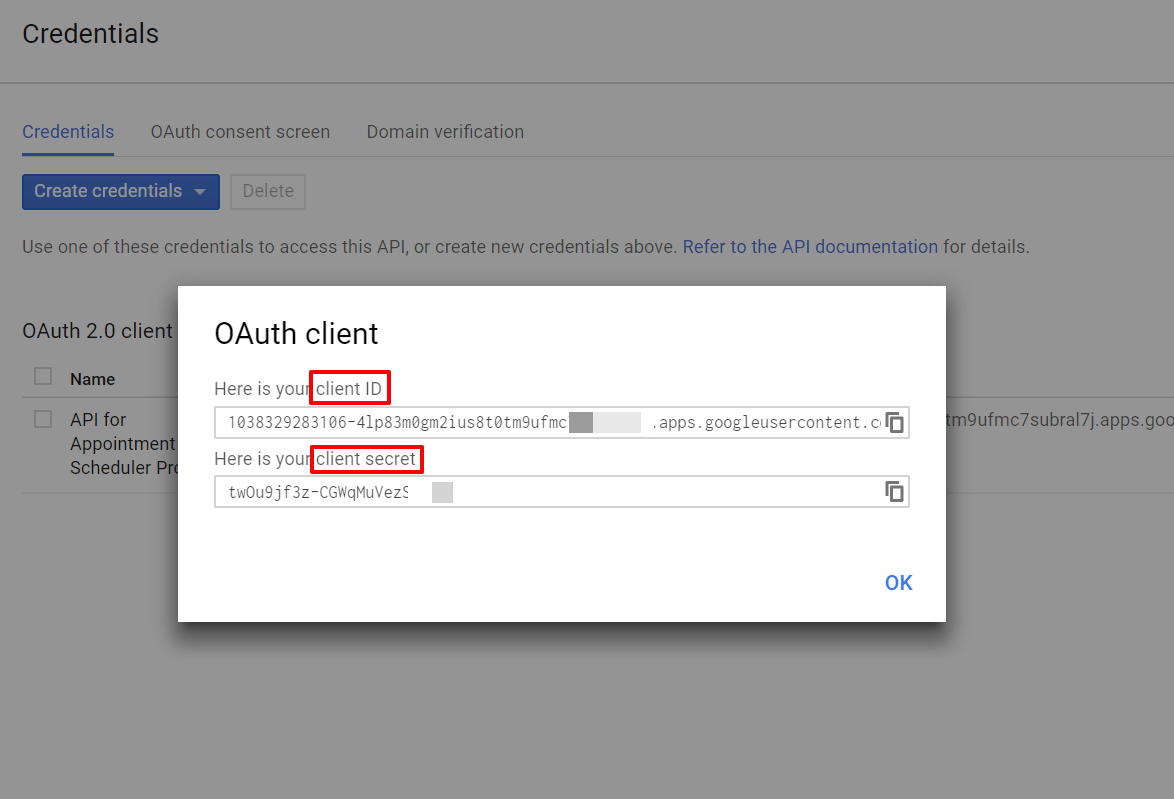
Now, you can copy and use these credentials in any application to sync your Google Calendar with the supported application.
Thanks for reading our article, if you have any queries or confusion regarding any step you can post comments on the post. Also, your feedback is appreciated to make this post’s readability easier.
FAQs”
How do I get Google client ID and client secret?
To get a Google client ID and client secret, create a project in the Google Developers Console, enable the necessary APIs, then generate OAuth 2.0 credentials in the "Credentials" section of your project.
How to get google calendar api key?
To obtain a Google Calendar API key, go to the Google Developers Console, create a project, enable the Google Calendar API, then generate an API key in the "Credentials" section of your project.
What google calendar client id and secret?
The Google Calendar client ID and client secret are credentials used for authentication when accessing the Google Calendar API.