


How to Create Virtual Device on Android Studio?
1. What is Android Studio?
Android Studio is a system software as well as an IDE (Integrated Development Environment) for Android Platform. Android Studio is written in JAVA language. It is available for download on Windows, MacOS and Linux based operating systems. Android Studio is the new option for developing android apps on the Android platform and it is completely replaced its previous primary tool Eclipse Android Development Tool.
Android Studio was announced on May 16, 2013, at the Google I/O conference. It was in early access preview stage starting from version 0.1 in May 2013, then entered beta stage starting from version 0.8 which was released in June 2014.The first stable build was released in December 2014, starting from version 1.0. The current stable version is 3.0 released in October 2017.
Recommended Post: Android Oreo Is Here, What Is New In Android O
2. Why we use Android Studio?
Android Studio is very popular system software for developing and testing of android application in an easy way.
it has many features. Some features are following
- Gradle based build support
- Android-specific refactoring and quick fixes
- Lint tools to catch performance, usability, version compatibility and other problems
- ProGuard integration and app-signing capabilities
- Template-based wizards to create common Android designs and components
- A rich layout editor that allows users to drag-and-drop UI components, option to preview layouts on multiple screen configurations
- Support for building Android Wear apps
- Built-in support for Google Cloud Platform, enabling integration with Firebase Cloud Messaging (Earlier ‘Google Cloud Messaging’) and Google App Engine
3. What is Virtual Device in Android Studio?
Virtual Device is run by Android SDK Manager. A virtual device is used for run android application on your system. In case we use windows, ios, Linux whatever virtual device is completely helpful for testing your Android application on your system.
Suggested Post: Google’s Latest Update in Google App
4. What’s the main purpose of creating virtual device?
The main purpose of creating virtual device is when Android developer created an application, The application testing is very important. For Testing Android Application according to the device like as (smartphone, tablet, and android wear device ) virtual device manager is very helpful. And Plus point is you have not need to install application once and more time on the real device.
A developer can easily customize your virtual device configuration like as (Ram, Internal Storage), It also can be easily tested of application android’s OS higher to a lower version.
5. How to Create Virtual Device in Android Studio?
We create virtual device step by step it is very helpful for android developer beginners. please follow these screenshot:-
Let us start it.
-
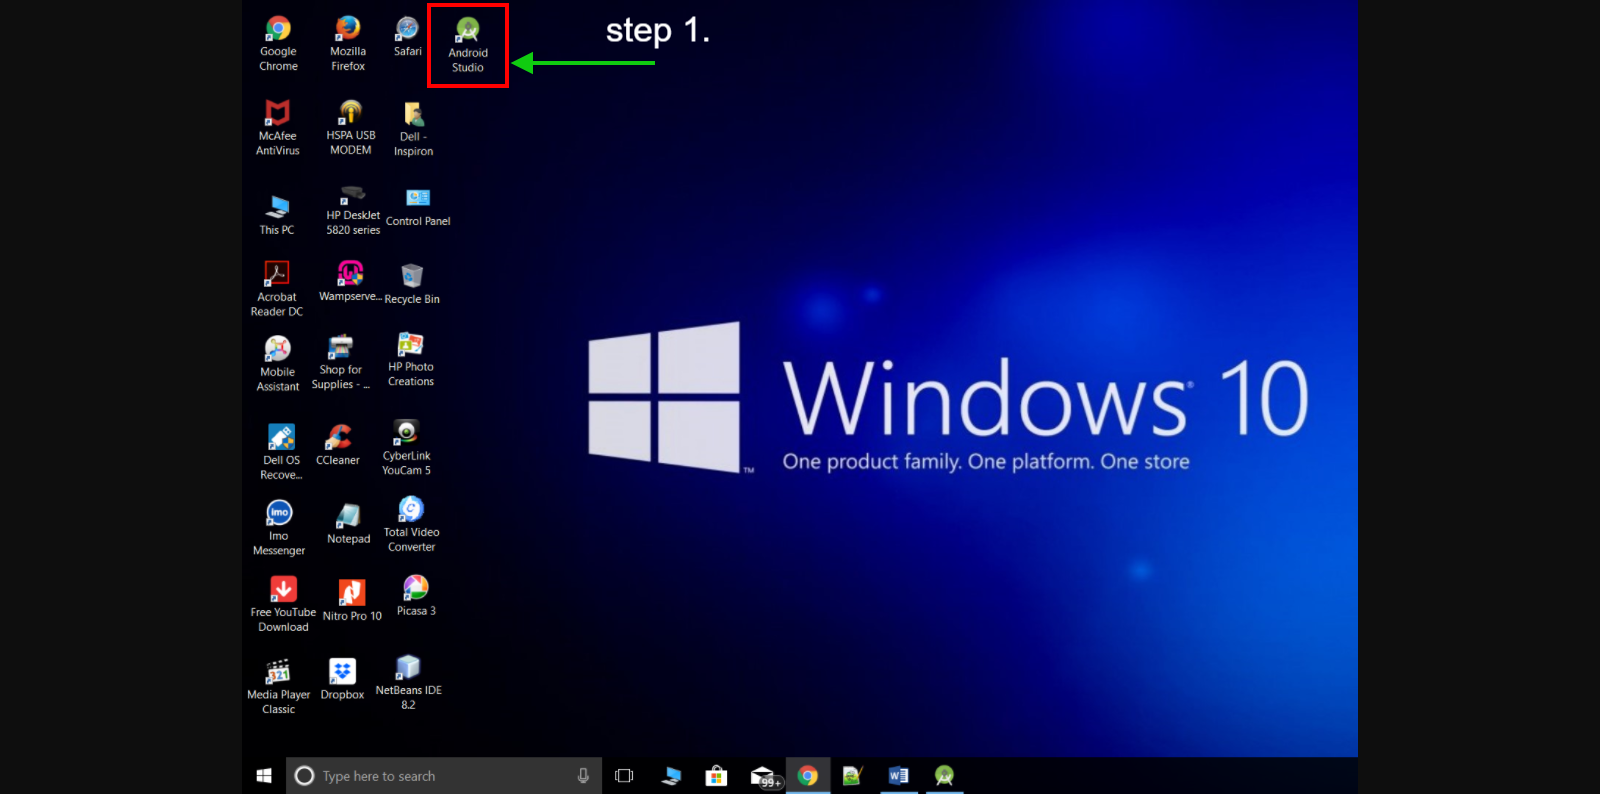
Click on Android Studio Software icon
-
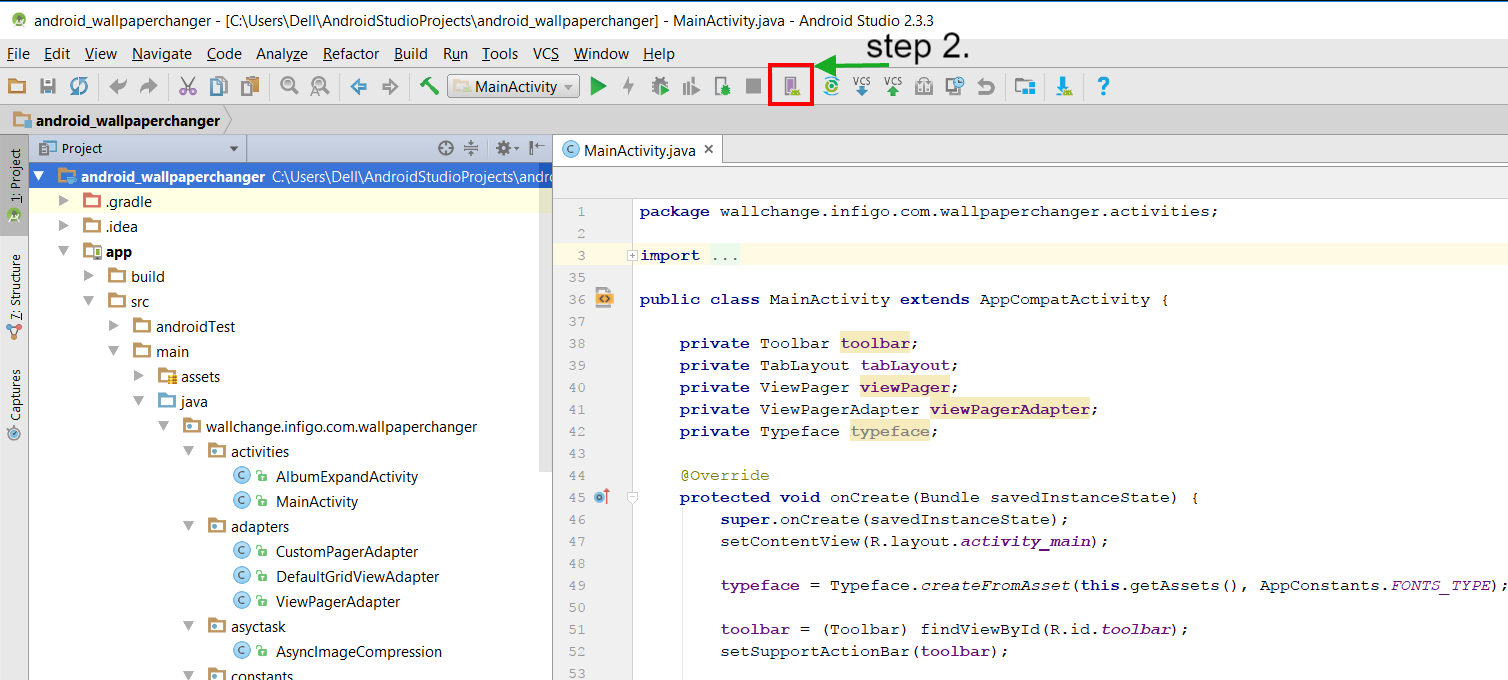
Click on AVD Button


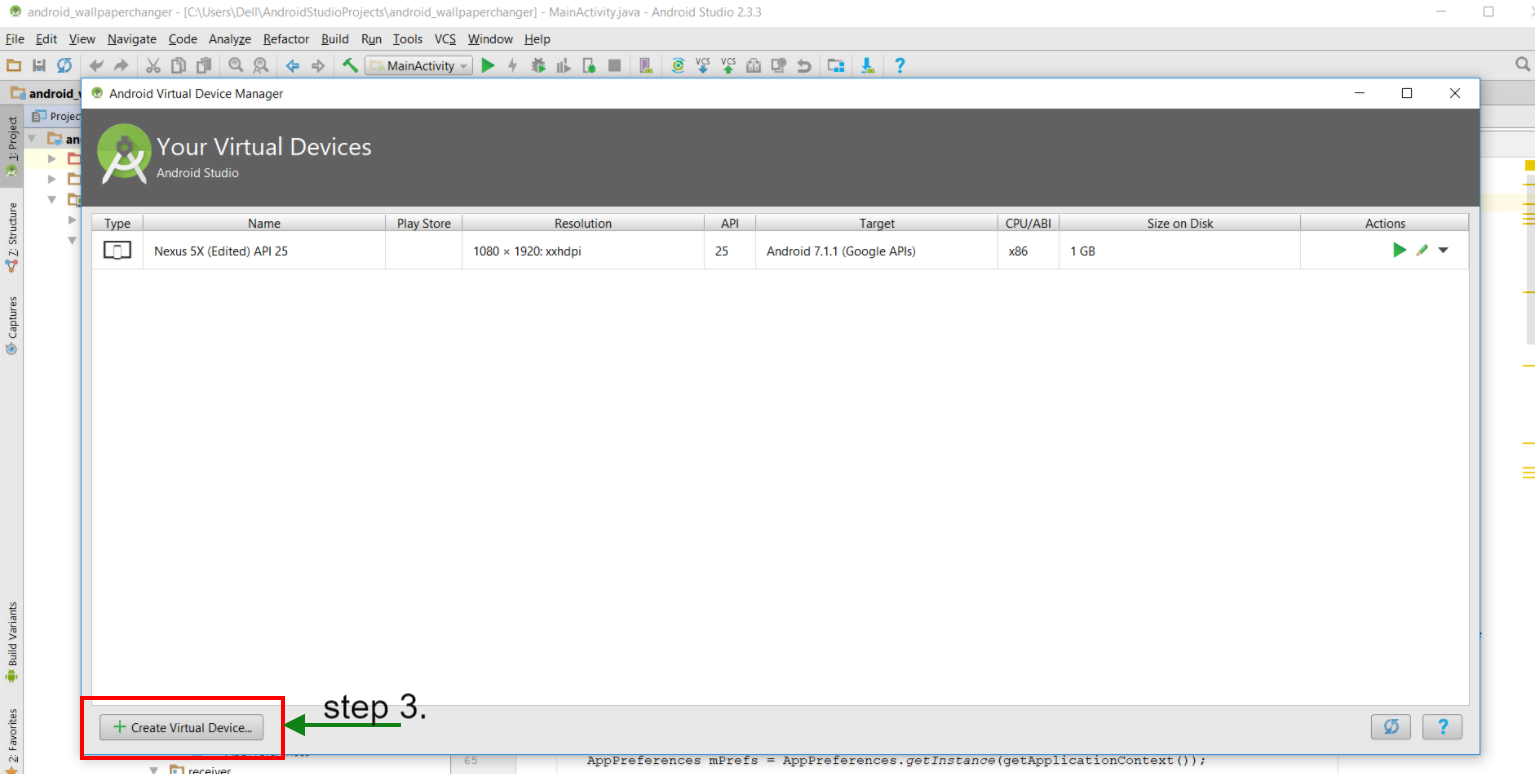
3. When it is open a new window is pop up and click on Create Virtual Device

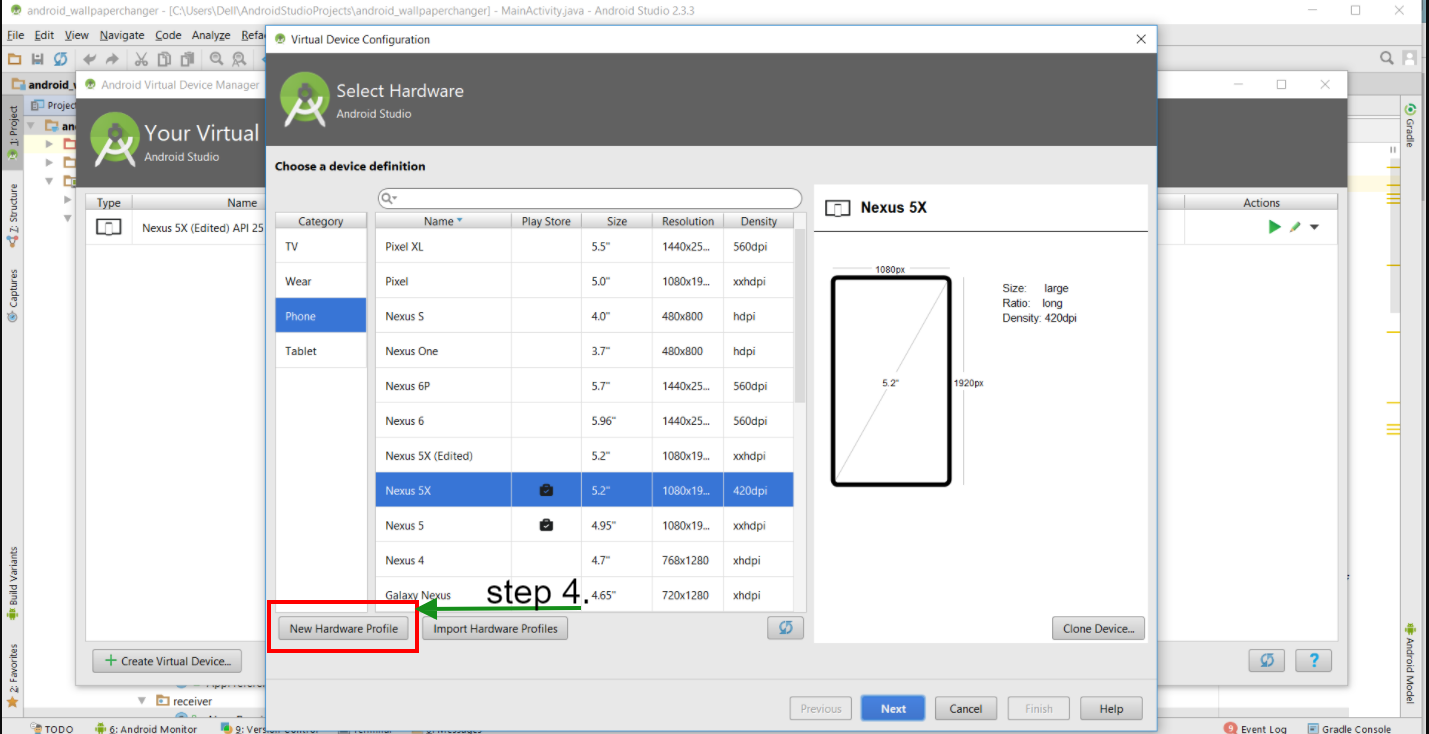
4. After Click on Create Virtual Device a new window pop up and click on New Hardware Profile

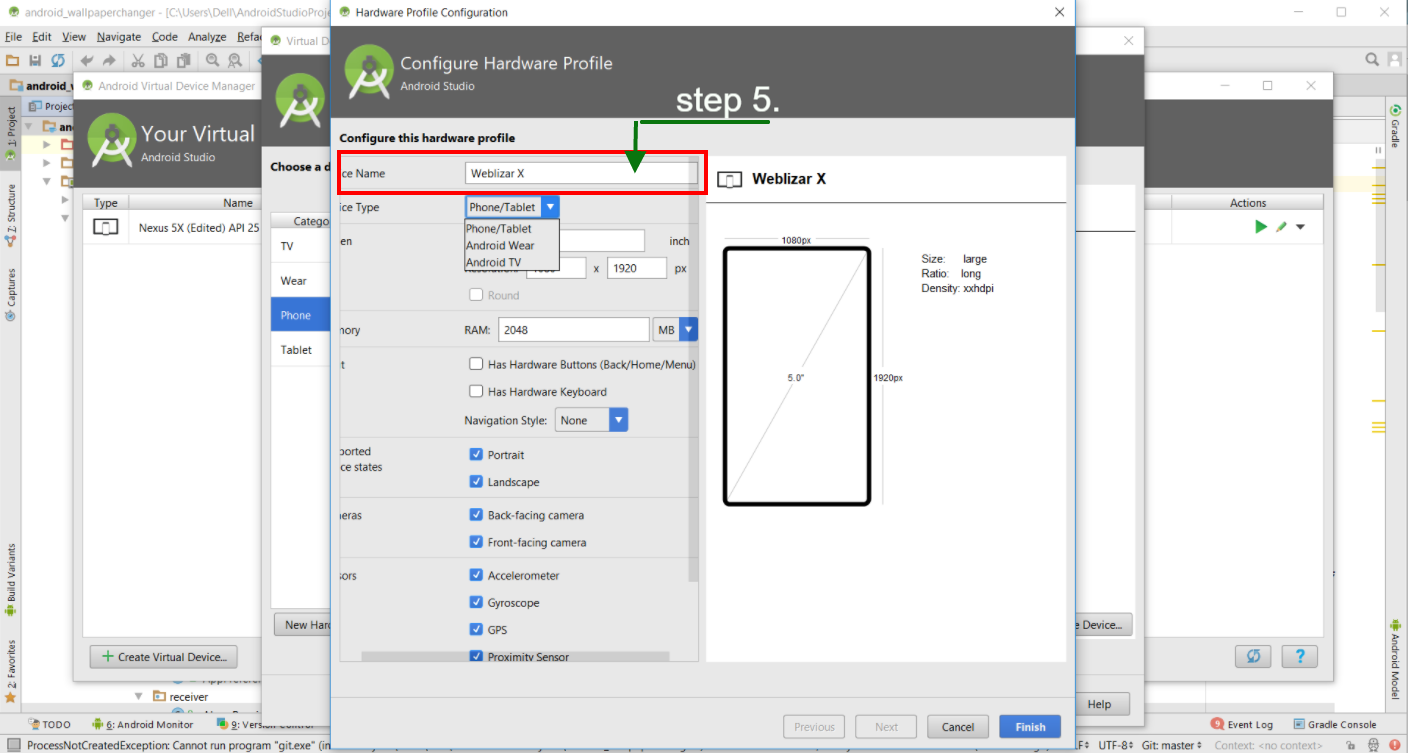
5. Now Configure your hardware profile and Enter Device Name (My Device Name like as “Weblizar X”)

6. Select your device type like as smartphone/tablet, android wear, android tv
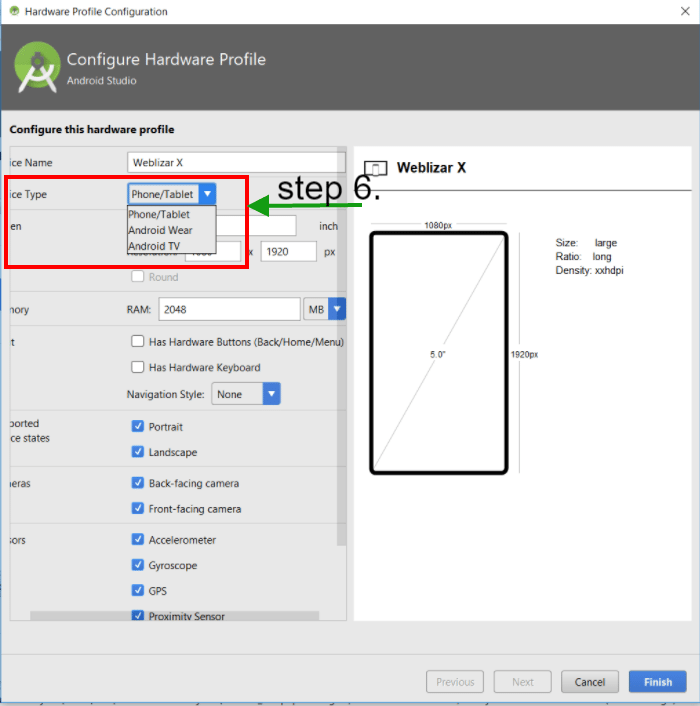

Select your device and click on Next Button.
7. Click on Finish Button, after clicking on finish button your device is listed in all device list.


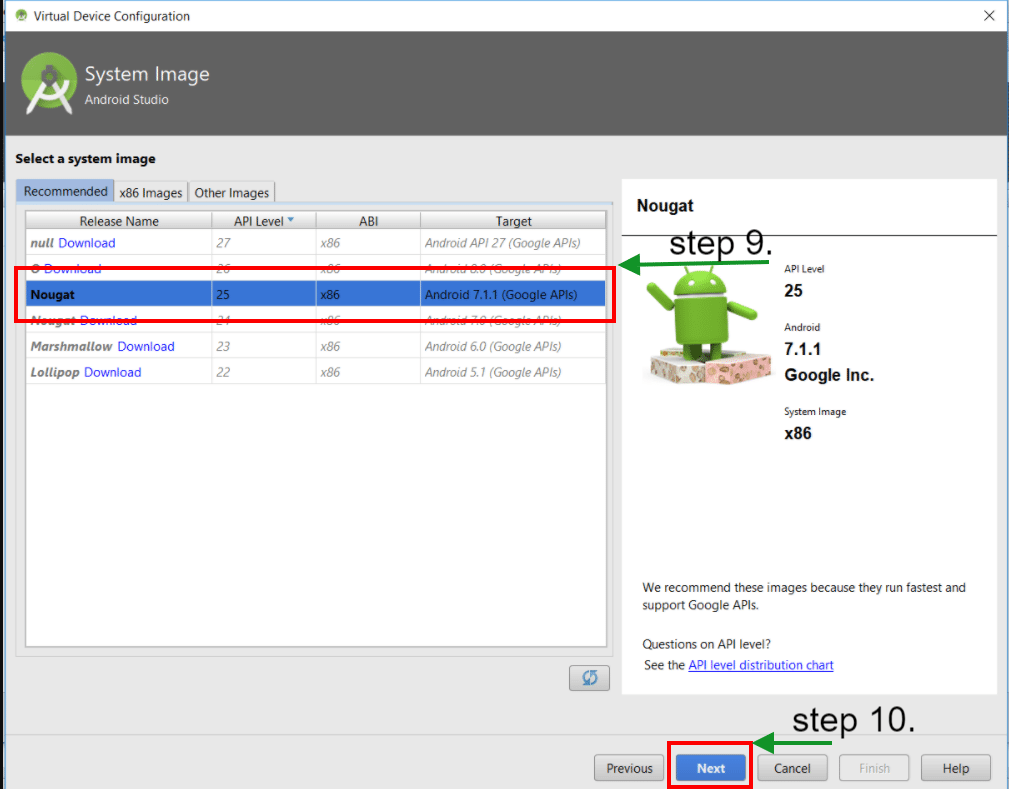
8. Select a system image according to your (in my case I choose Nougat) and click on Next Button

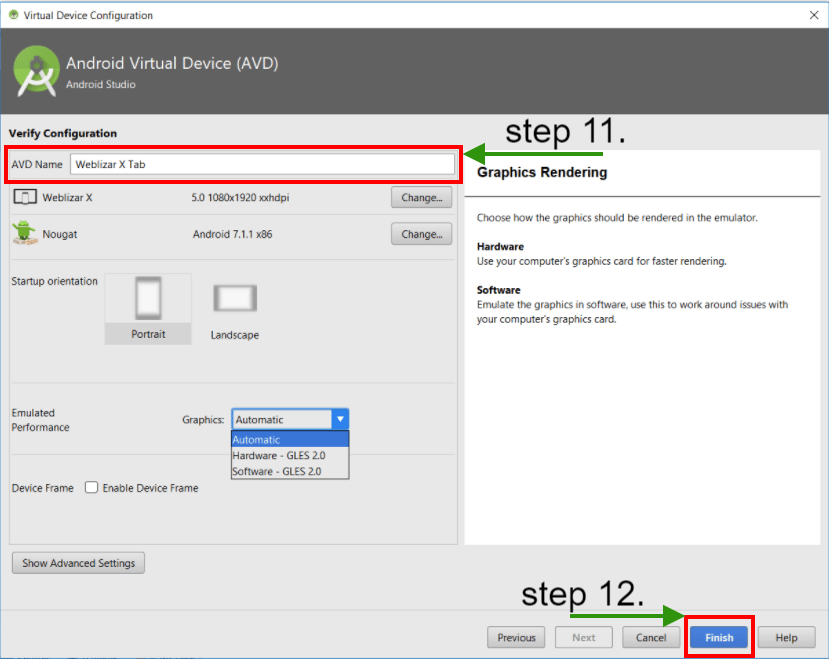
9. And finally, verify your configuration and input your virtual device name (AVD name) after clicking on Finish button

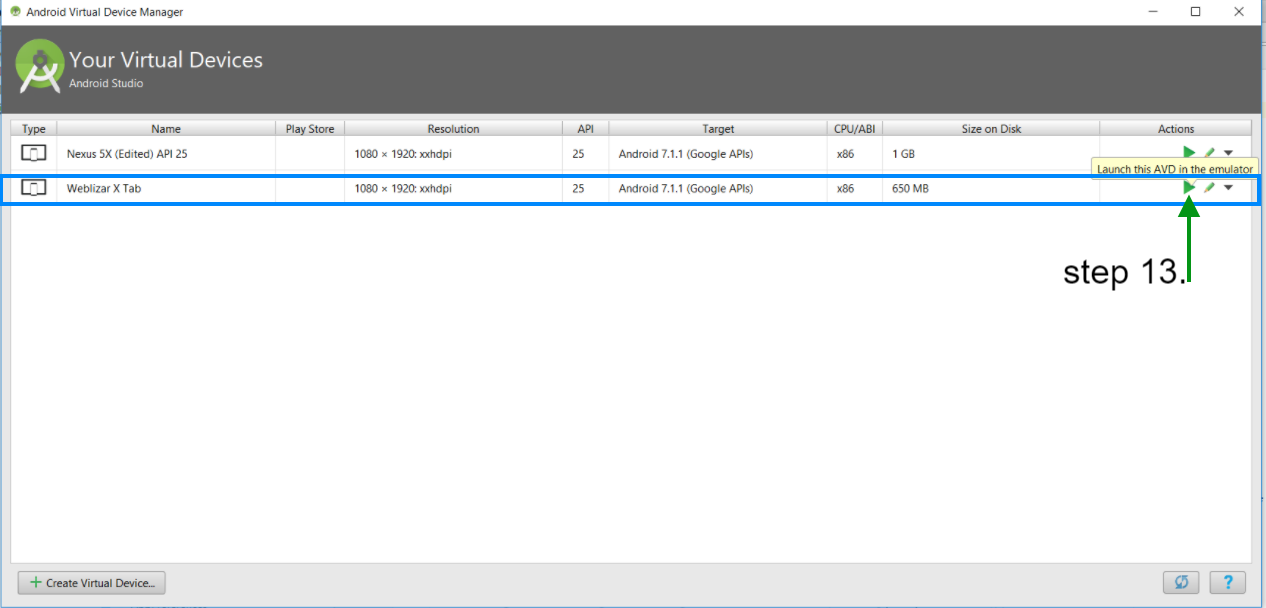
10 . Your Virtual Device is now listed, Select and Launch your virtual device

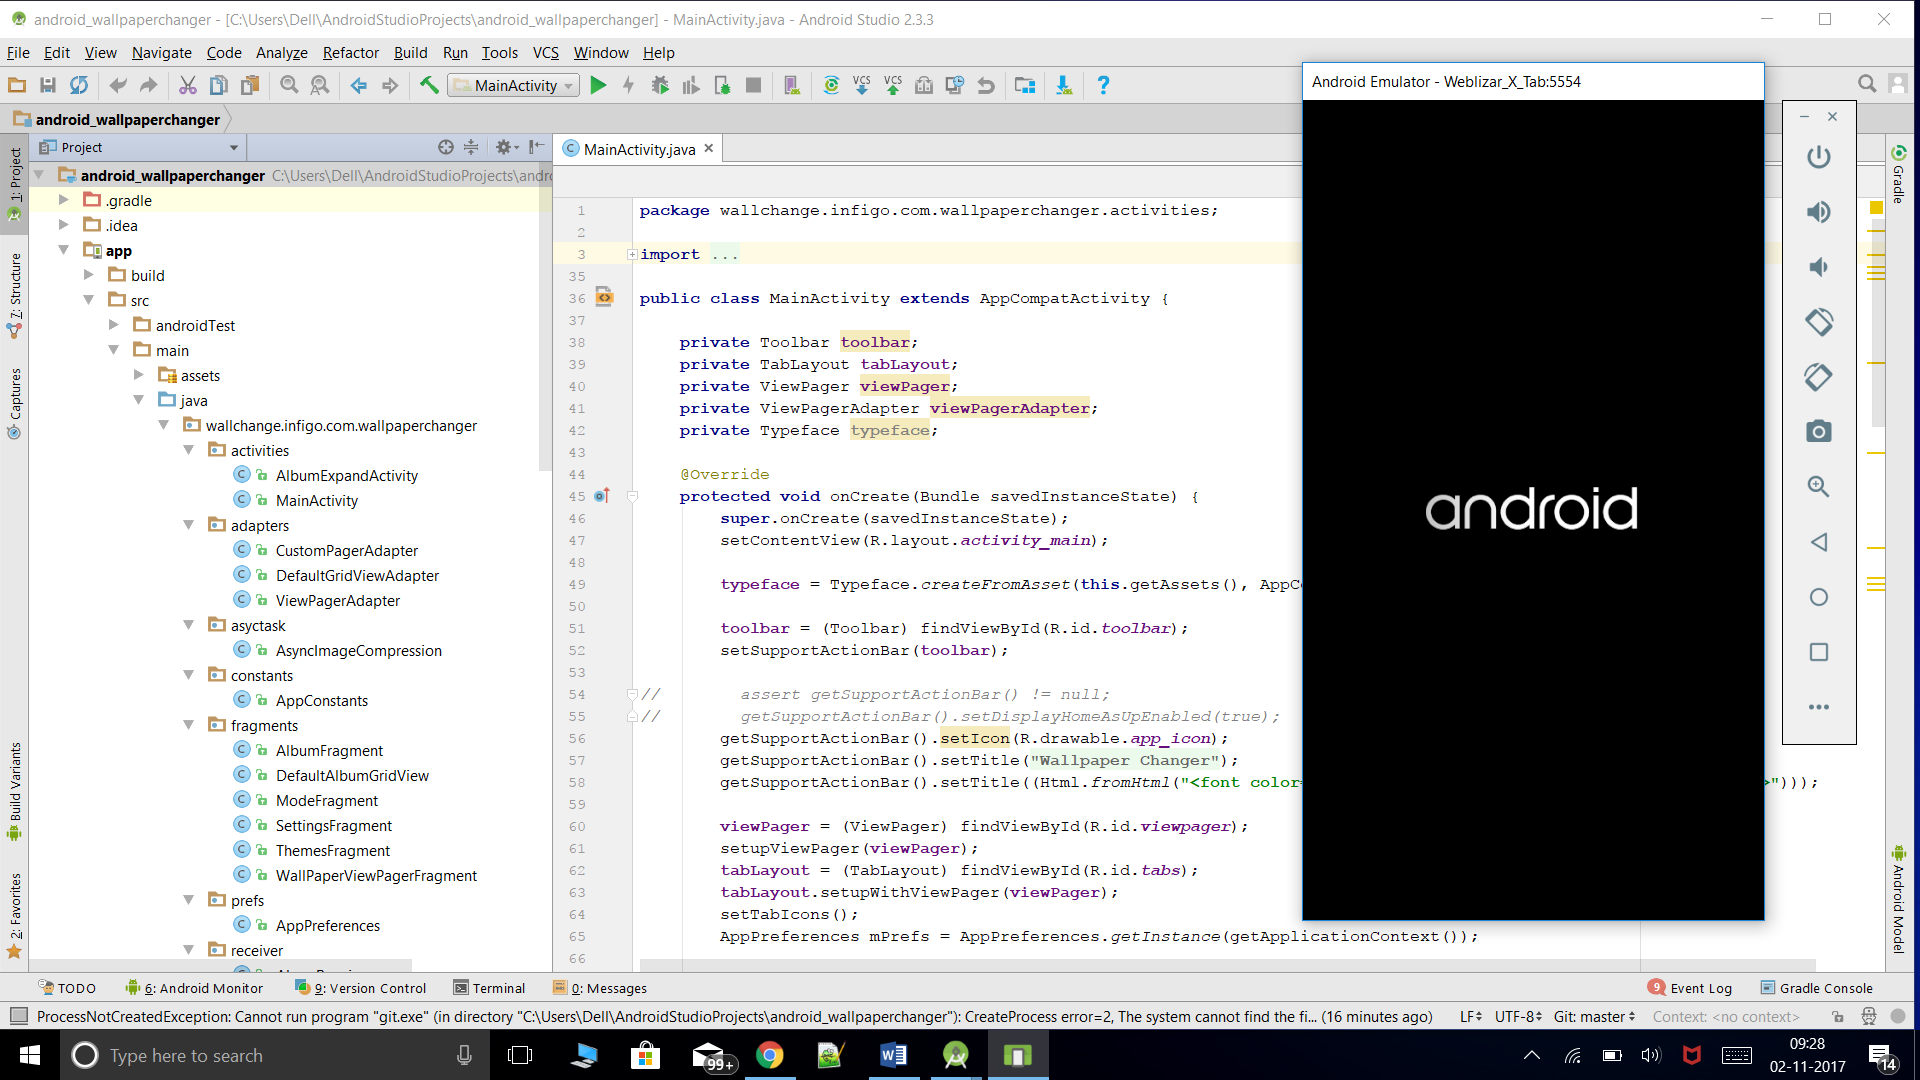
11. Your Virtual Device when launching look like this

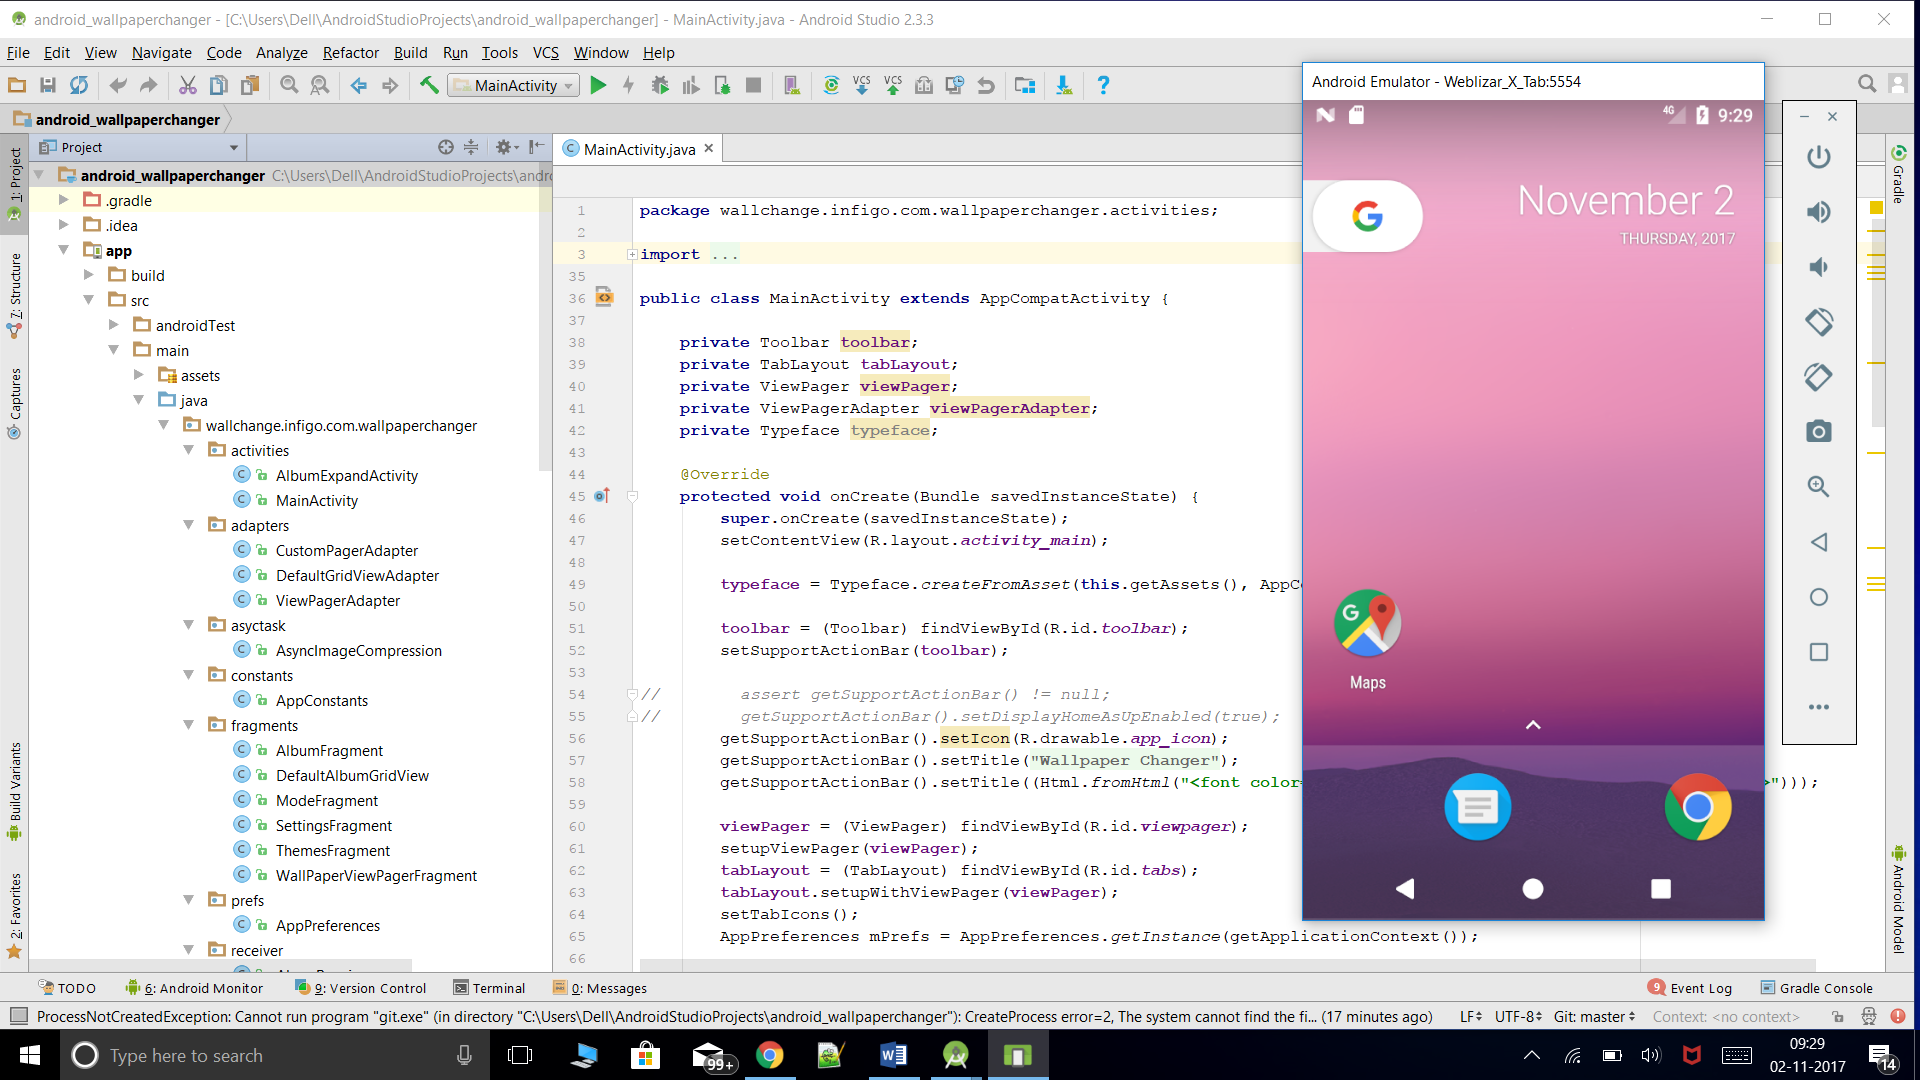
12. You are ready for debugging your app, it’s your Customize Virtual Device
Thanks.