


What is media upload in WordPress?
In addition to uploading media files directly to your blog’s Media Library, you can also upload, manage, and insert images, audio (with a Space Upgrade that comes as part of the WordPress.com Premium and Business plans) and video (with VideoPress) directly from your post or page editing screen using the (+) Insert Content icon.
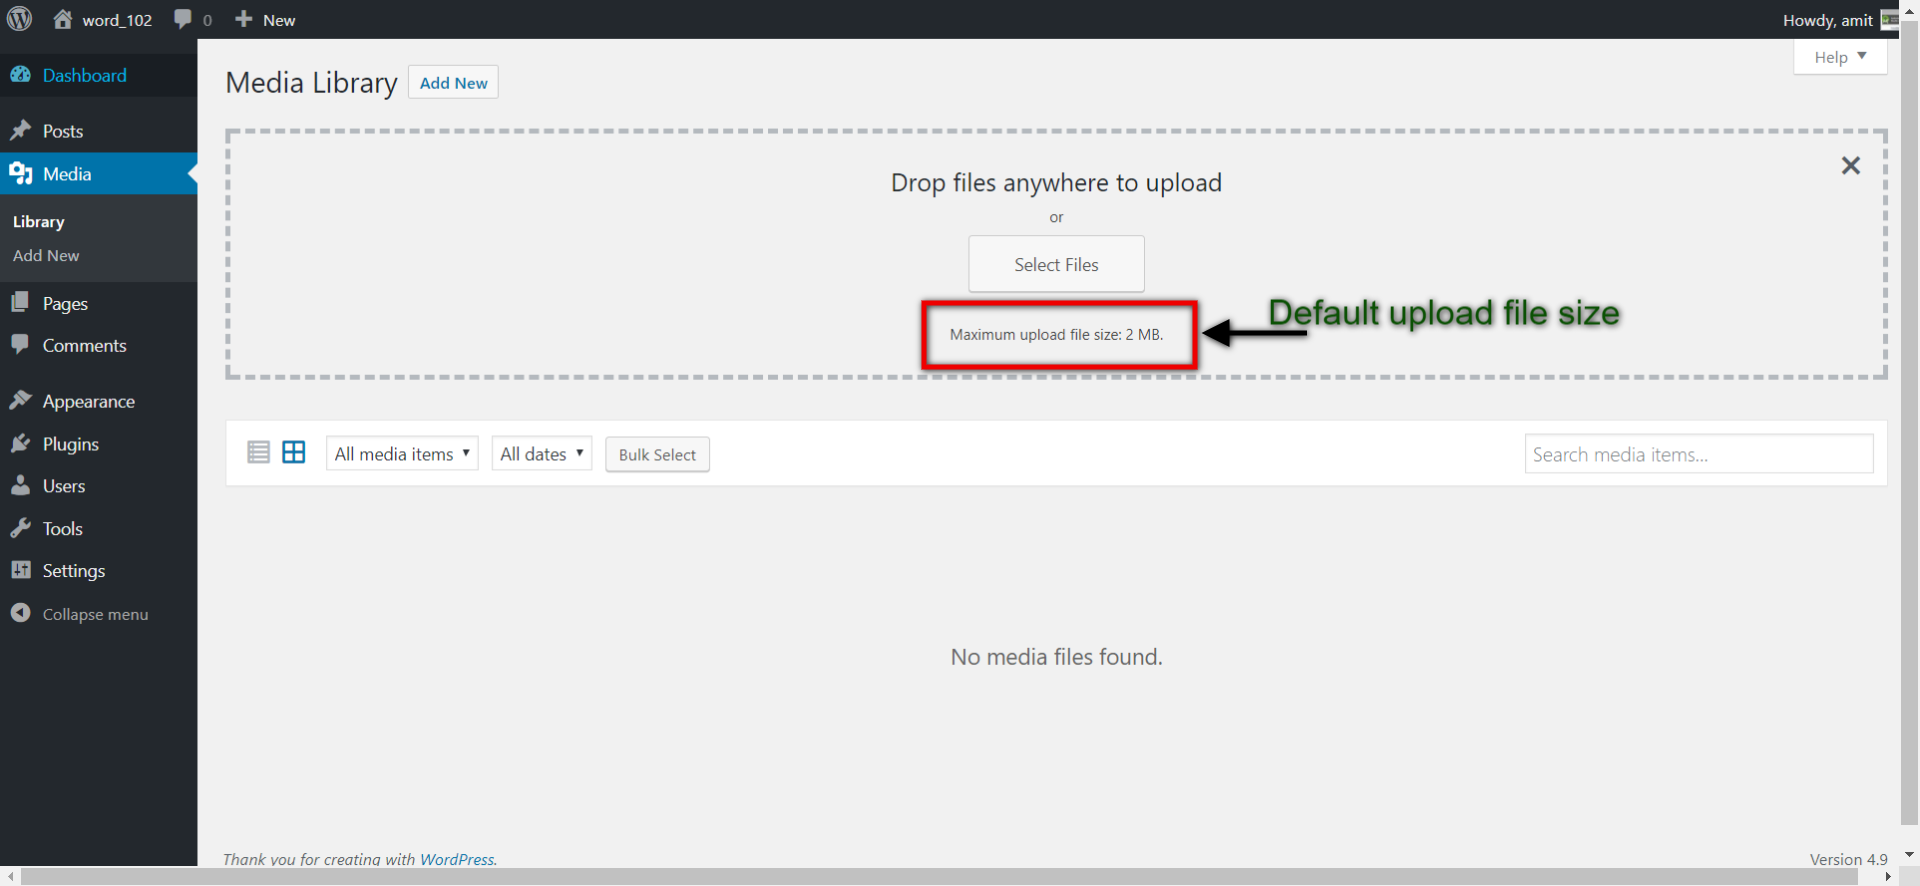
What is default size for WordPress media upload?
2 MB
Suggested Post: Why WordPress Websites are Better than Traditional Websites in 2017
The problem we are facing :
Many time we noticed we want to upload the file but we cannot upload a file in WordPress.Because WordPress has default upload file size is like as 2MB So the user , face this problem about file size upload.

So you need to know that there is more than one way to upload your picture, theme or any other content to your WordPress.
Three ways to upload files to WordPress:
1. Log in to your hosting provider by accessing their online file manager.
2. Connect to your server via an FTP client like FileZilla.
3. Upload your media, themes, or plugin files directly from the WordPress Dashboard.
Suggested Post: Build Your WordPress Website to Be SEO Friendly
But in case if you want to upload images but not the plugin, the theme you can always upload them via a file manager. However, for all normal uploads, simply navigate to your desired location within the WordPress Dashboard and choose add/upload file.
How can we increase media upload file size?
Solution – 1 Changes in php.ini file
If you are using wamp server follow this.
- Got to your drive:/wamp64/bin/apache/apache2.4.23/bin/php.ini
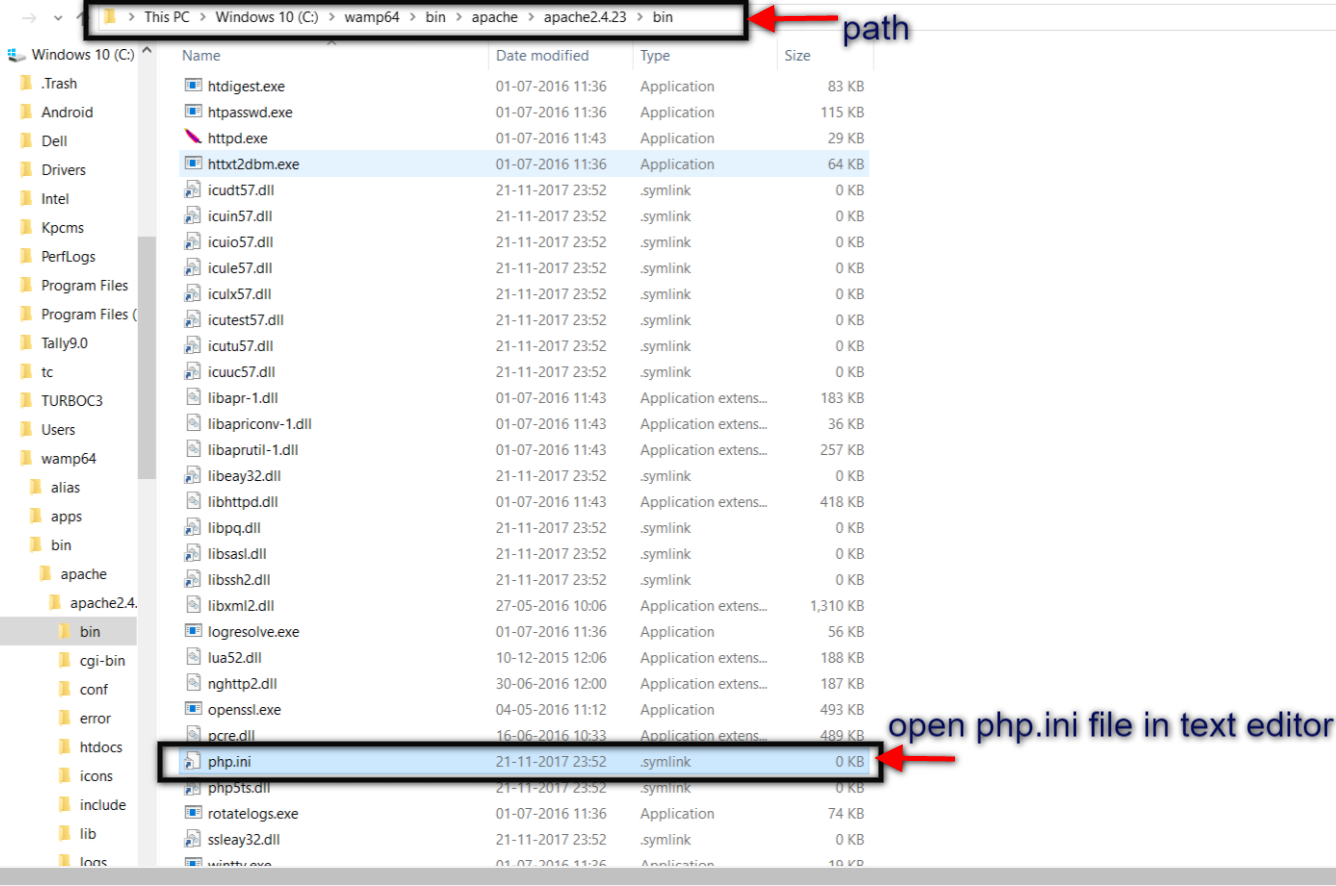

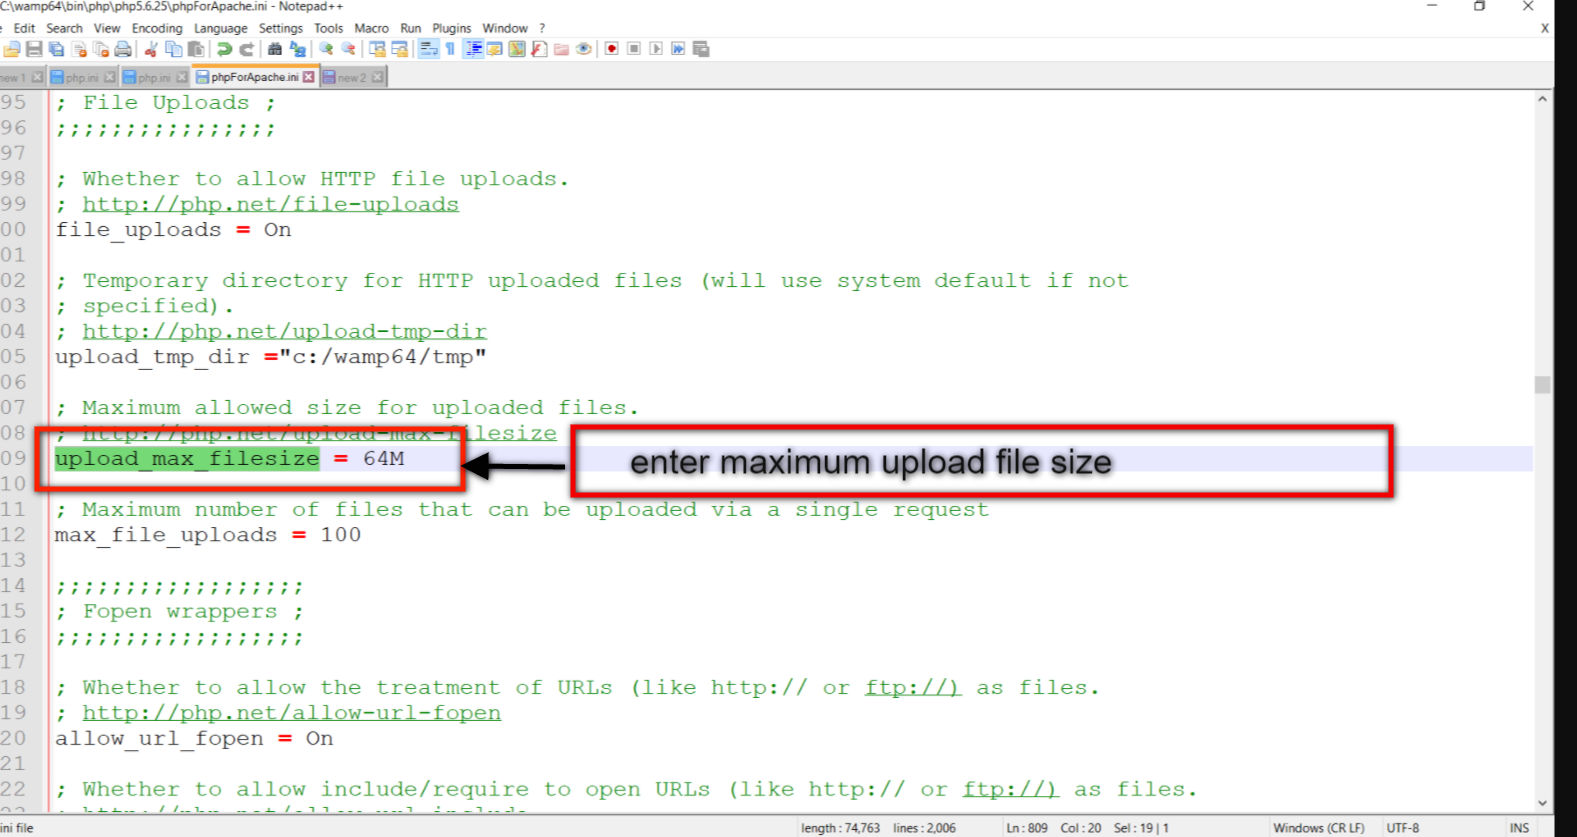
2. Open php.ini file in Text editor. and find “post_max_size” and “upload_max_filesize”
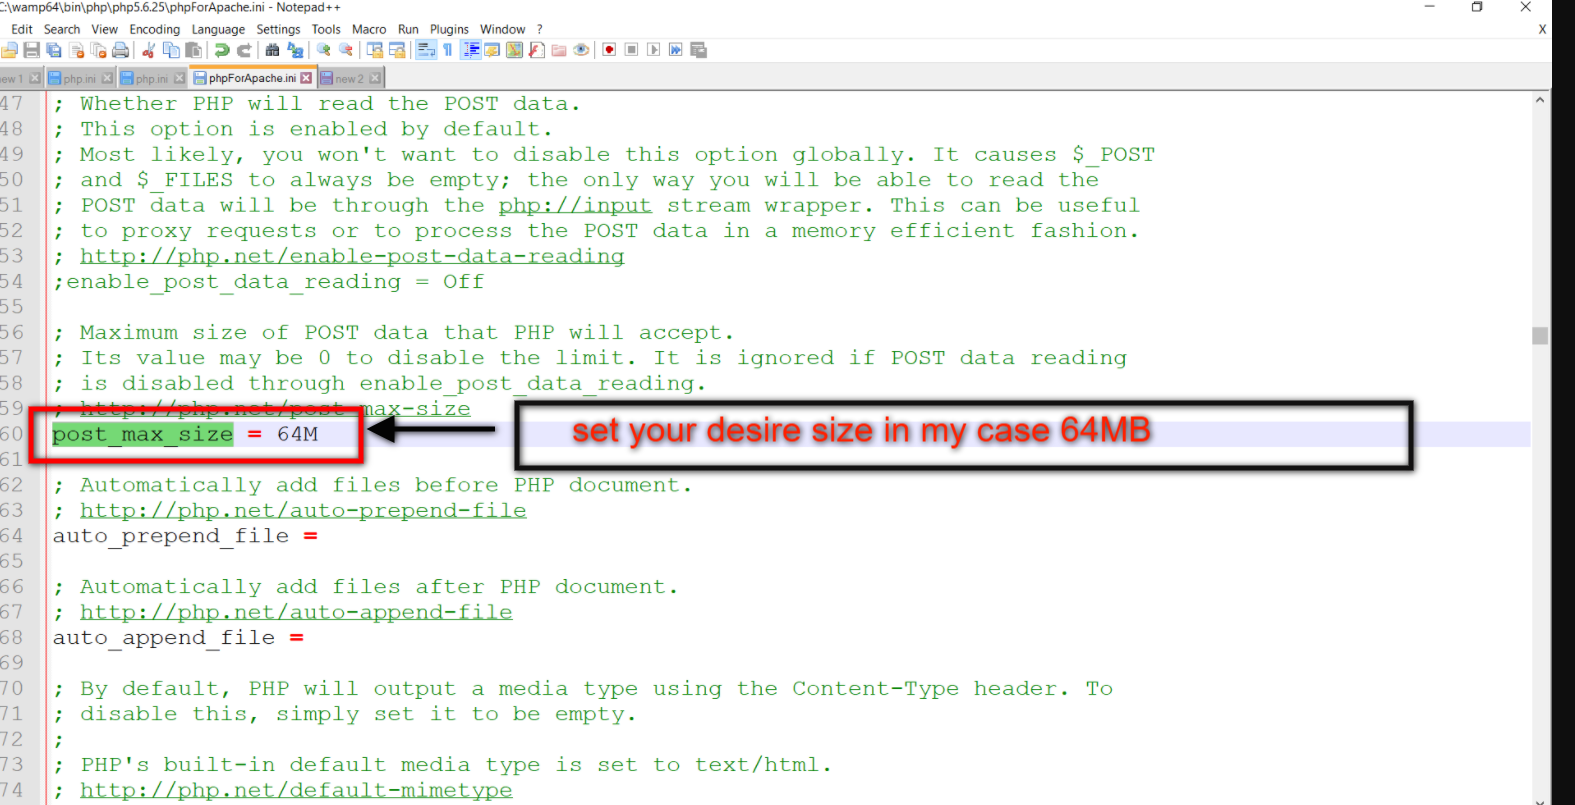


3. After set “post_max_size” and “upload_max_filesize” save your php.ini file.
4. Go to your drive:/wamp64/bin/php/php5.6.25/php.ini
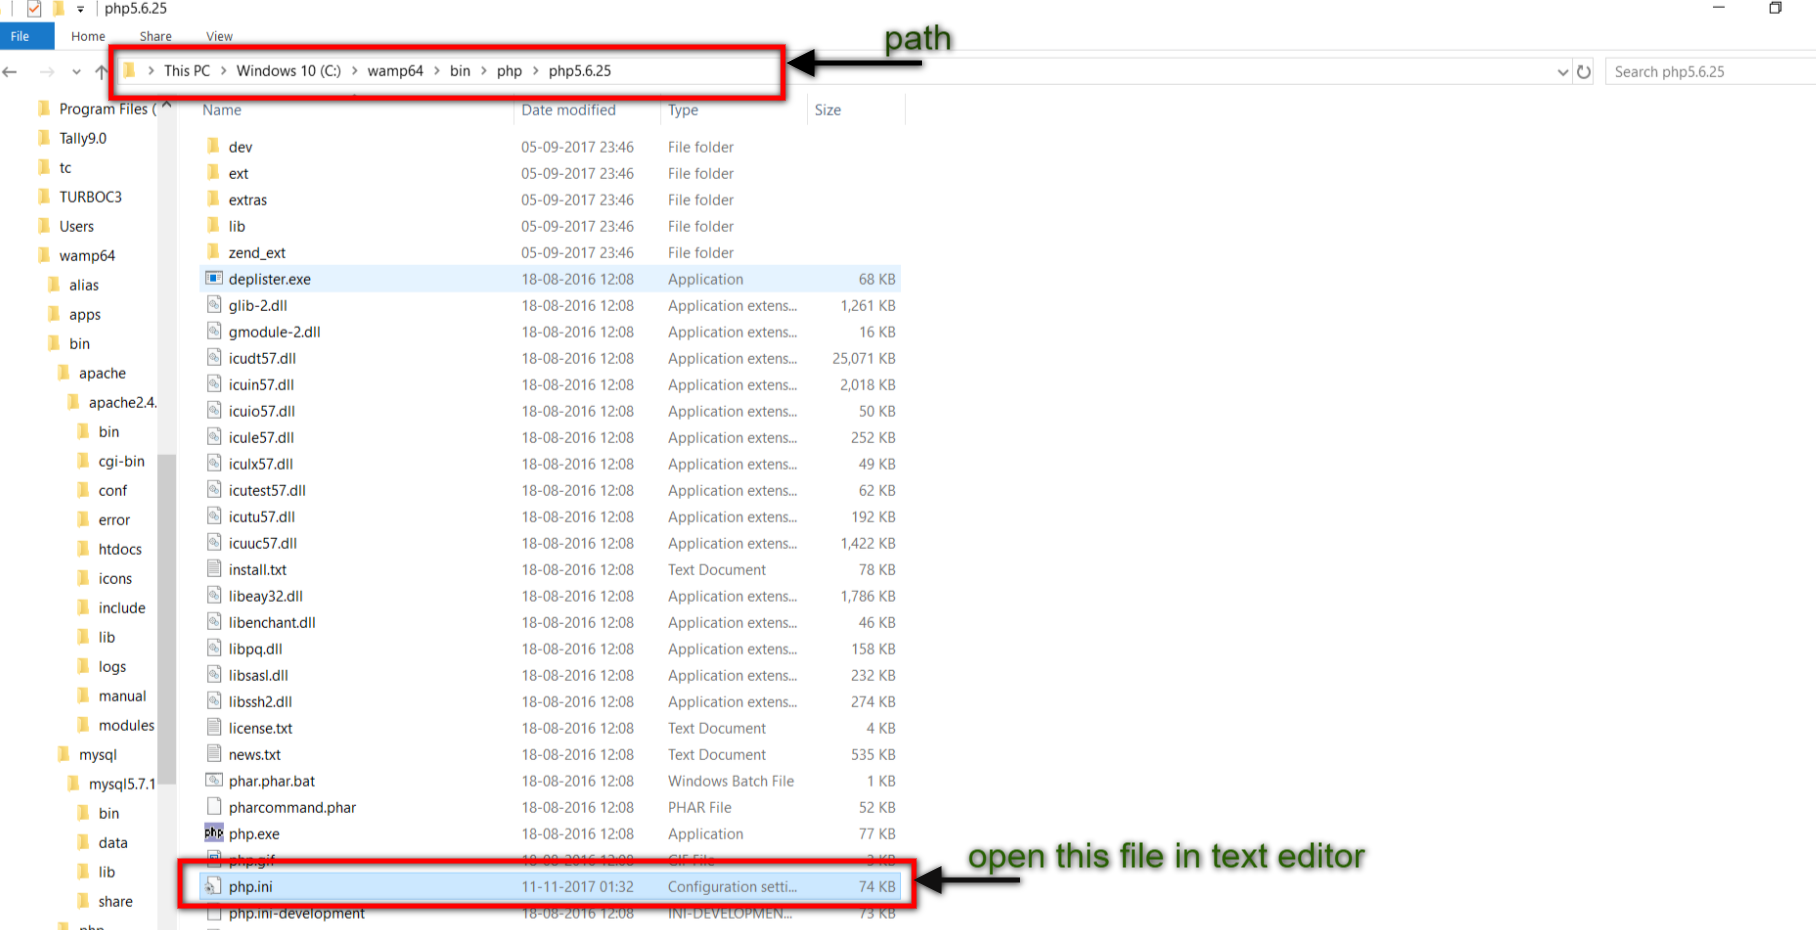

5. Find “post_max_size” and “upload_max_filesize” and set size according to your requirement.
6. After set “post_max_size” and “upload_max_filesize” save your php.ini file.
7. Restart your wamp server.
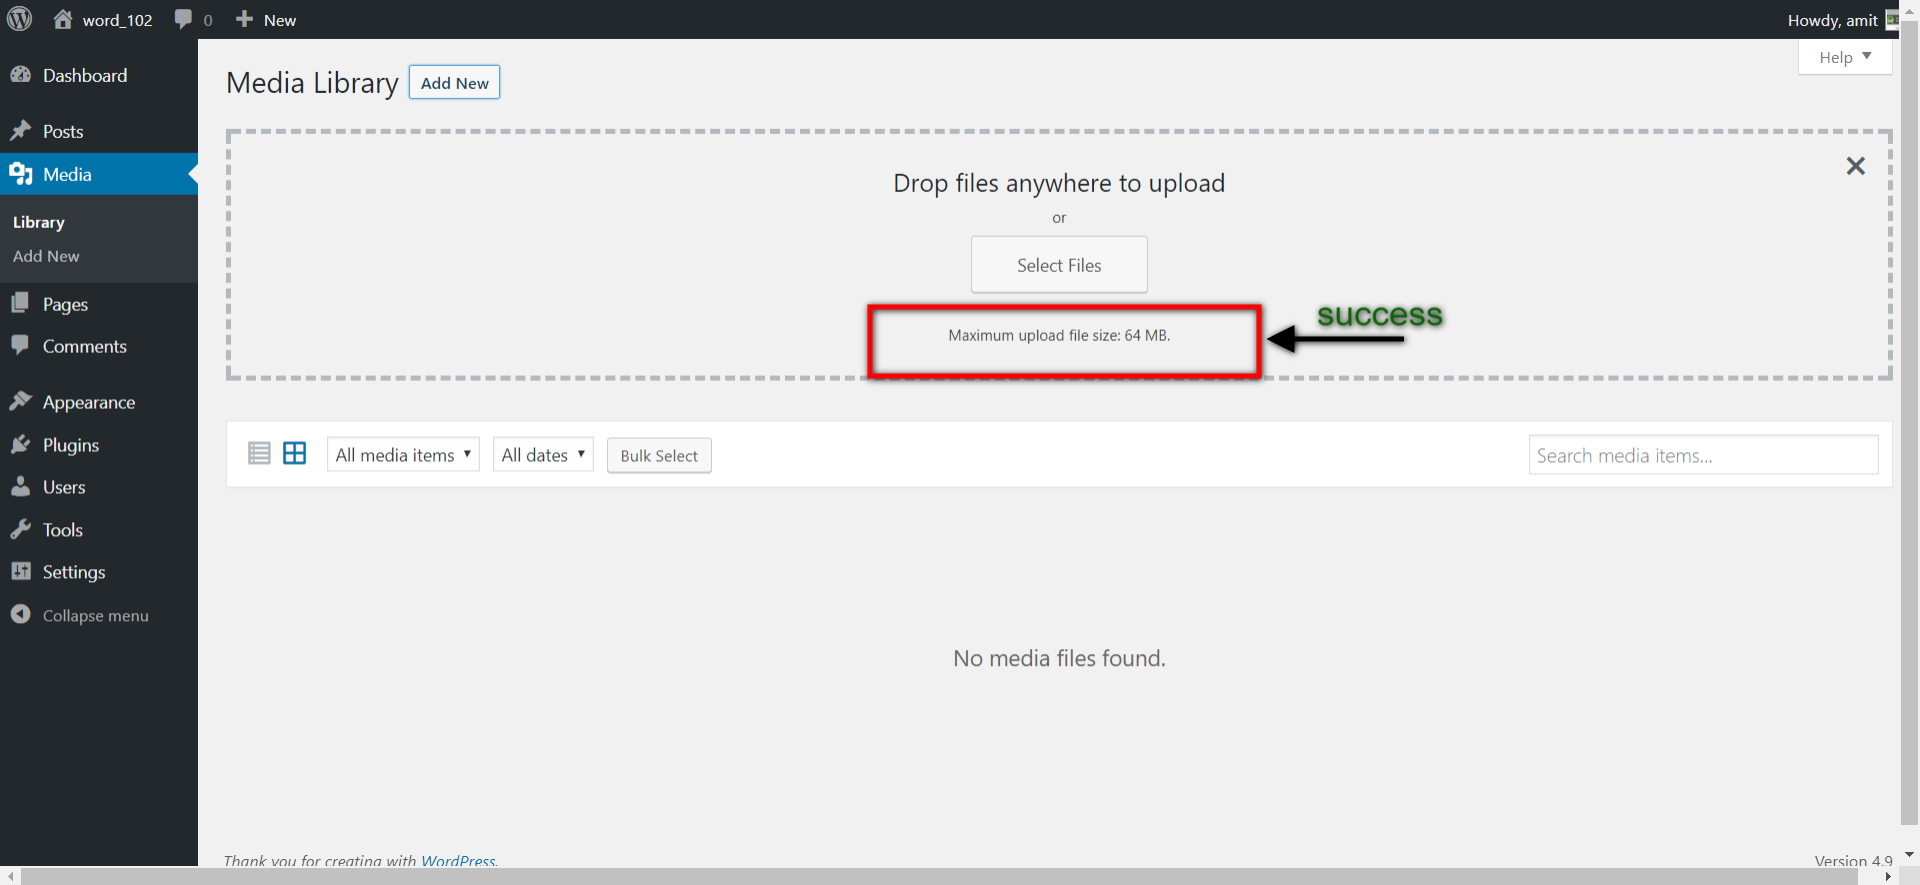
8. Now this time is testing. First, clear your cache.
9. Second Go to Media > Add New. You should see the new upload limits. If you are on a dedicated server, you may need to restart your server to see the changes.

If your server is running PHP 7, you may need to changes in. Go to your drive:/wamp64/bin/php/php7.0.10/php.ini and follow same process is above.
Solution 2 – Change .htaccess File
Your .htaccess file is used to configure Apache server modules but can be used to control PHP values. Make sure you have a backup of the original .htaccess file in case things go sideways and you get the white screen of death. Simply upload your original .htaccess to revert back to normal.
Open your .htaccess file via FTP. Add these lines to the bottom of the file, save and upload back to the server.
php_value upload_max_filesize 64M
php_value post_max_size 64M
php_value max_execution_time 300
php_value max_input_time 300
Go back to the Media > Add New screen to see if your changes have taken effect. If things go bad in any way, upload your original file.htaccess.
Summary
- After this tutorial you can see, increasing the WordPress maximum upload file size is not difficult
- The main term is where and which commands to use for simplifying increasing upload file size.
- Hopefully, now you understand a little better on how to change and adjust the settings for your WordPress site. If you’ve had a particularly stubborn case of file size limits being stuck let us know how you managed to fix it, as each host and server can be set up differently.