


Wondershare Filmora : It can be difficult to find a video editing app that meets your requirements. It’s simple to see why: software developers often appear to be torn between making home films and developing Hollywood-quality blockbusters.
As a result, many apps are missing features, while others are overly complicated. The best applications don’t force you to choose between “powerful” and “easy-to-use,” but instead focus on providing you with tools to bring your vision to life while being intuitive and simple to use.
Wondershare Filmora’s video editing software brilliantly embodies the “best of both worlds” concept. It has all of the capabilities you’ll need to make a video, you won’t have to waste hours watching YouTube tutorials to learn how to use it. This allows you to concentrate on your project rather than learning how to use the app.
How to use Wondershare Filmora?
Tips to Create Your Video with Wondershare Filmora
Wondershare Filmora is a simple video editing tool with no complex capabilities; therefore it’s a good choice. Filmora is a popular video editing software. It works on both Windows and macOS.
Tips to Create Video with Wondershare Filmora
You may utilize Filmora‘s built-in royalty-free audio effects to enhance your video. It comes with a variety of video effects, components, and filters to help you make your video more appealing. Furthermore, over 150 video transitions can make the video more natural to watch.
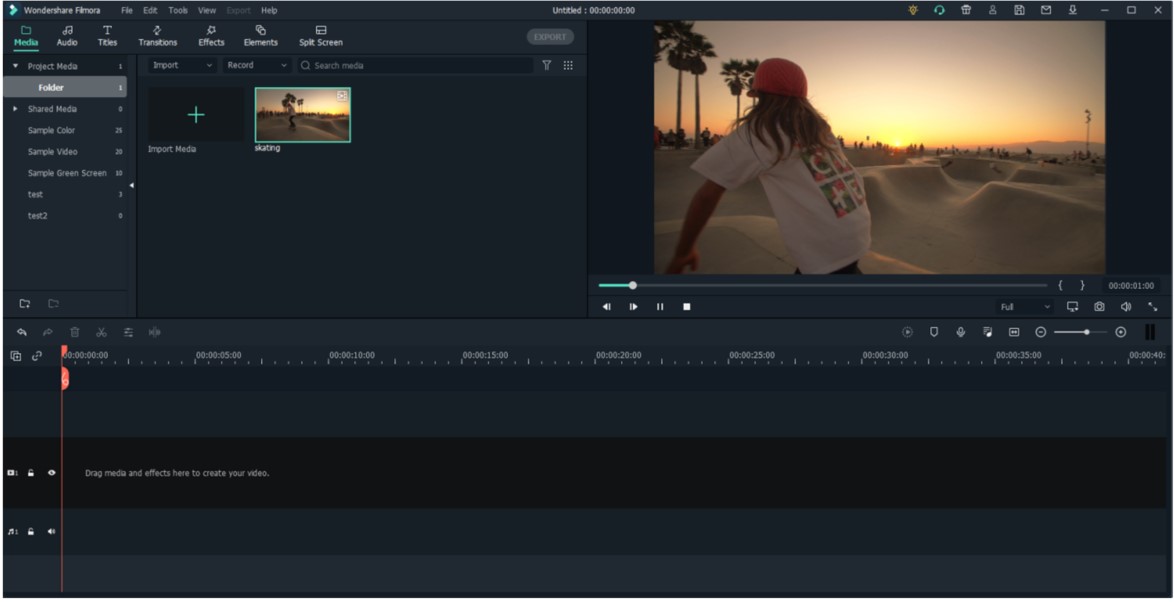
1. Import audio and video files
Create a new project in Filmora, import your photographs or video footage, and then start editing by dragging and dropping the files onto the timeline.
2. Make your own story.
The duration of a still image is set to 5 seconds by default, but you can change it by dragging the image’s border on the timeline. Adding motion and transitions to your photo slideshow might make it more appealing. Simply double-click on the image clip in the timeline to access the motion options.
There are over 50 options to choose from. Choose your favorite (the effect will appear in the preview window) and double-click it to apply it to the image you’ve chosen.
It is possible to make the story flow more smoothly by using transitions between images. To test the effect, go to Transitions, pick a transition, and click the Play button in the preview window. To apply a transition to a clip, click the + button on the transition you want to use.
3. Apply title and effects
You can simply add text to the image if you want to express your feelings or explain something in the slideshow. To see the different caption styles, go to the top of the page and click Titles. Drag a title style to the Timeline once you’ve picked a title style.
4. Select Music For Your Post.
In a photo slideshow, music is essential. You may choose from over 50 royalty-free audio tracks in Filmora to make your slideshow more entertaining. Simply drag the one you want to the timeline.
5. Changing the Music
If you don’t like the song that comes with your video, you may replace it with another track from the Photos app’s music library or import a song from your hard drive. The original sound of a clip may be too loud or too quiet at times, but you may alter the volume level of a clip in the Storyboard by right-clicking on it and selecting the Volume option.
6. Exporting and Sharing Videos
If you don’t want to edit anything else in your film, click the Export and Share button in the top menu. After clicking this button, you’ll be given the option of choosing between Small, Medium, or Large video sizes.
You can choose the image quality, but you can’t adjust the frame rate or resolution of a video because those are set automatically. Your movie will be exported to the Pictures folder after the rendering process is completed, and you can use the Share option in the Photos app to upload it to YouTube or send it to a friend on Skype.
7. What to look for when choosing a good slideshow maker?
To edit and produce your video, use a smart video slideshow maker and keep the following in mind:
1. Use popular image formats such as PNG, JPEG, BMP, GIF, and others.
2. Fine-tune the settings or easily trim, cut, crop, or combine your slideshow.
3. Add stunning transitions, intro/credits, and sound effects to your video slideshow.
4. Use advanced video effects such as Face Off, Jump Cut, Mosaic, and others.
5. Video slideshows can be saved to any device, burned to DVD, or uploaded to the internet.
Reasons To Choose Wondershare Filmora:
1. Initiative Interface
This video slideshow creator has a sophisticated wizard that allows you to quickly upload photographs and movies, add a soundtrack, and your slideshow is ready! It is compatible with both Windows and Mac OS.
2. Extensive Slideshow Themes and Effects
In Filmora, there are over 300 effects to choose from. You can experiment with different filters, text, and elements. Your static photos will come to life with pan and zoom, rotation, and beautiful color effects. PIP, Face Off, Jump Cut, and other advanced effects are waiting to be explored.
3. Handy Video Editing Tools
To fine-tune your video slideshow, just rotate photos and adjust brightness and color balance. Add your favorite music to your slideshow to give it a new dimension.
4. Share Video in Different Ways
Save your slideshow in a variety of formats, choose from ready-made presets for all main mobile devices, share it on Facebook and YouTube, or burn it to DVD.
Conclusion – How To Make Video Filmora
Wondershare Filmora is a fantastic video editing software that offers a good mix of sophisticated capabilities and an easy-to-use interface at a reasonable price. All recent video formats are supported, as well as HD and 4K video editing and output. While it has some limitations with its social media integration features, it is still a great editor for making high-quality internet films.