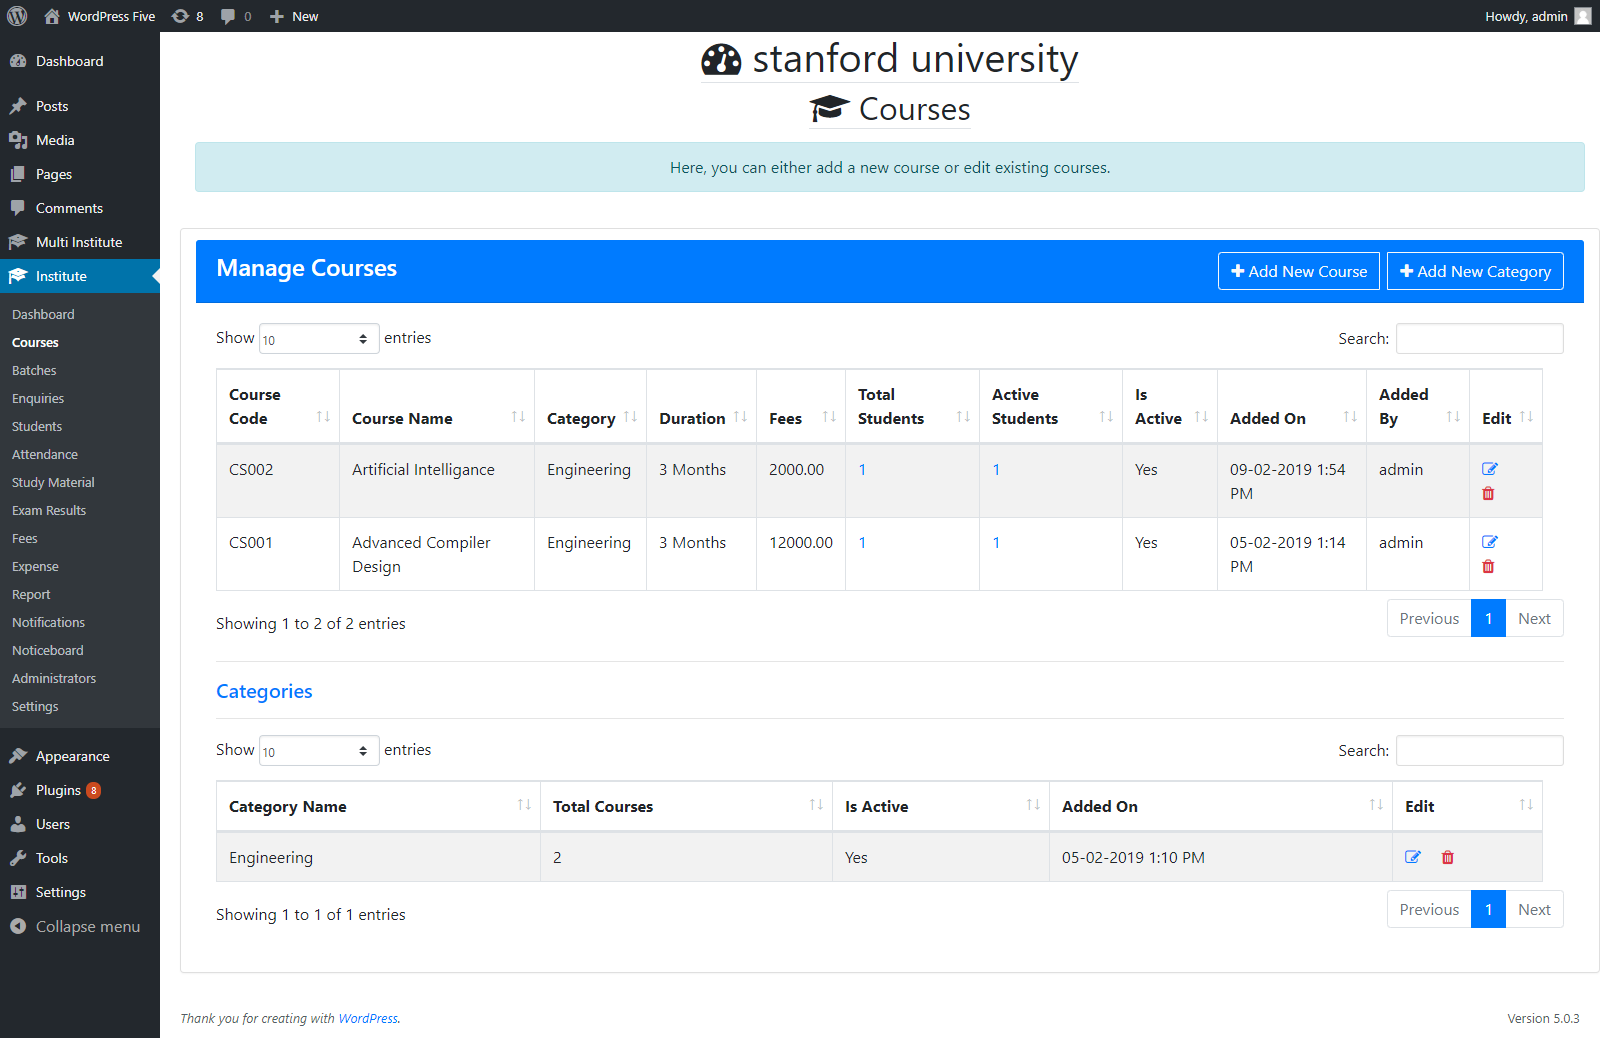
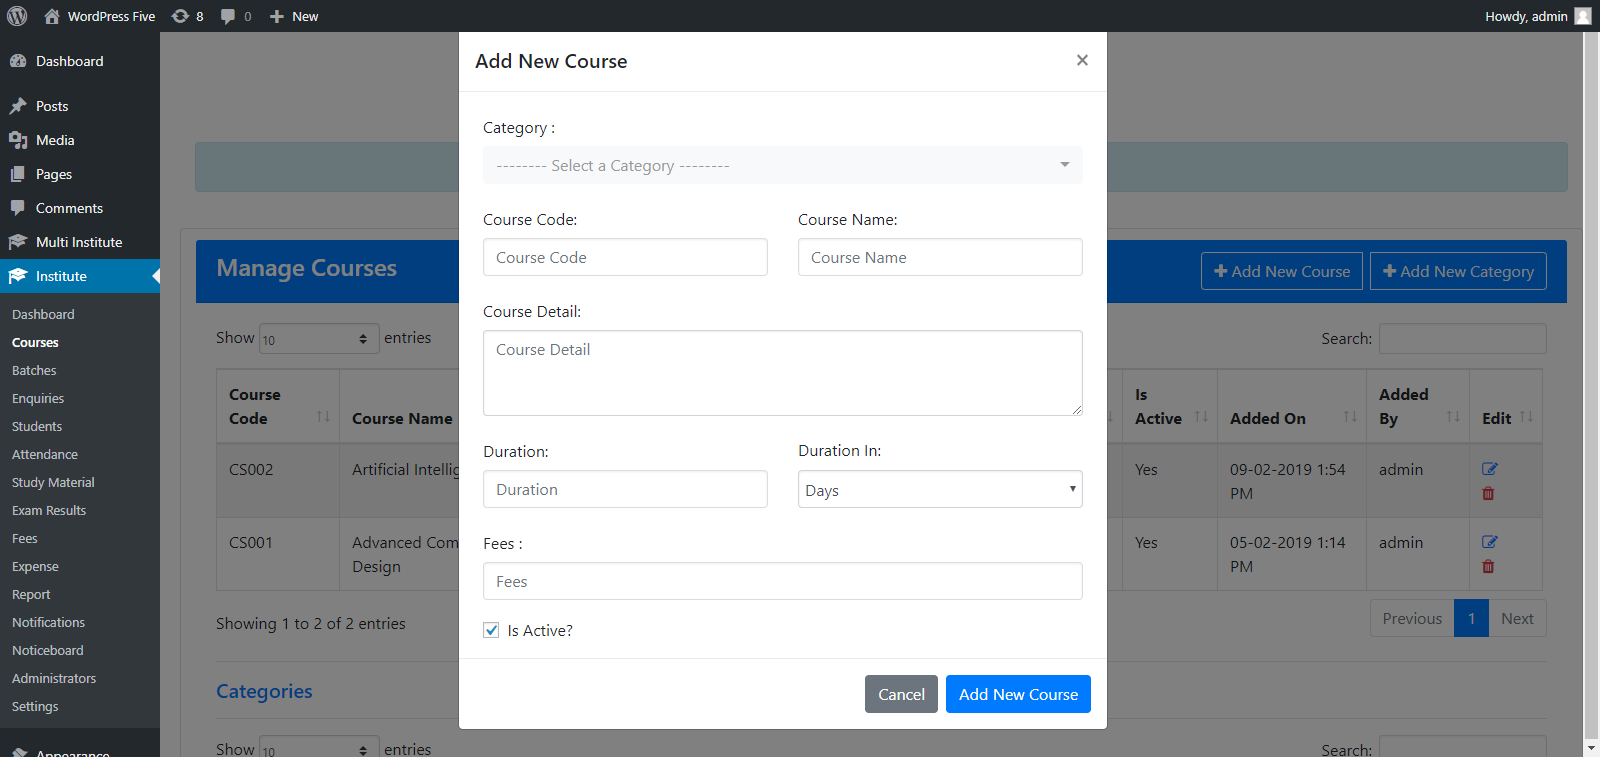
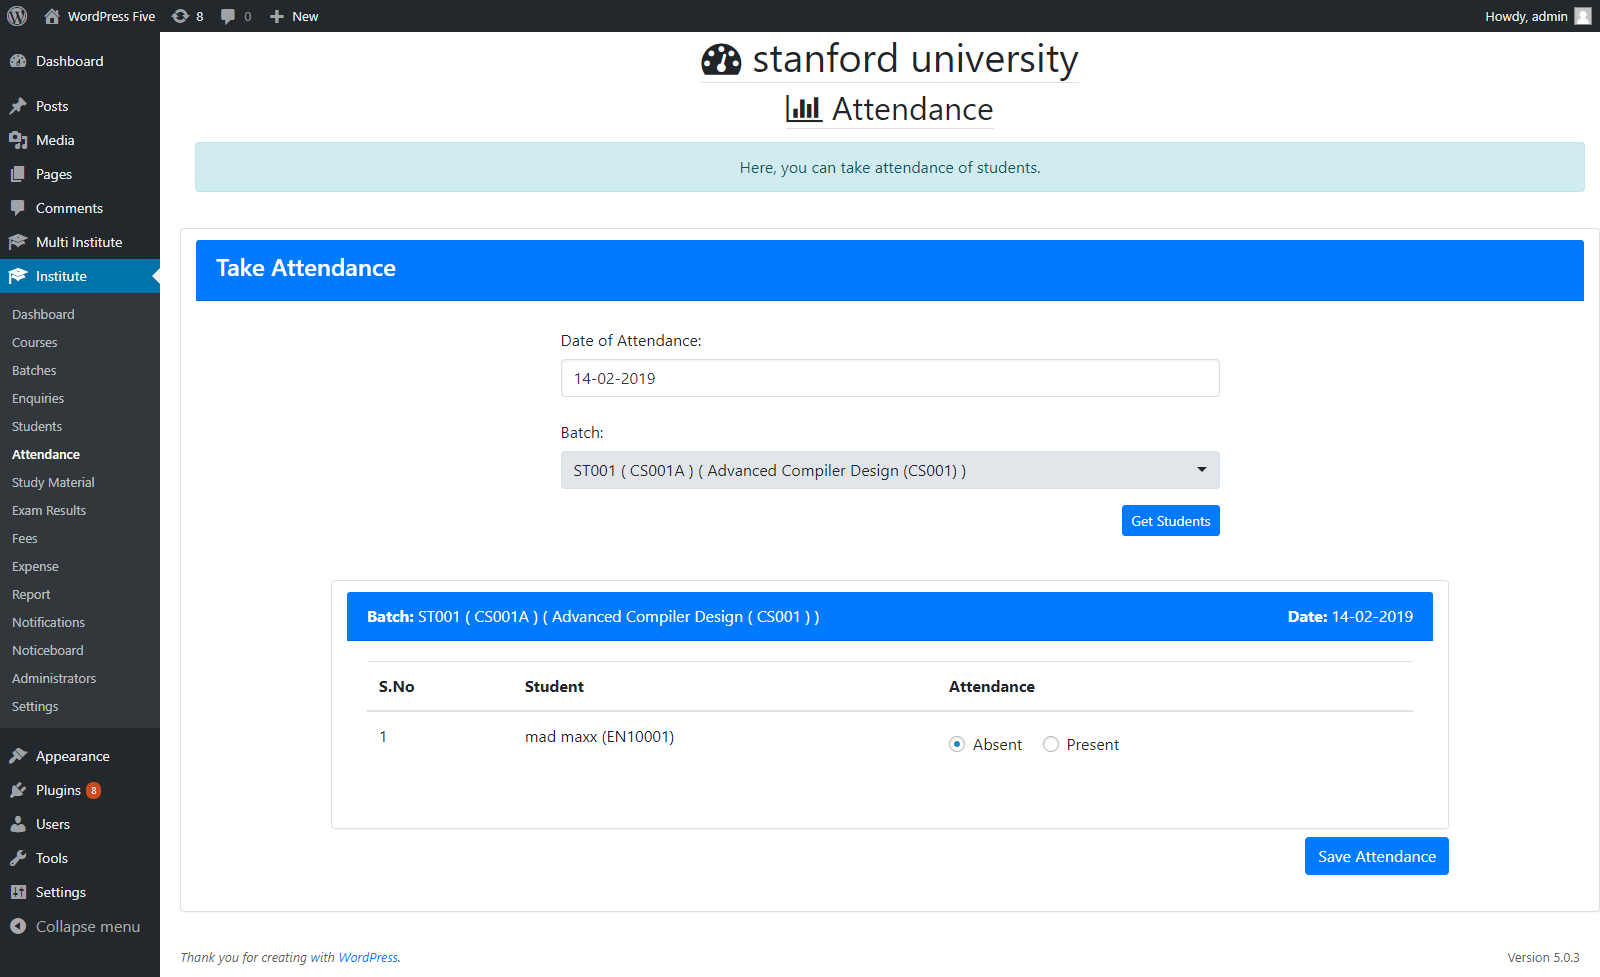
2. Plugin Features
Course Management :-
Add courses and categories, durations and fees of courses.
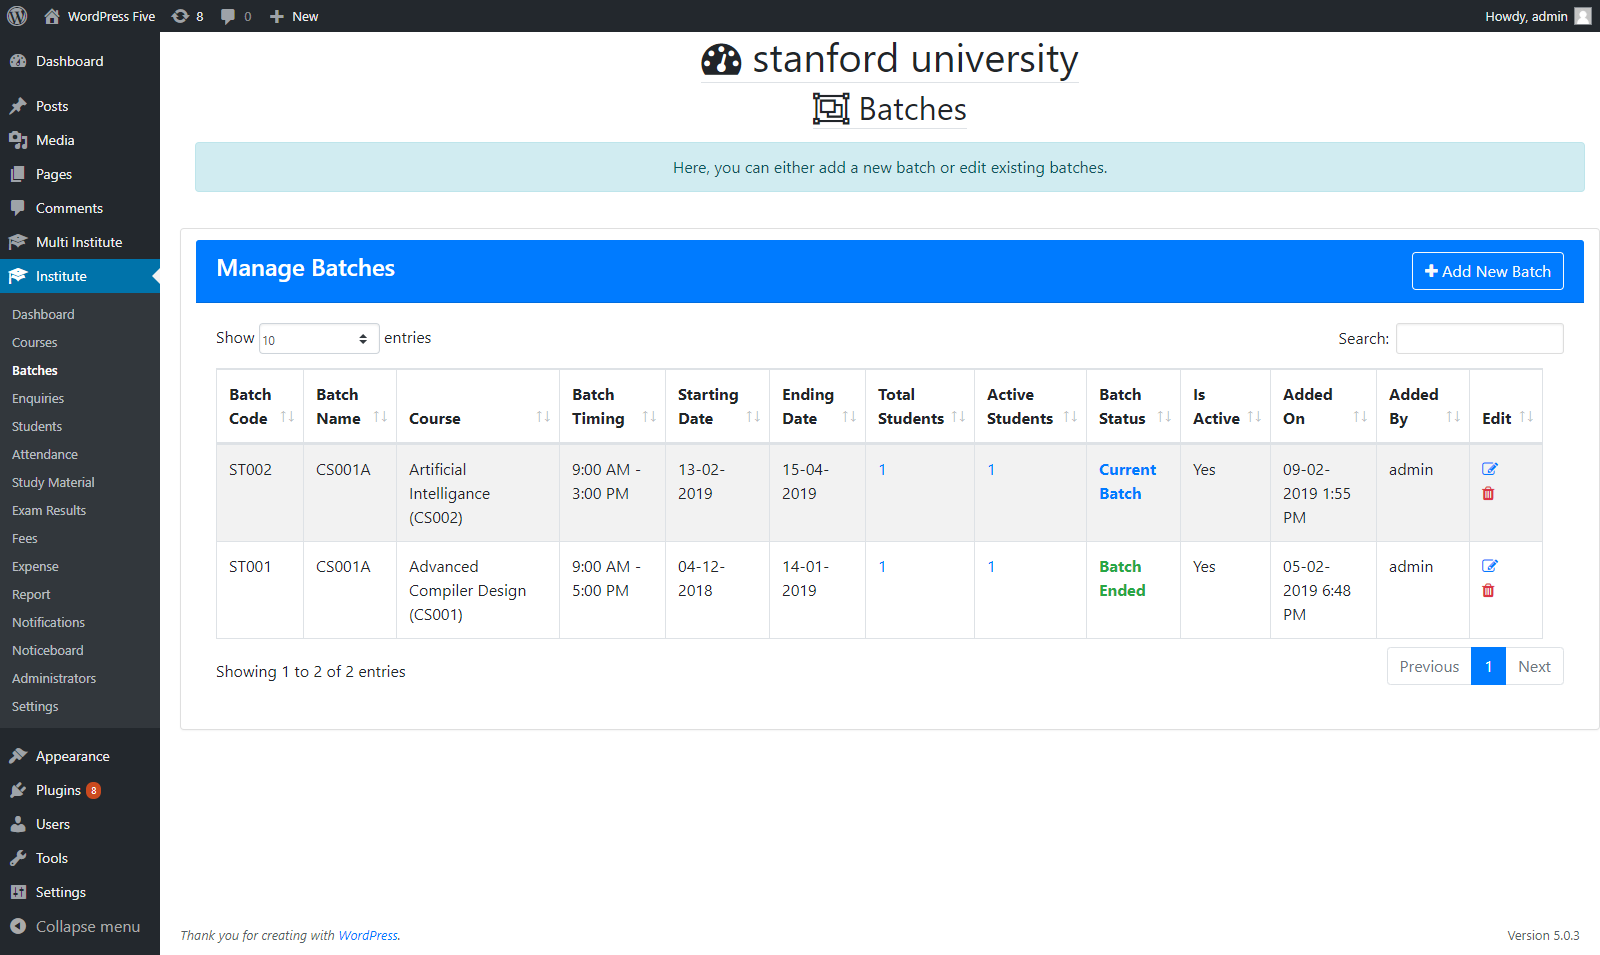
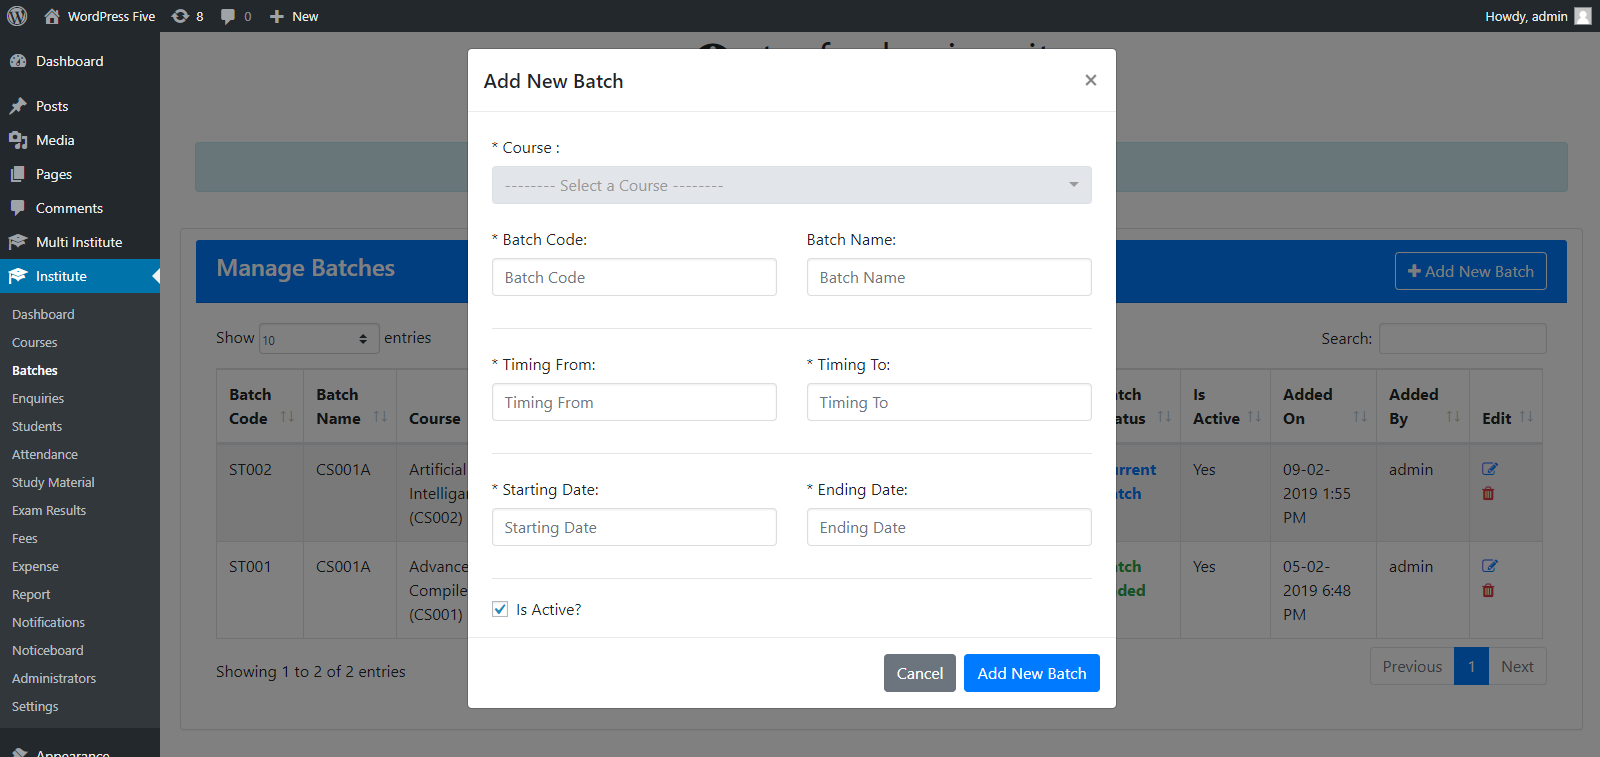
Batch Management :-
A course can have multiple batches. Add new batch to a course or edit them.
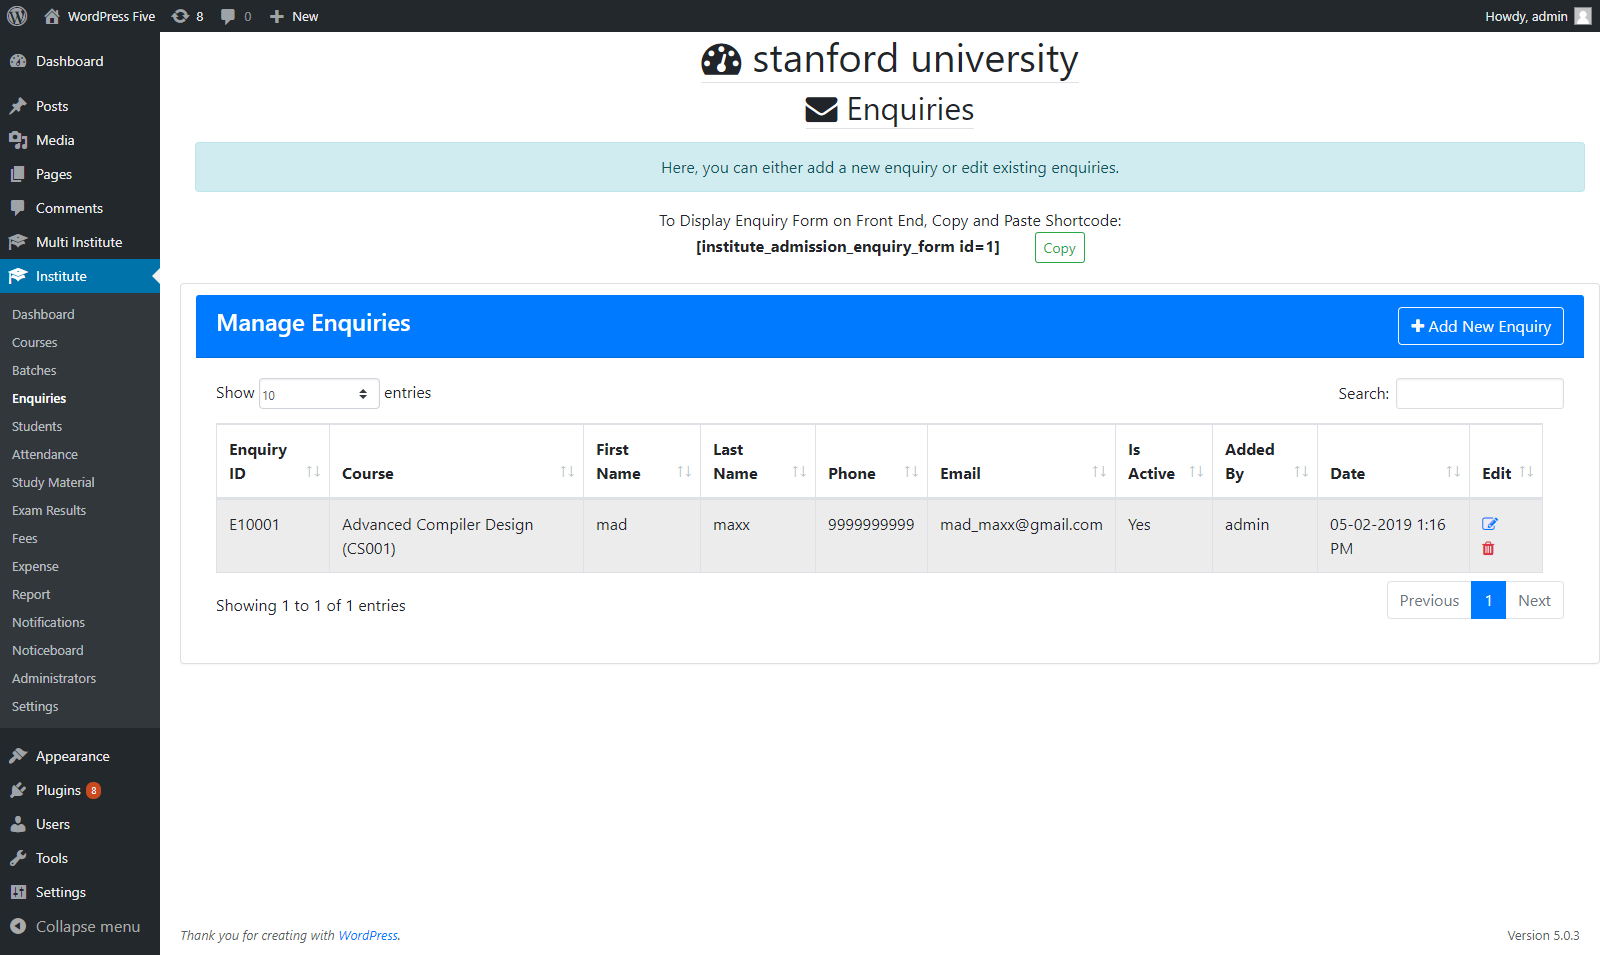
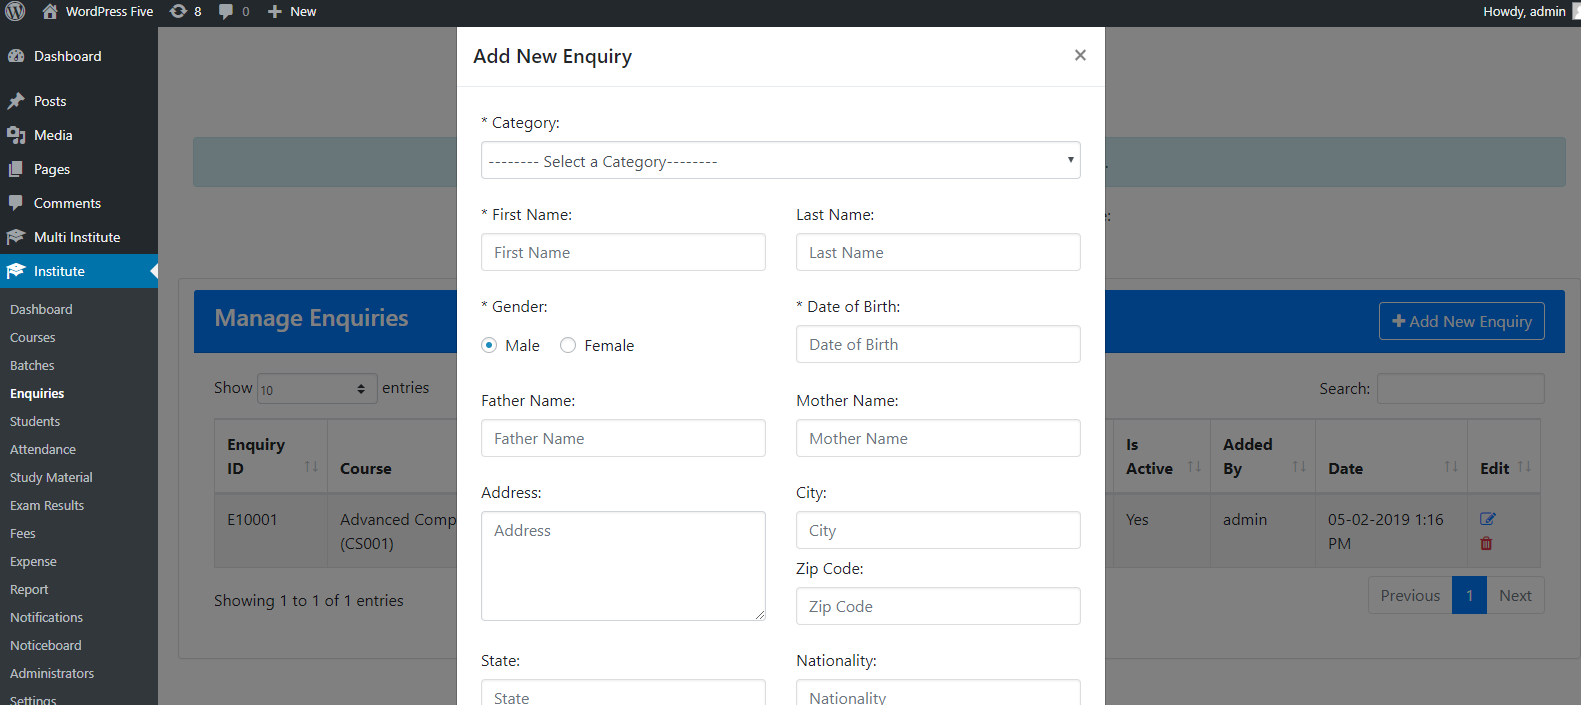
Enquiry Management :-
Receive enquiries from front-end or add directly from admin panel.
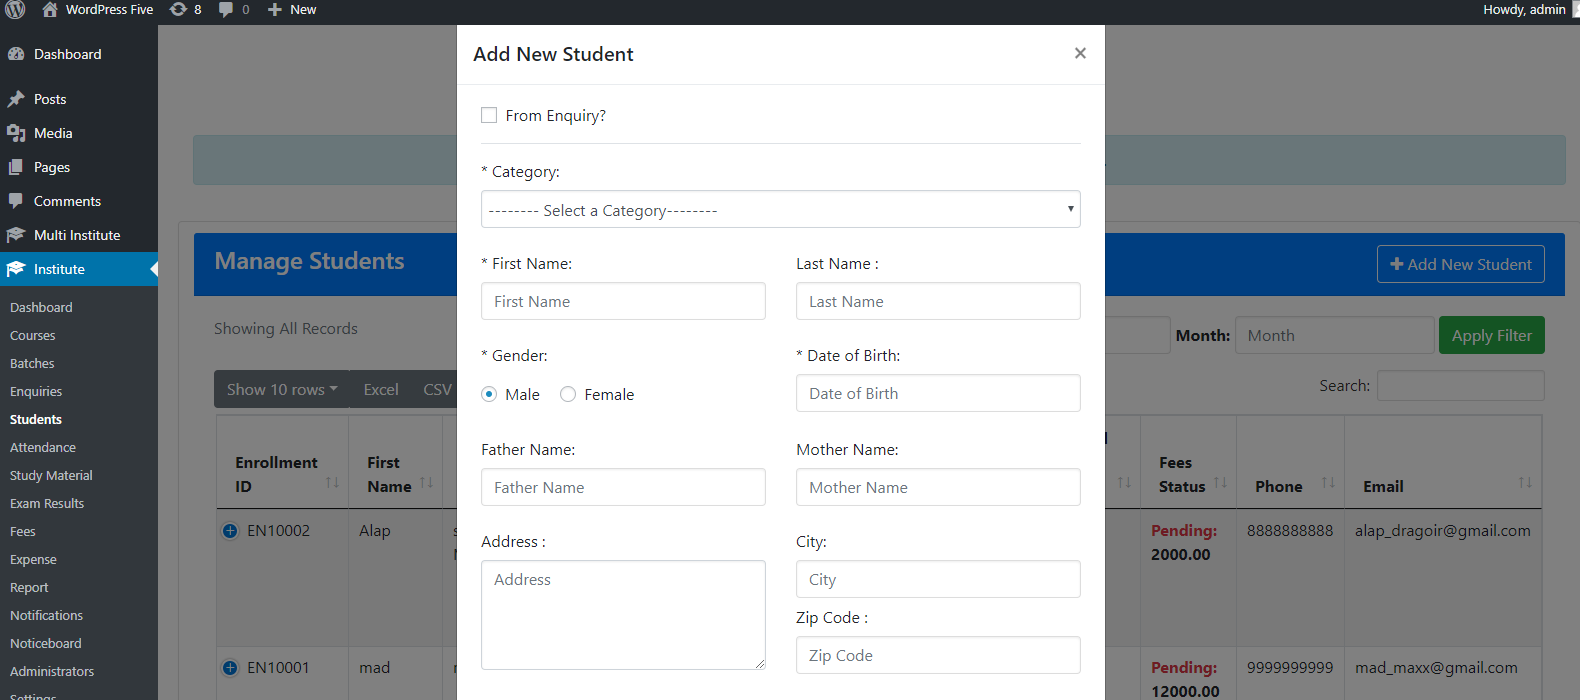
Student Management :-
Register a new student for a course, which can also be done from active enquiry. Then, enquiry can be
removed or marked as inactive. Also, mark the course as completed.
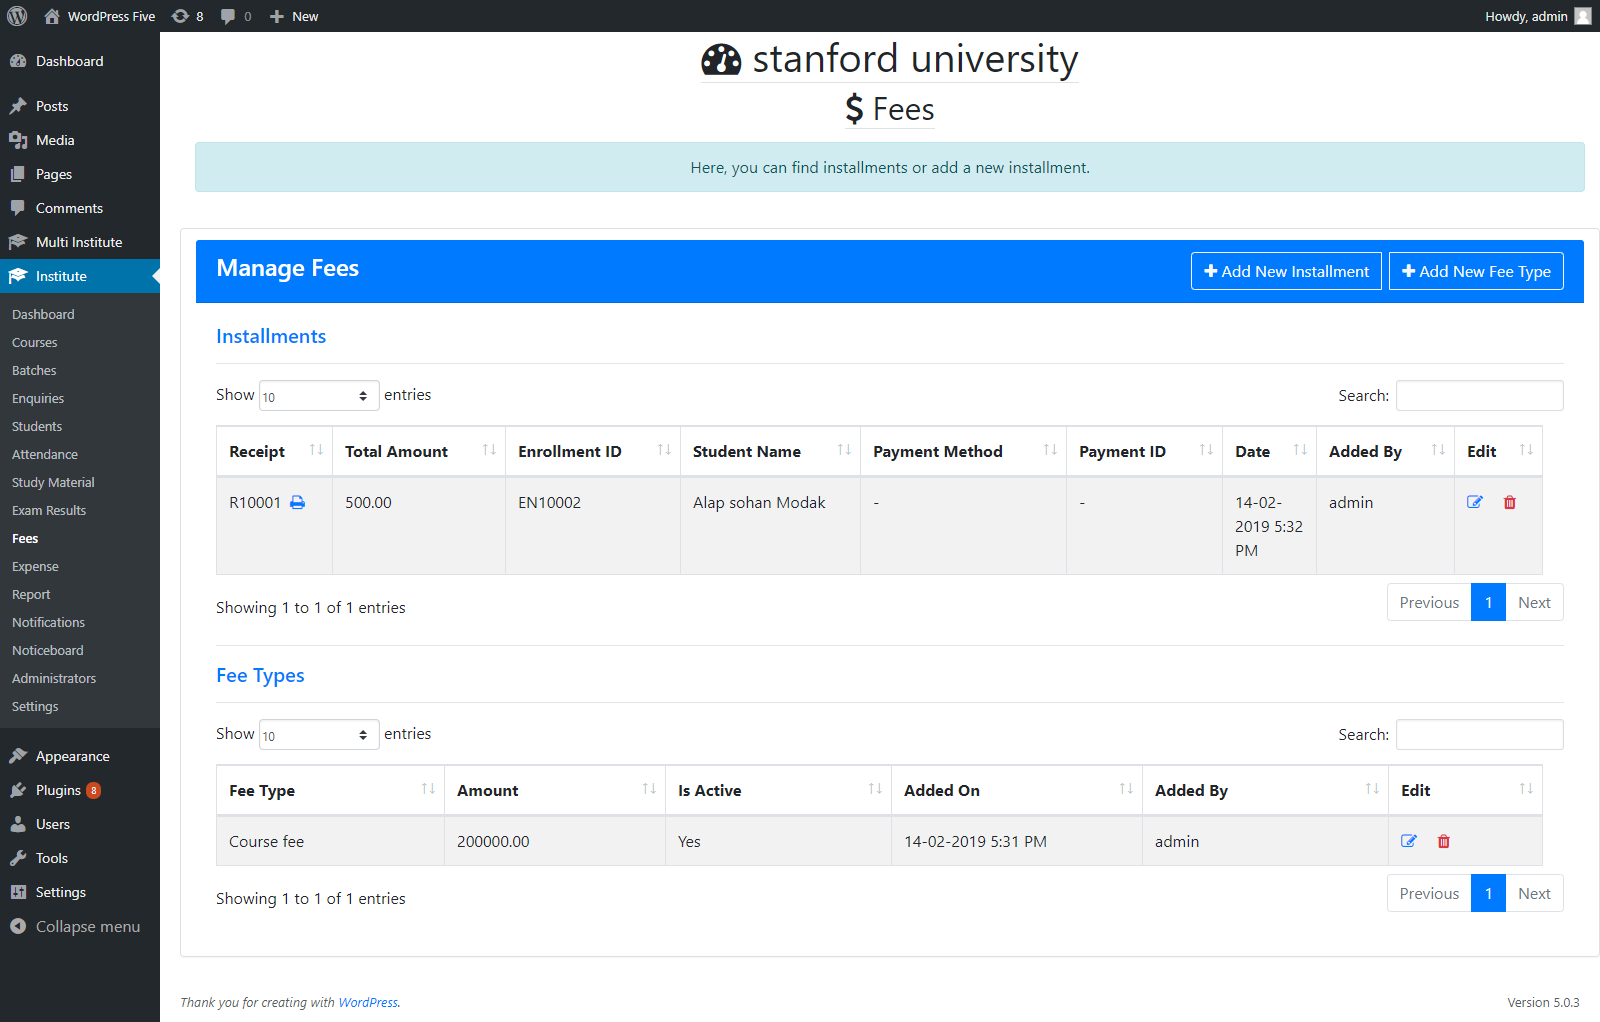
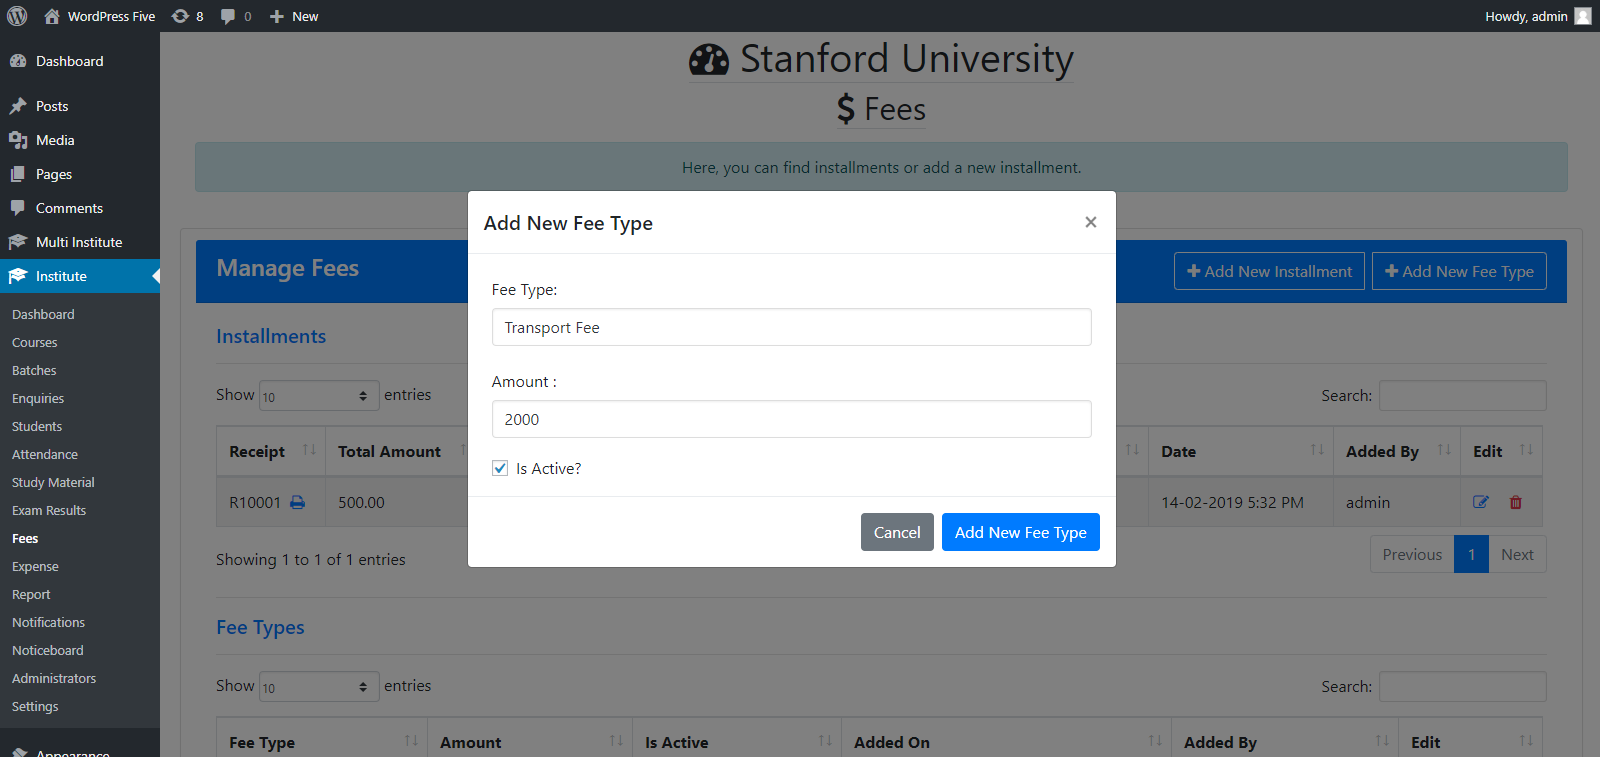
Fee Management :-
Easy to manage fee, shows pending fees, supports payment in installments for a student enrolled in a
course.
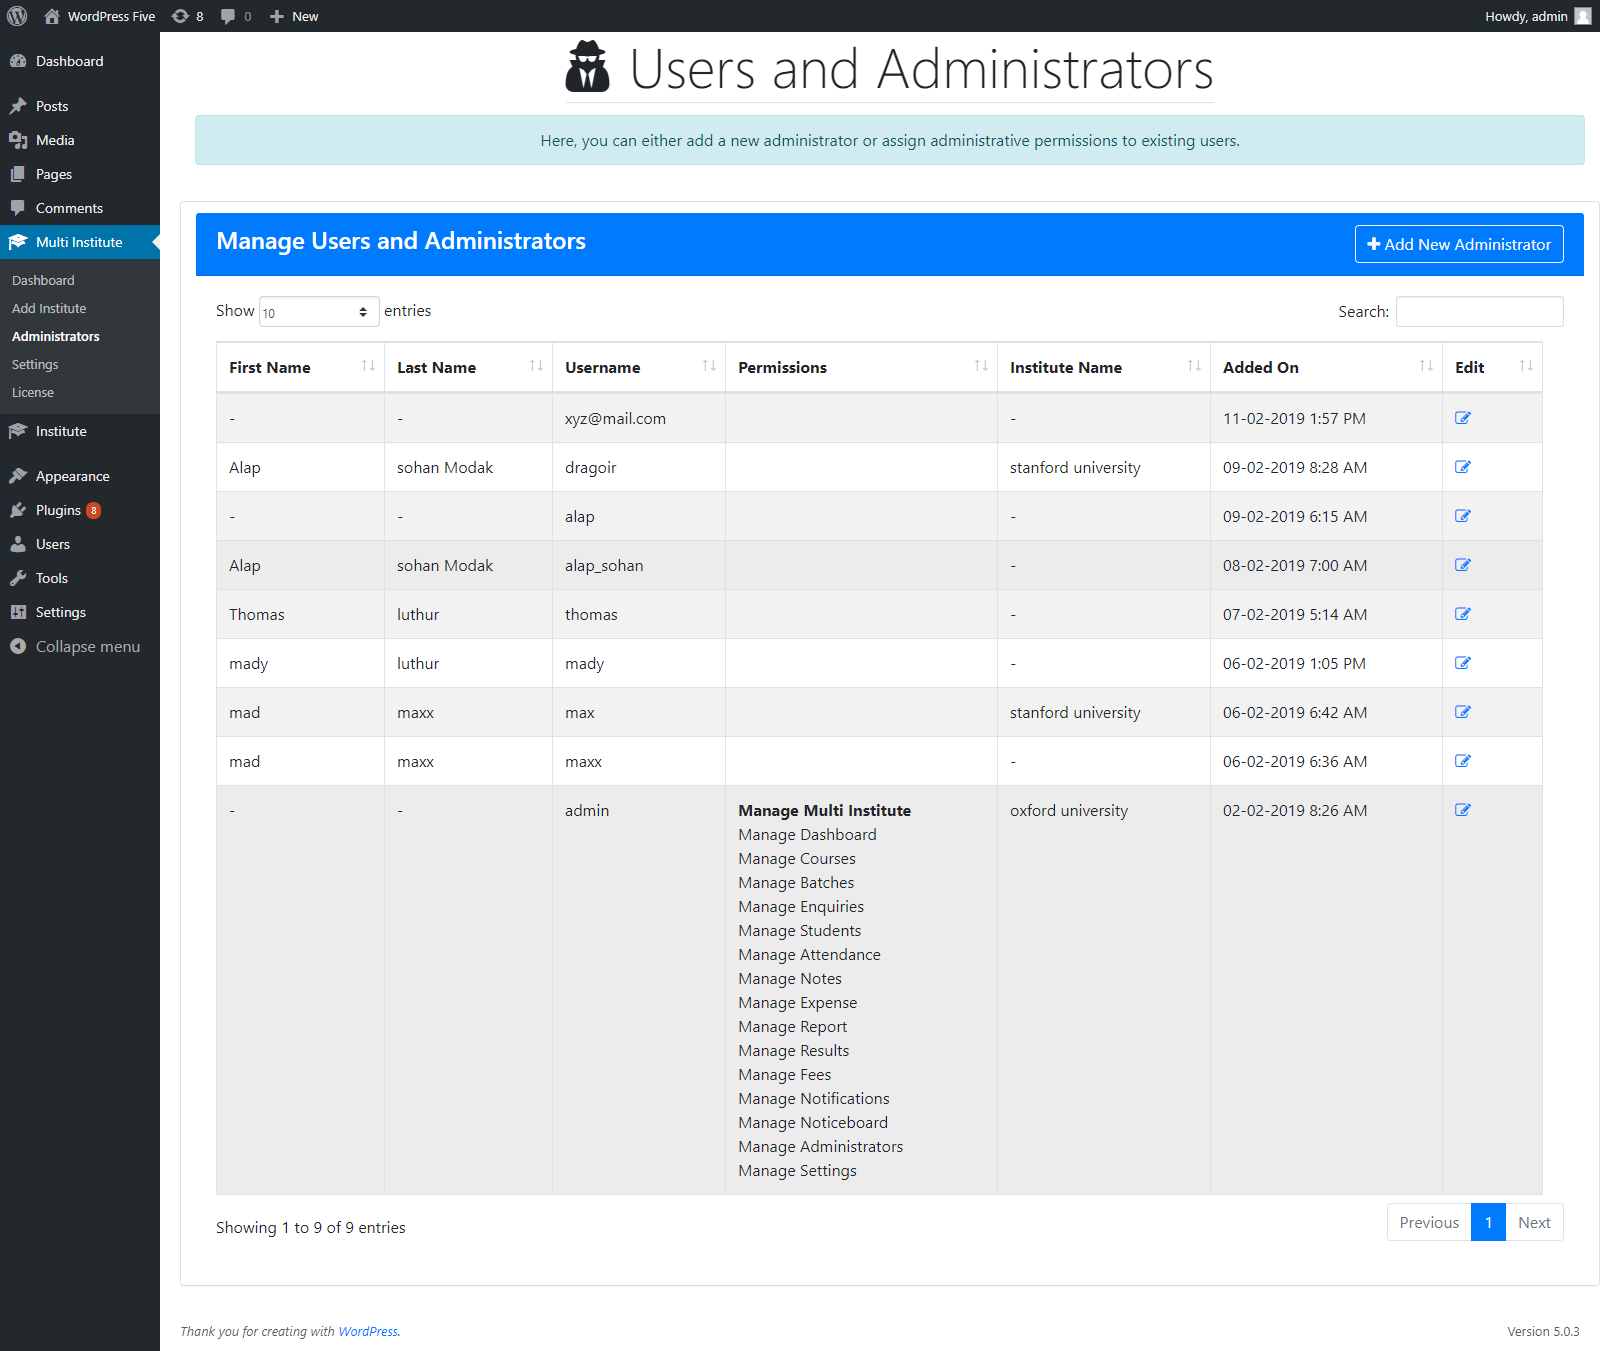
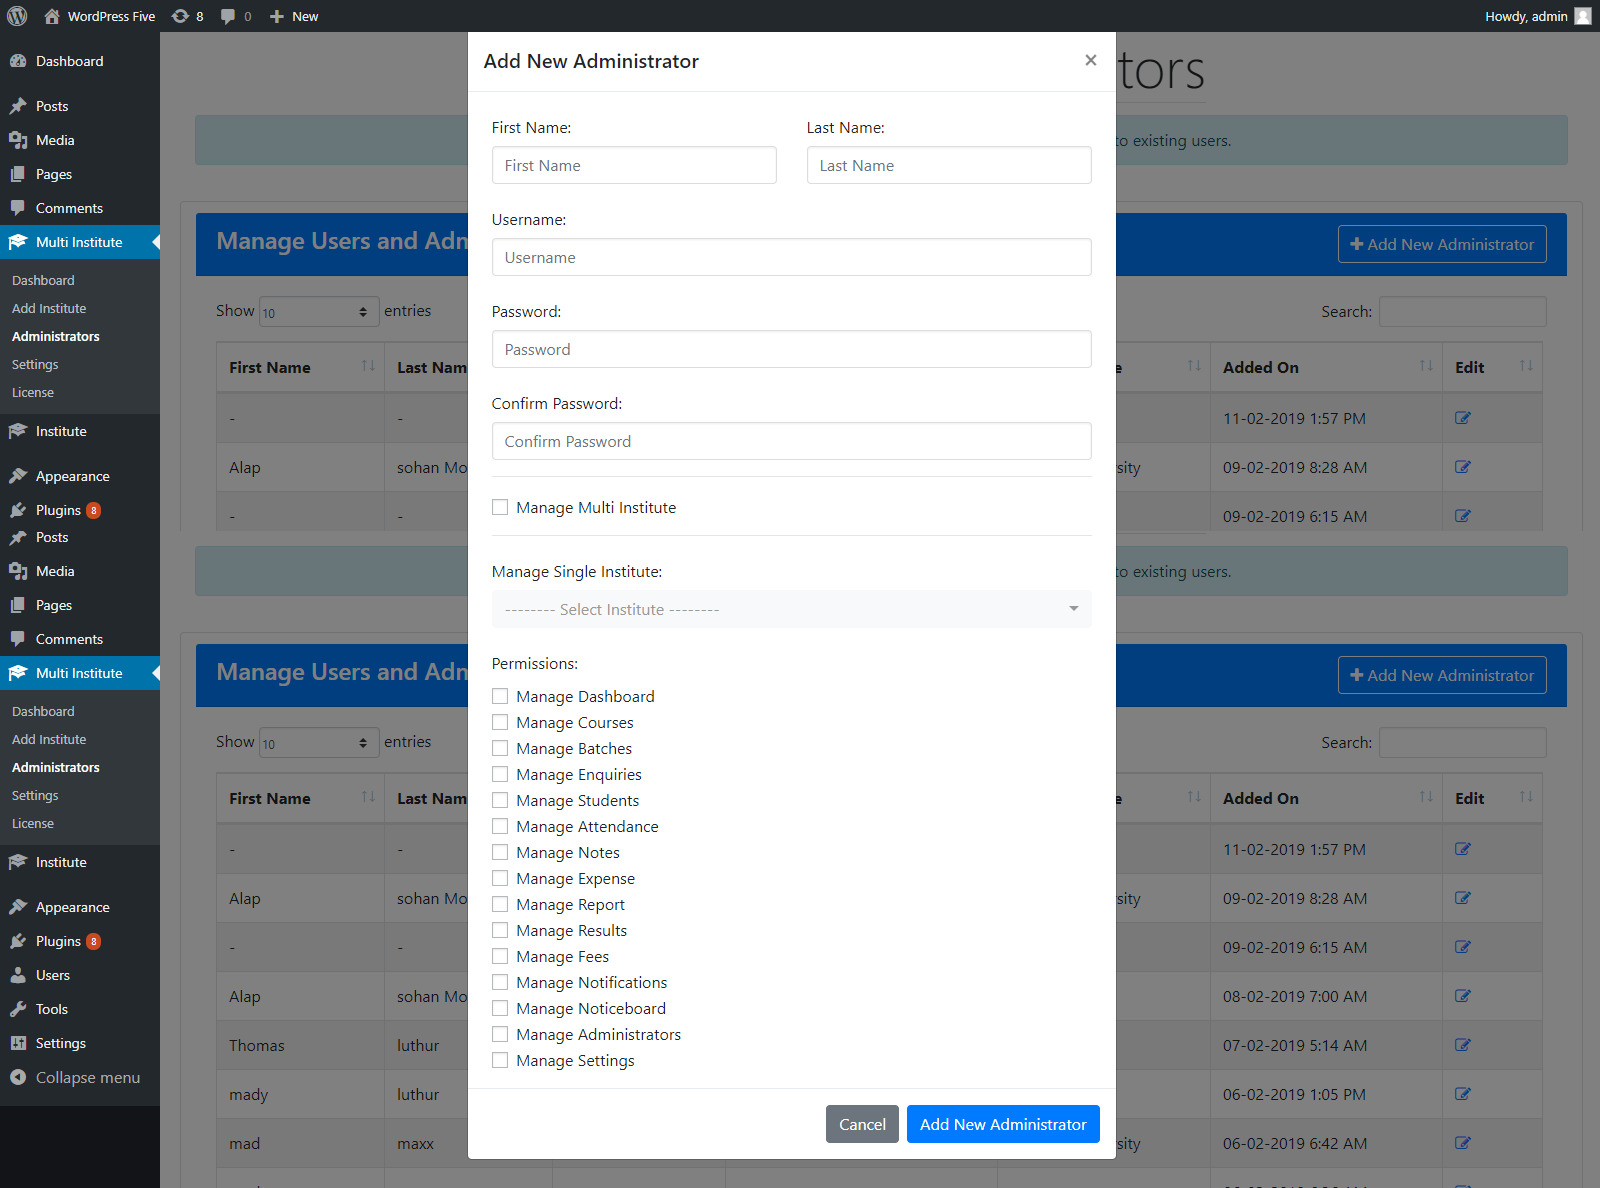
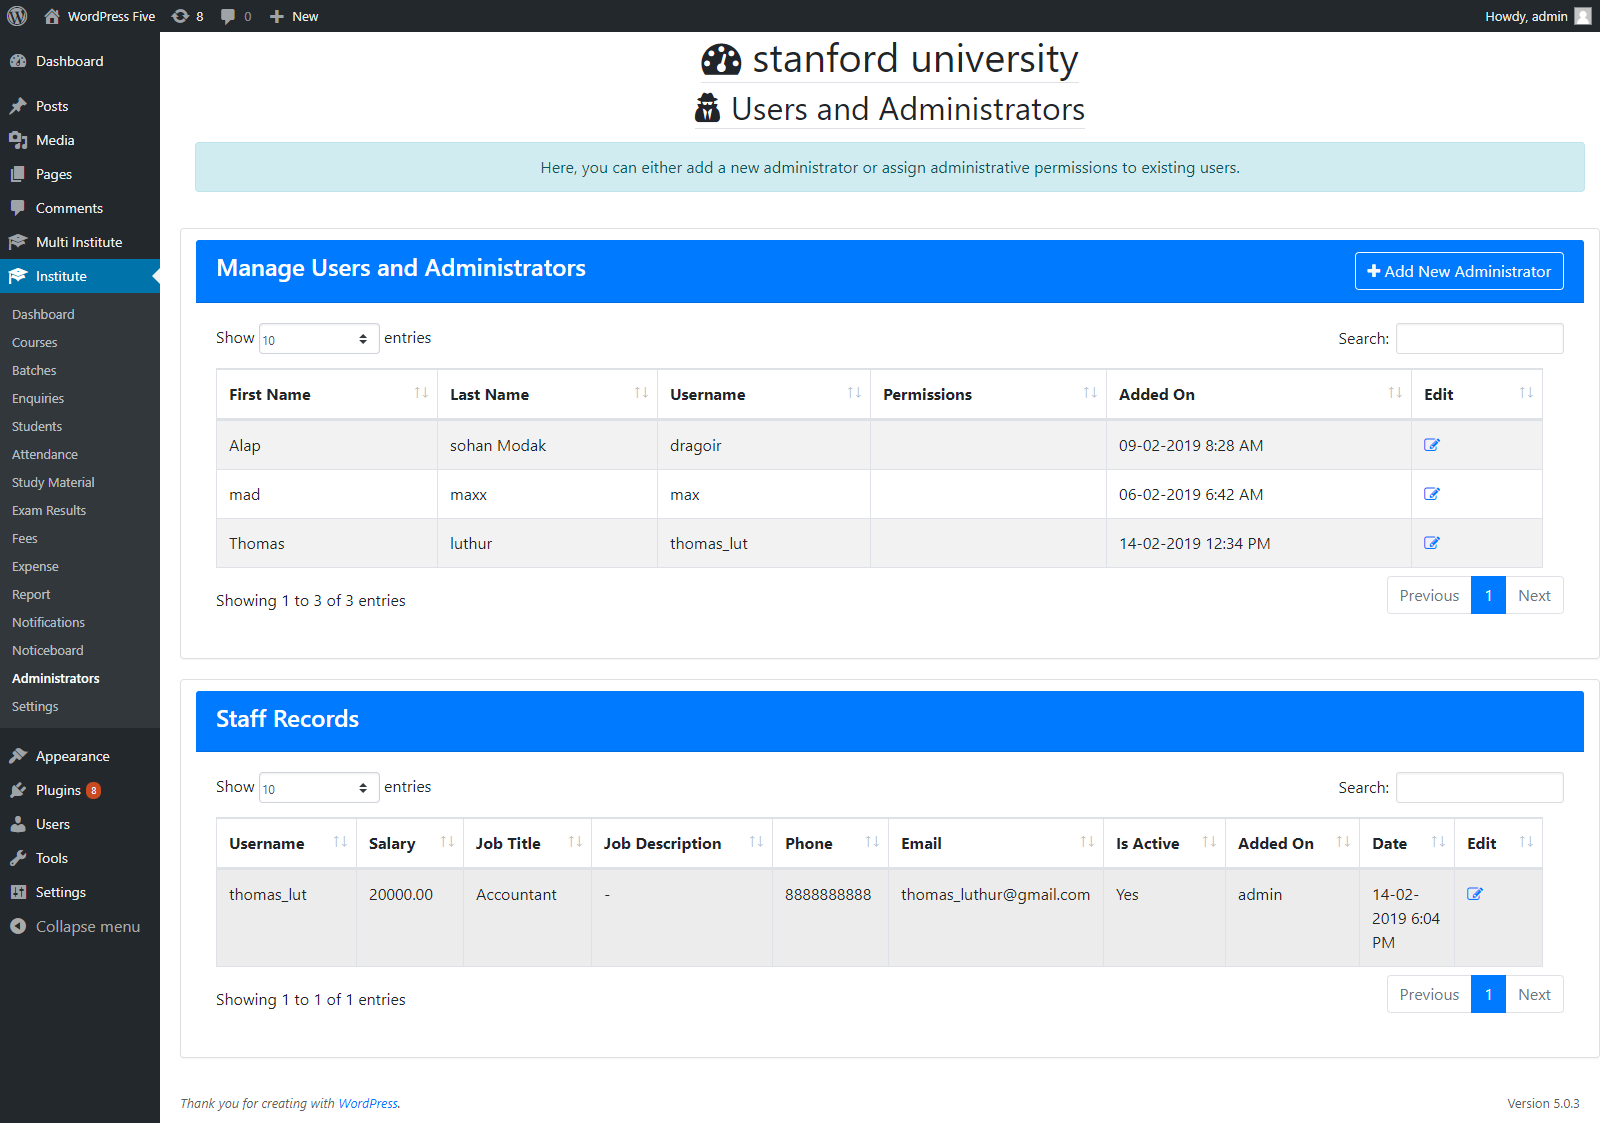
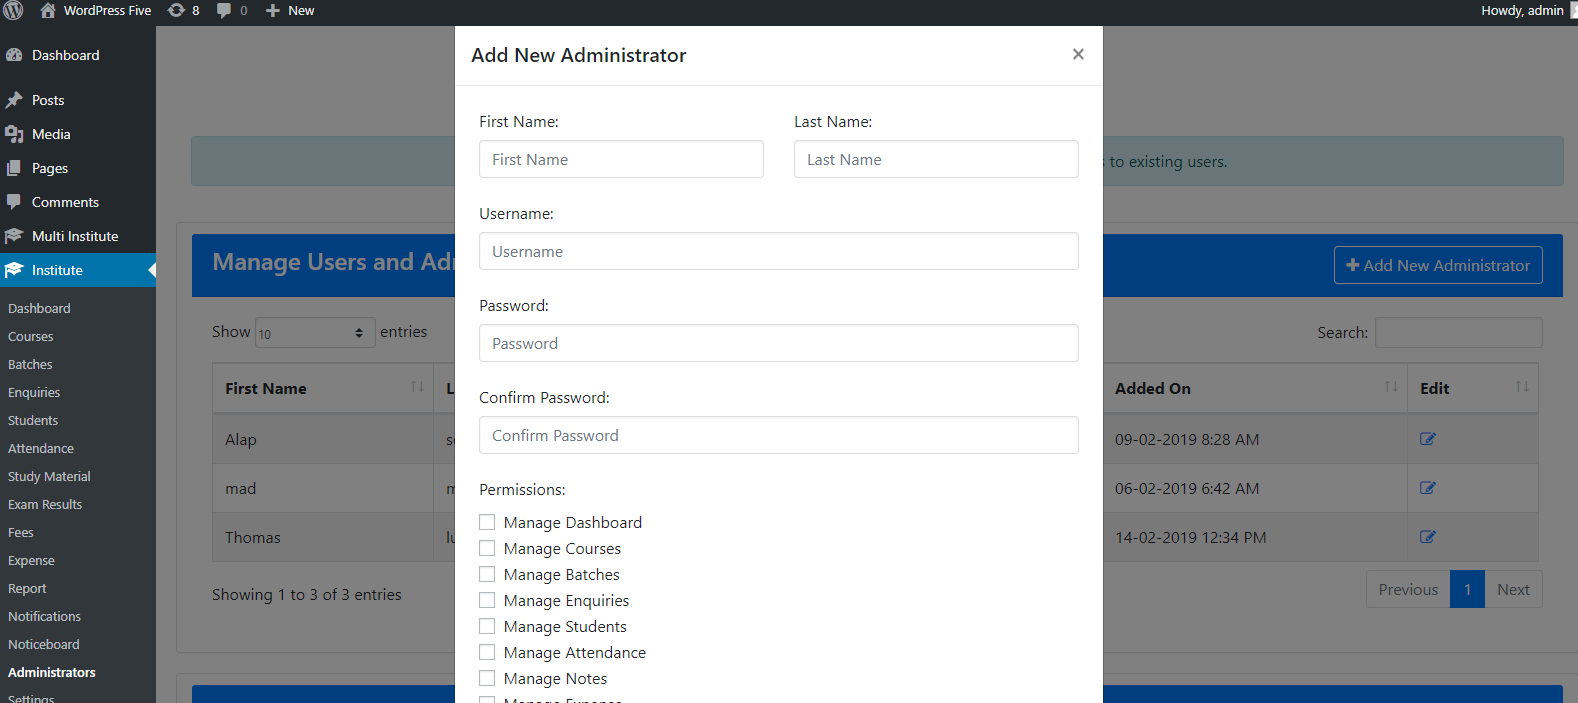
Staff Management :-
Add an administrator to manage courses, batches, enquiries, fees, students, notifications, noticeboard
etc.
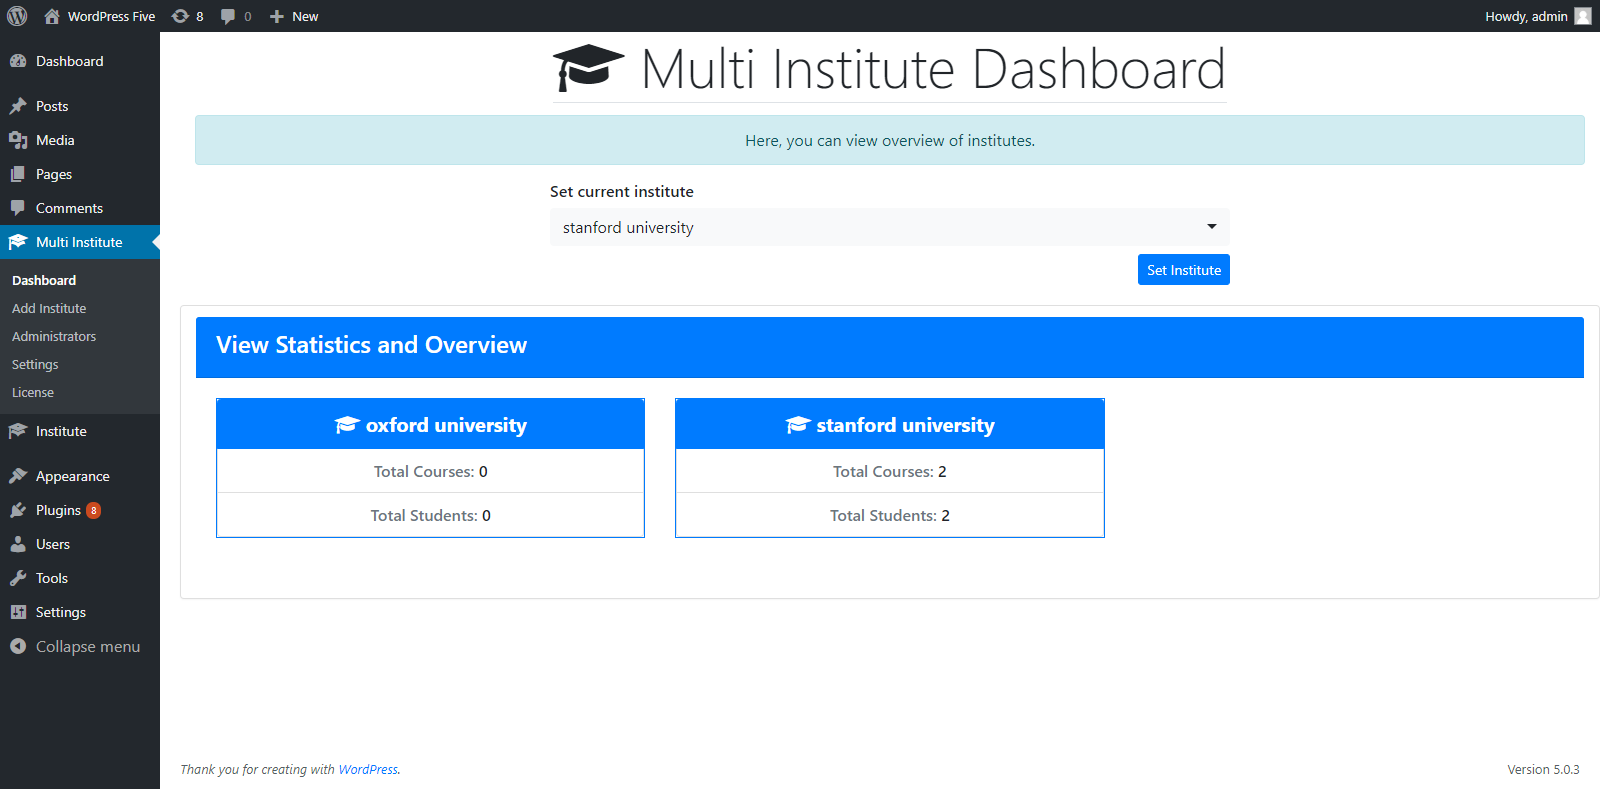
Admin Dashboard :-
View popular courses, recent enquiries and number of active courses, students, enquiries, etc.
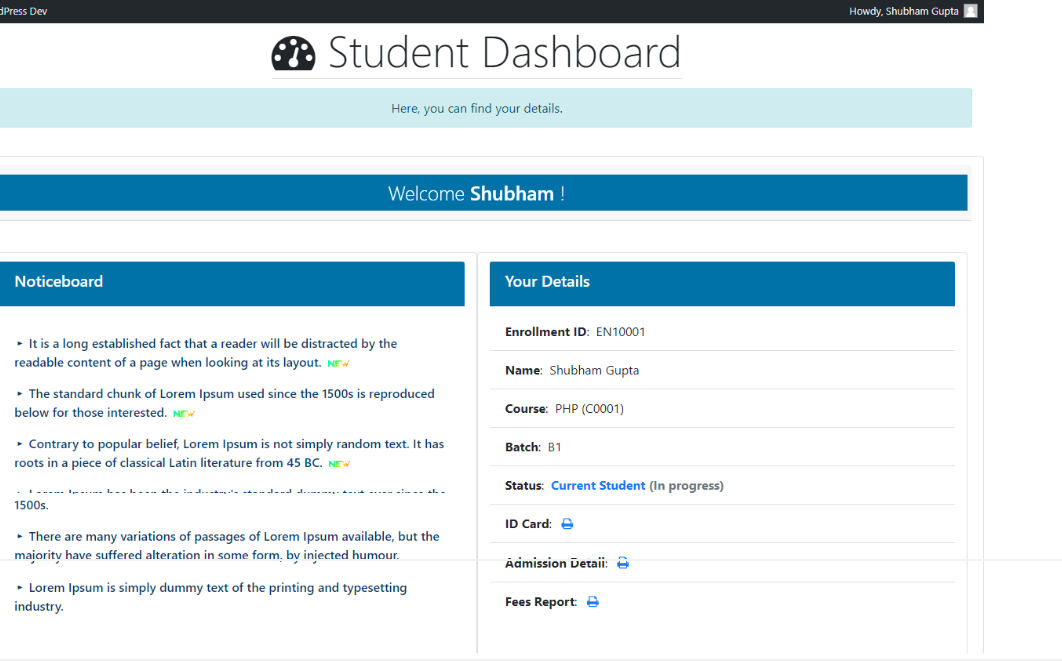
Student Dashboard :-
Students view their fees report, admission details, ID card etc. and pay remaining fees using suitable
payment method.
Access Control :-
Assign task to an administrator having certain permissions to perform the task.
Generate and Print Reports :-
Select a student and generate reports such as fees report, admission details, ID card, completion
certificate etc.
Export records to excel :-
Easy to export student records to excel or pdf format.
Search and Filter Records :-
Search and filter courses, enquiries, students, fee receipts.
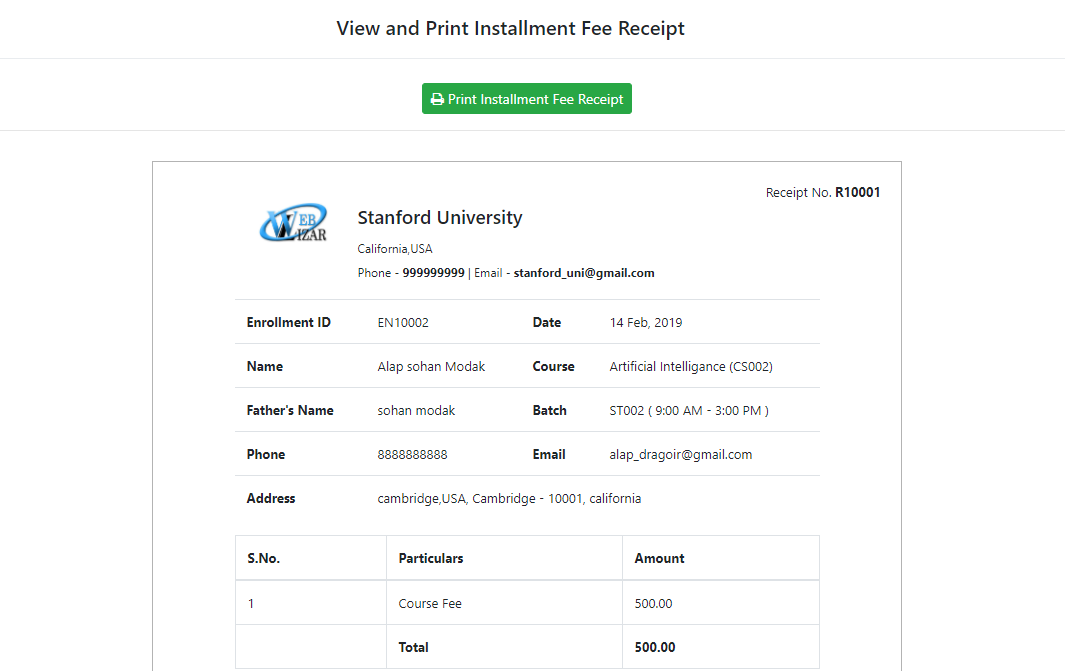
Print Fee Receipt, Report, ID Card, Admission Detail and Completion Certificate :-
Print fee receipt for each installment, print fees report, admission details, student's ID card and
completion certificate.
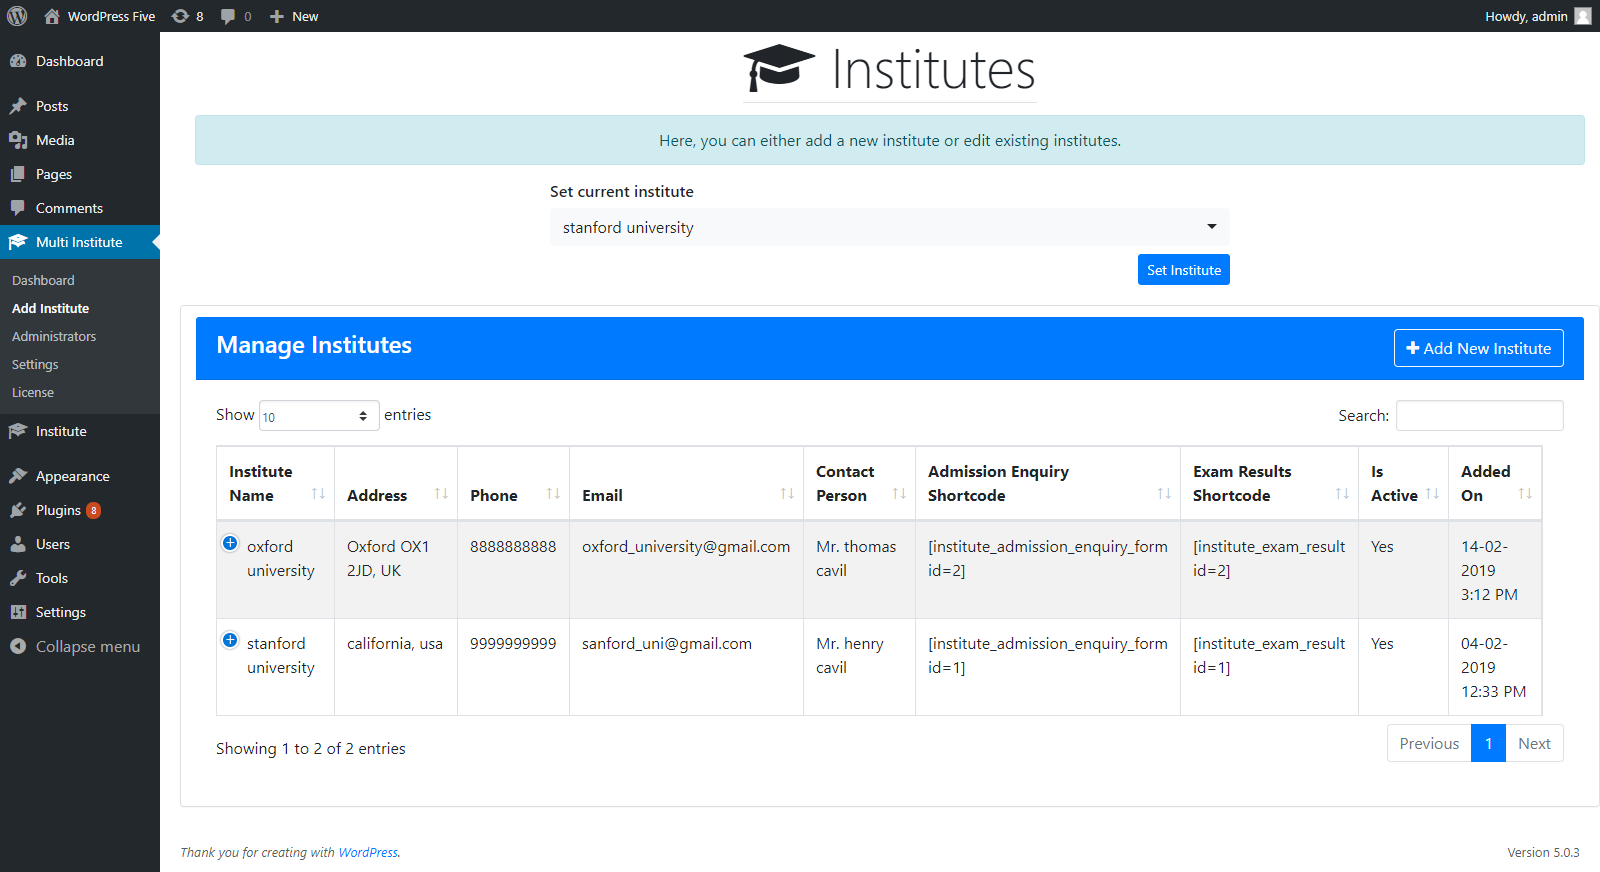
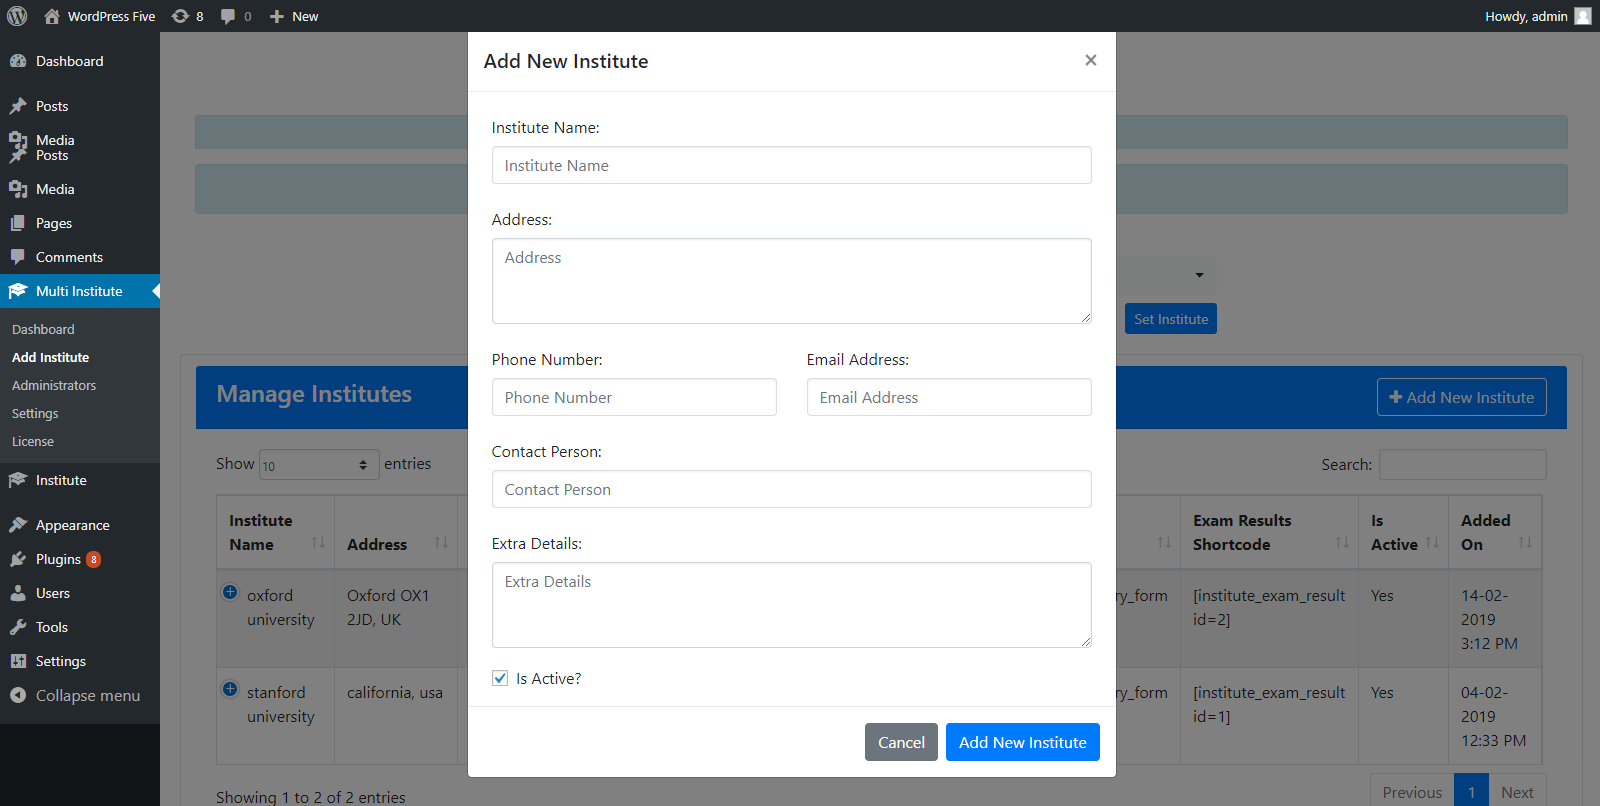
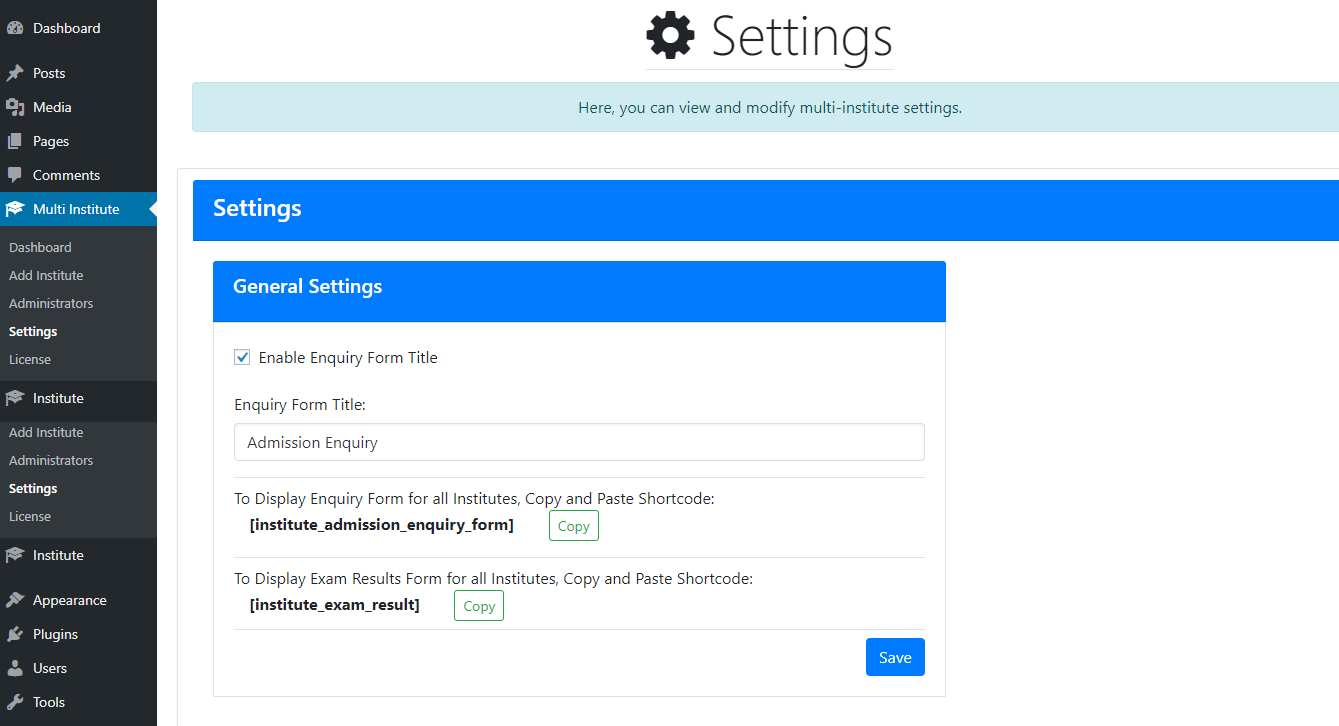
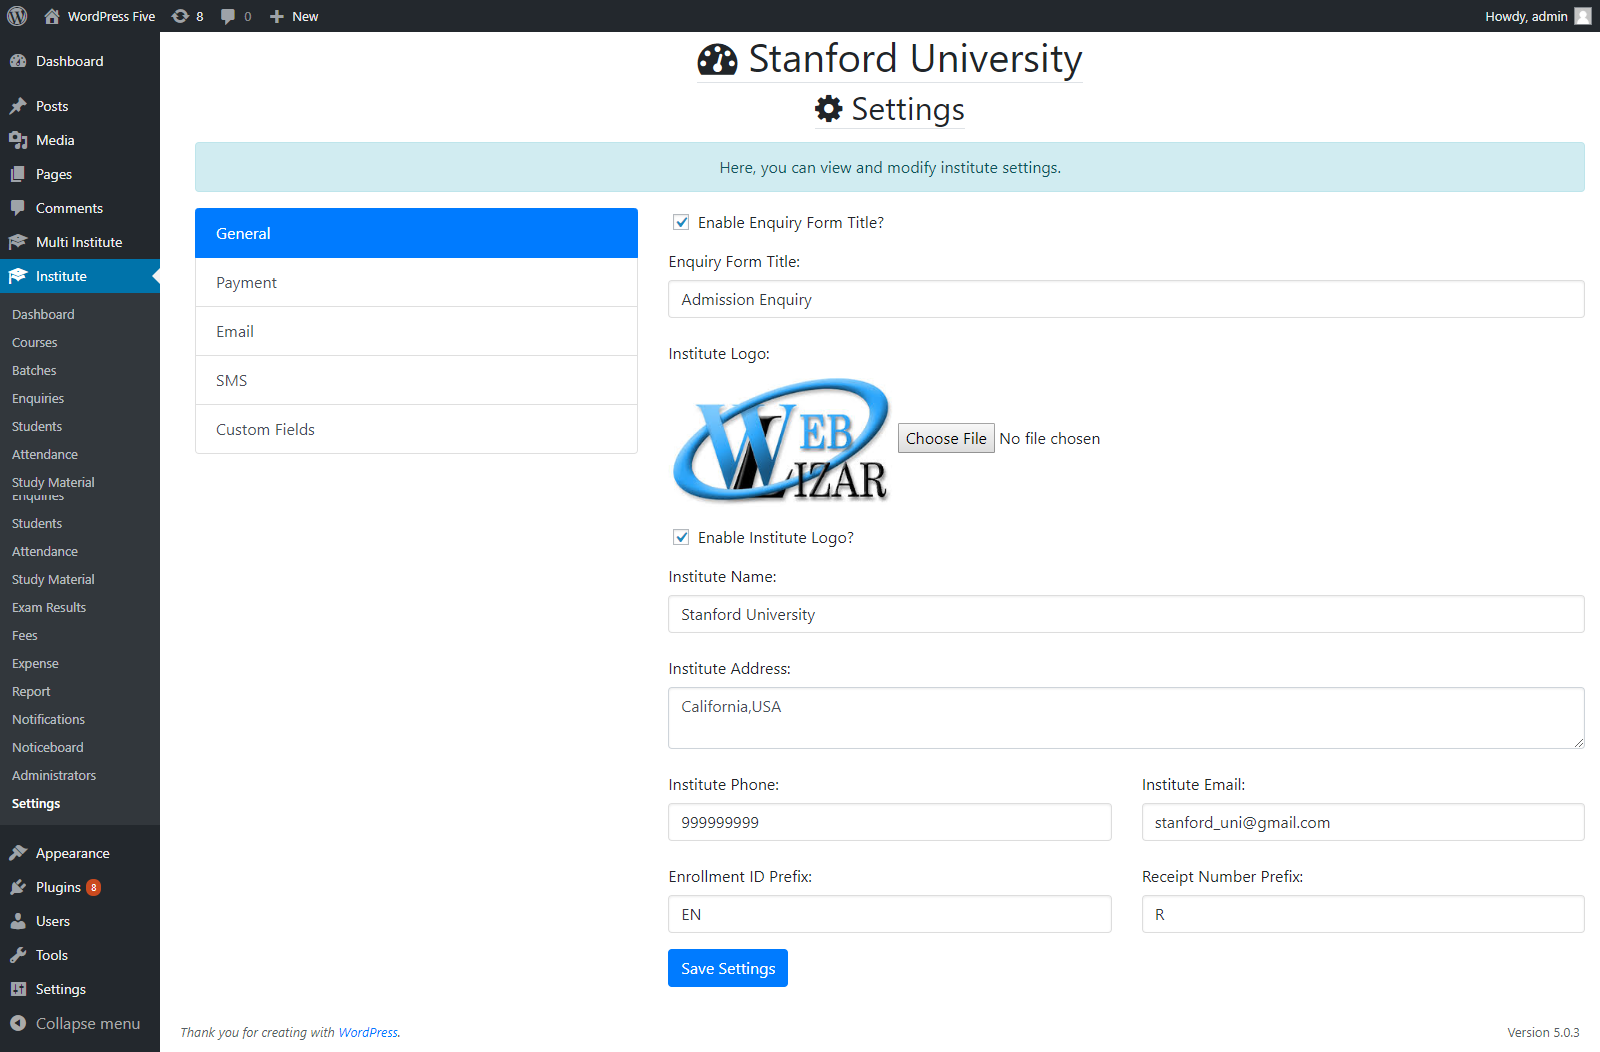
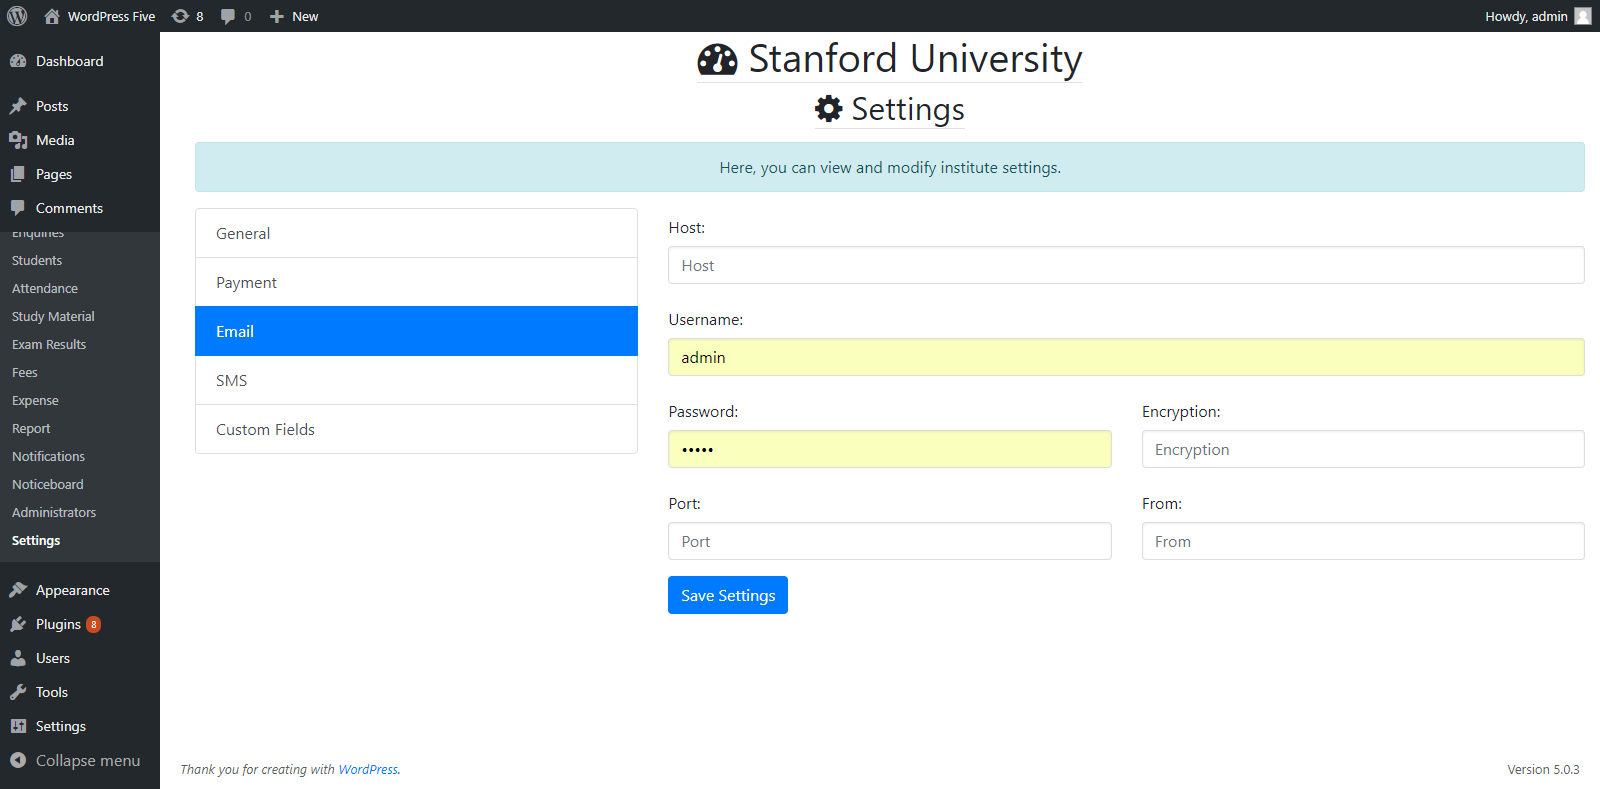
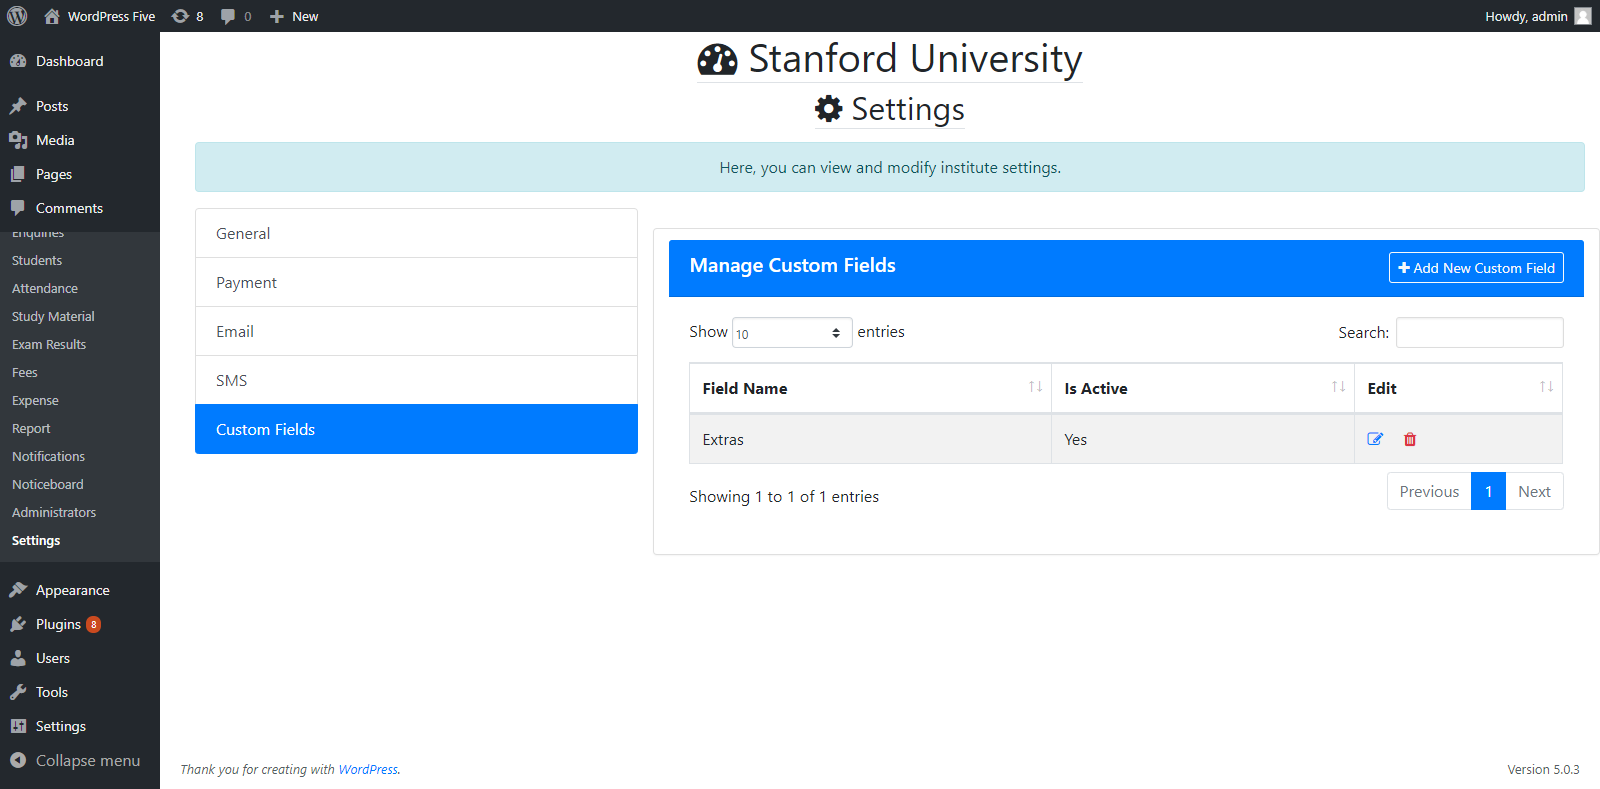
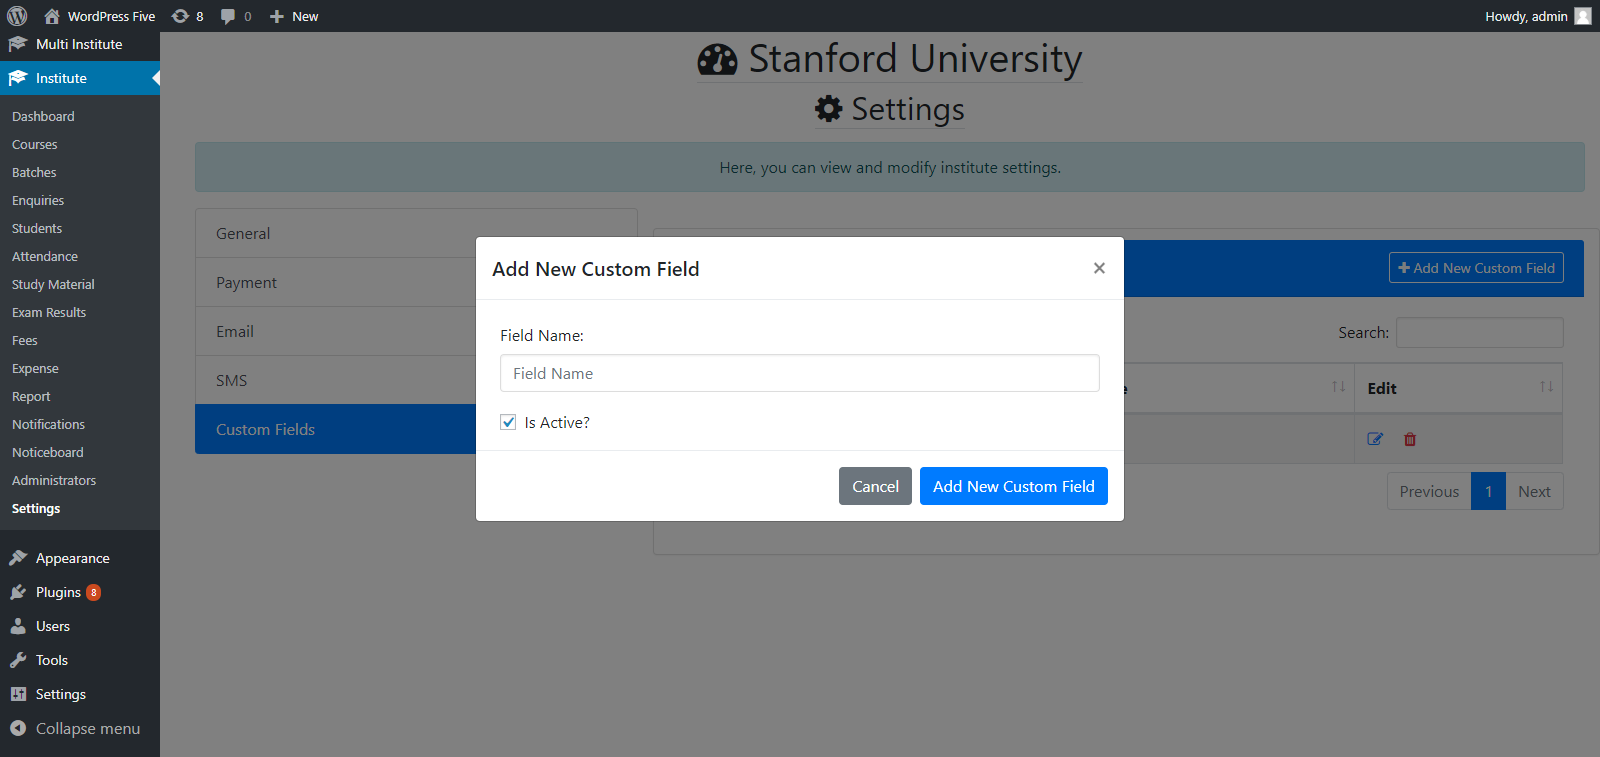
Institute Settings :-
such as name, logo, address, phone, email etc. Set institute details such as name, address, logo, phone,
email etc. which show up in printable documents.
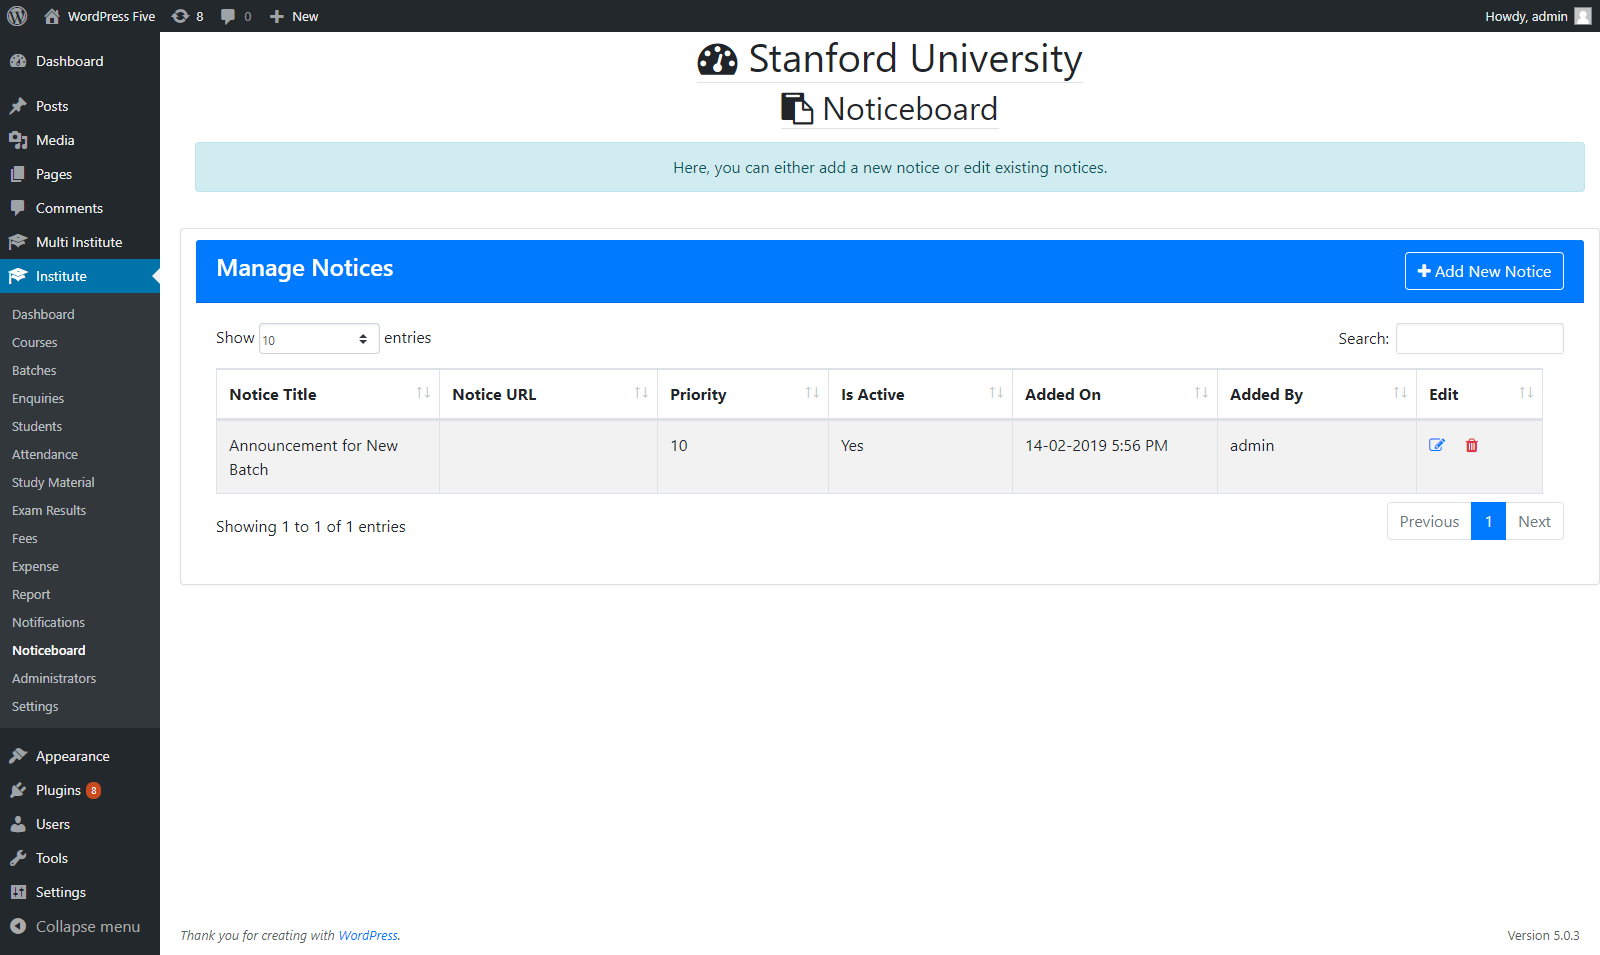
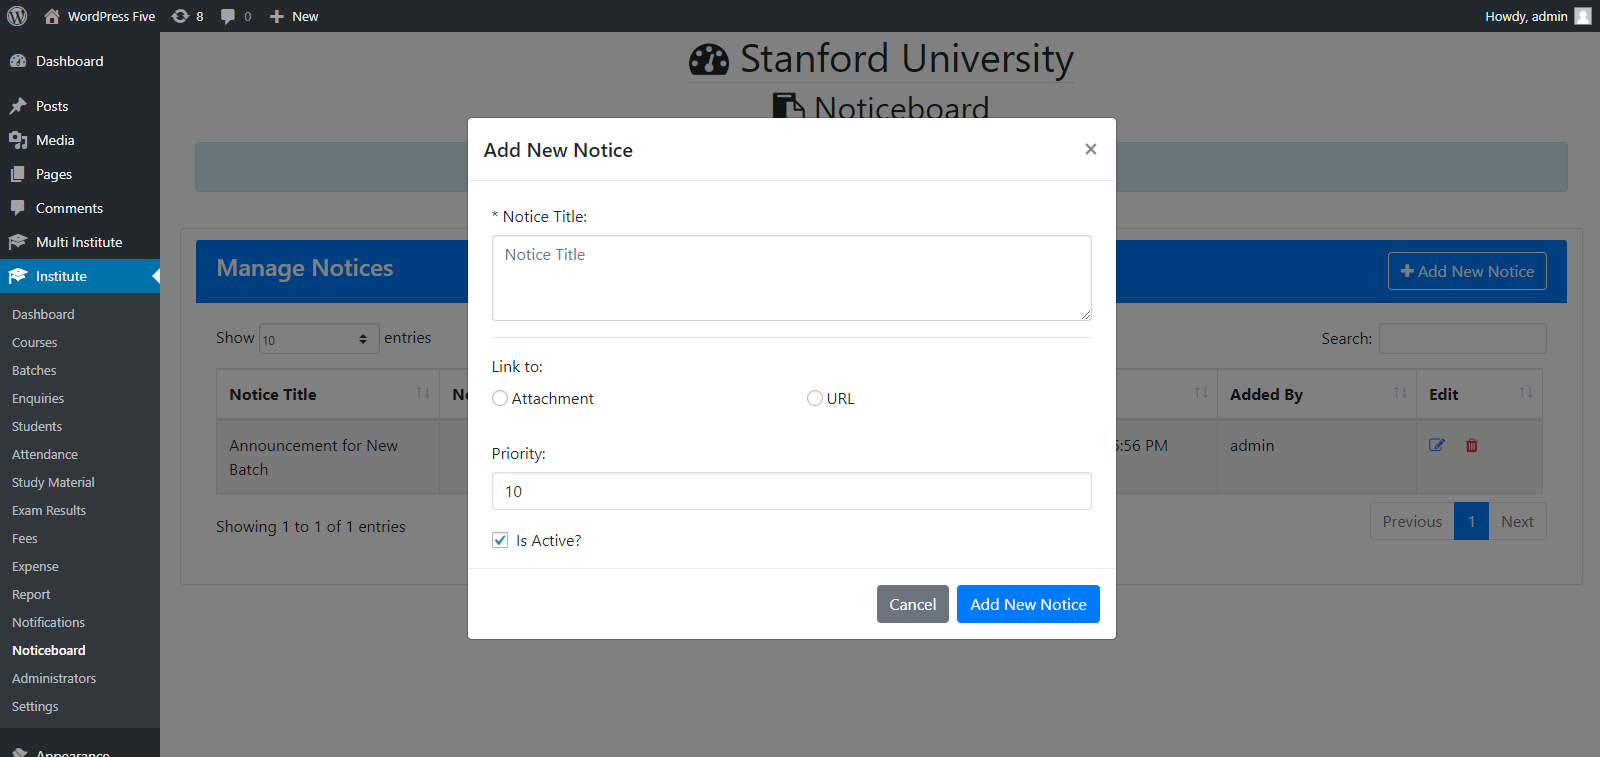
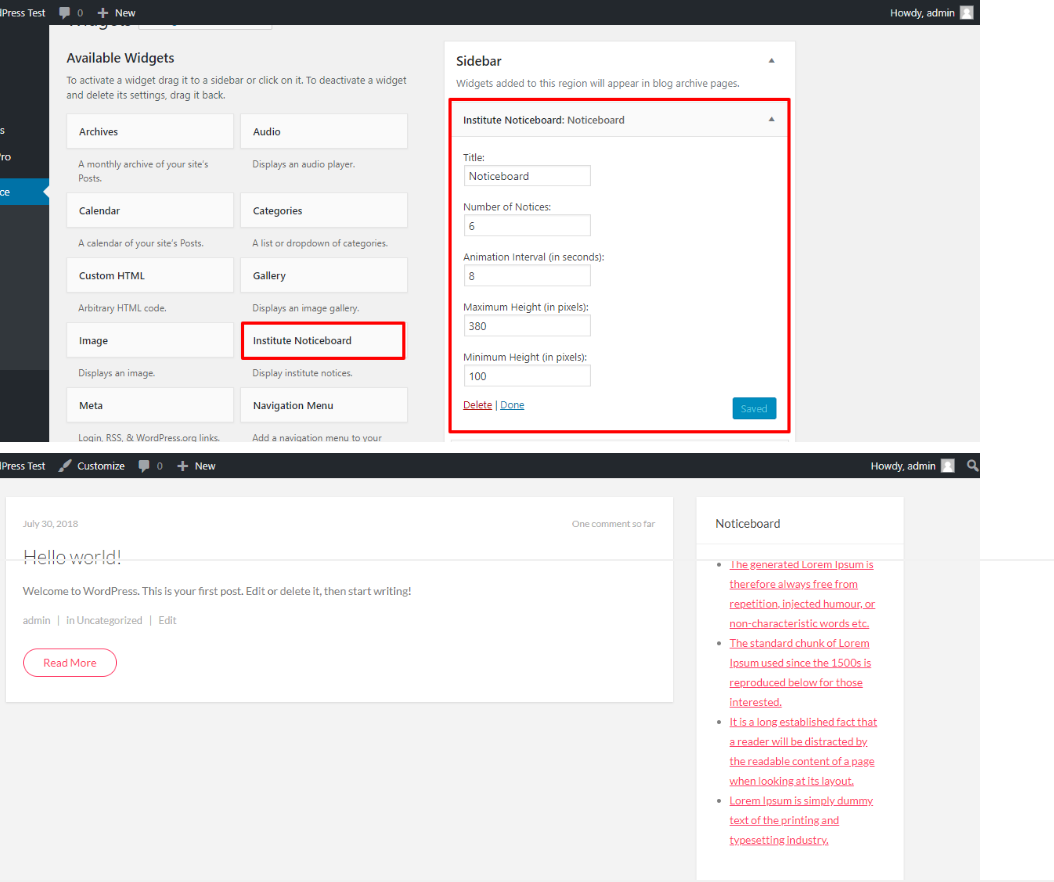
Institute Noticeboard Widget :-
Display important notices on your website with Institute Noticeboard Widget.
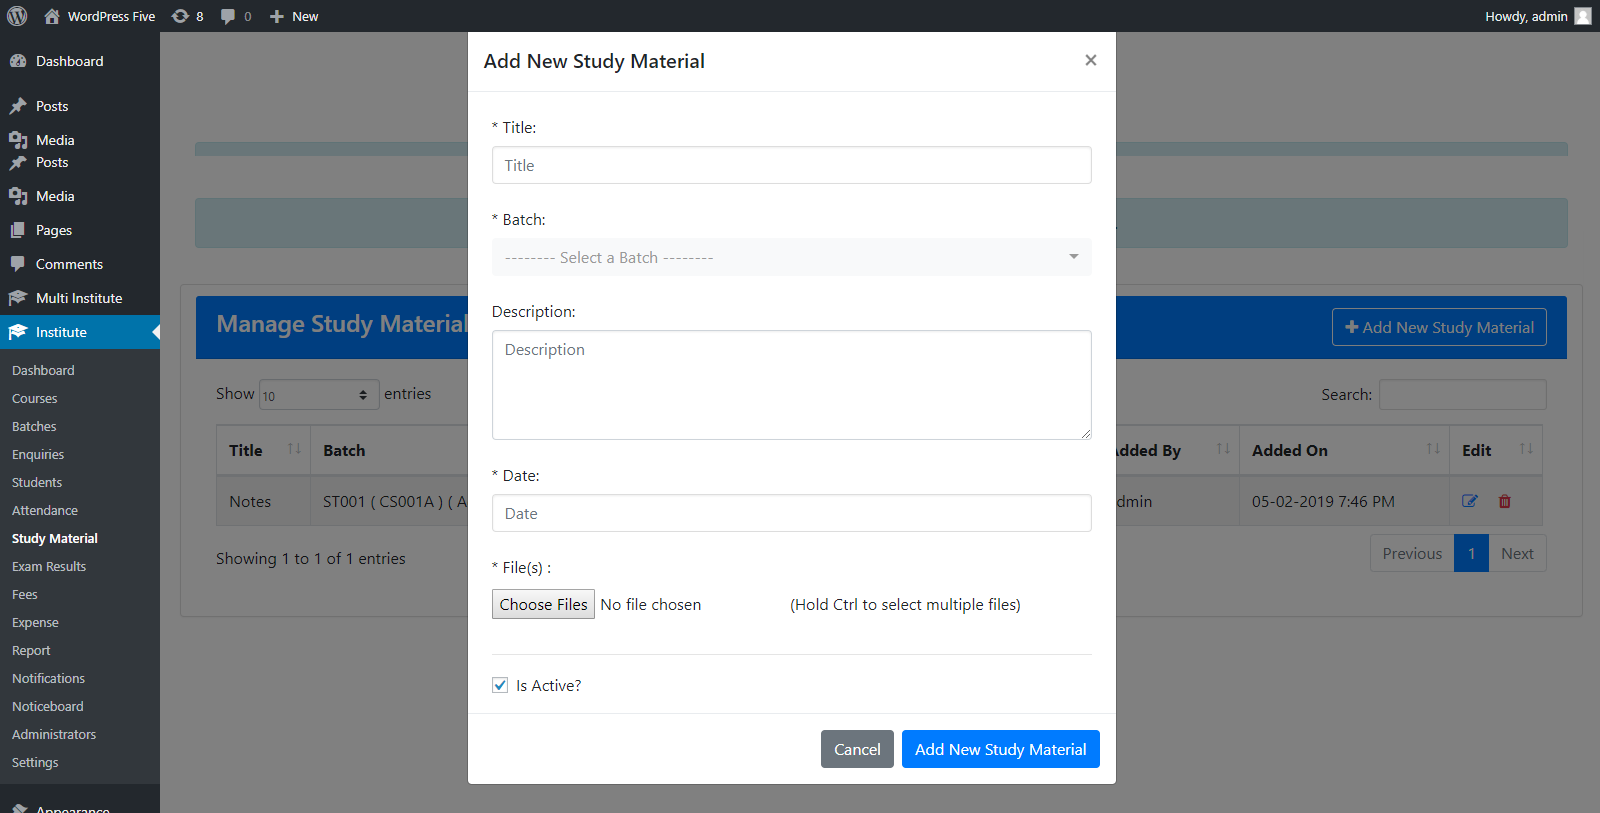
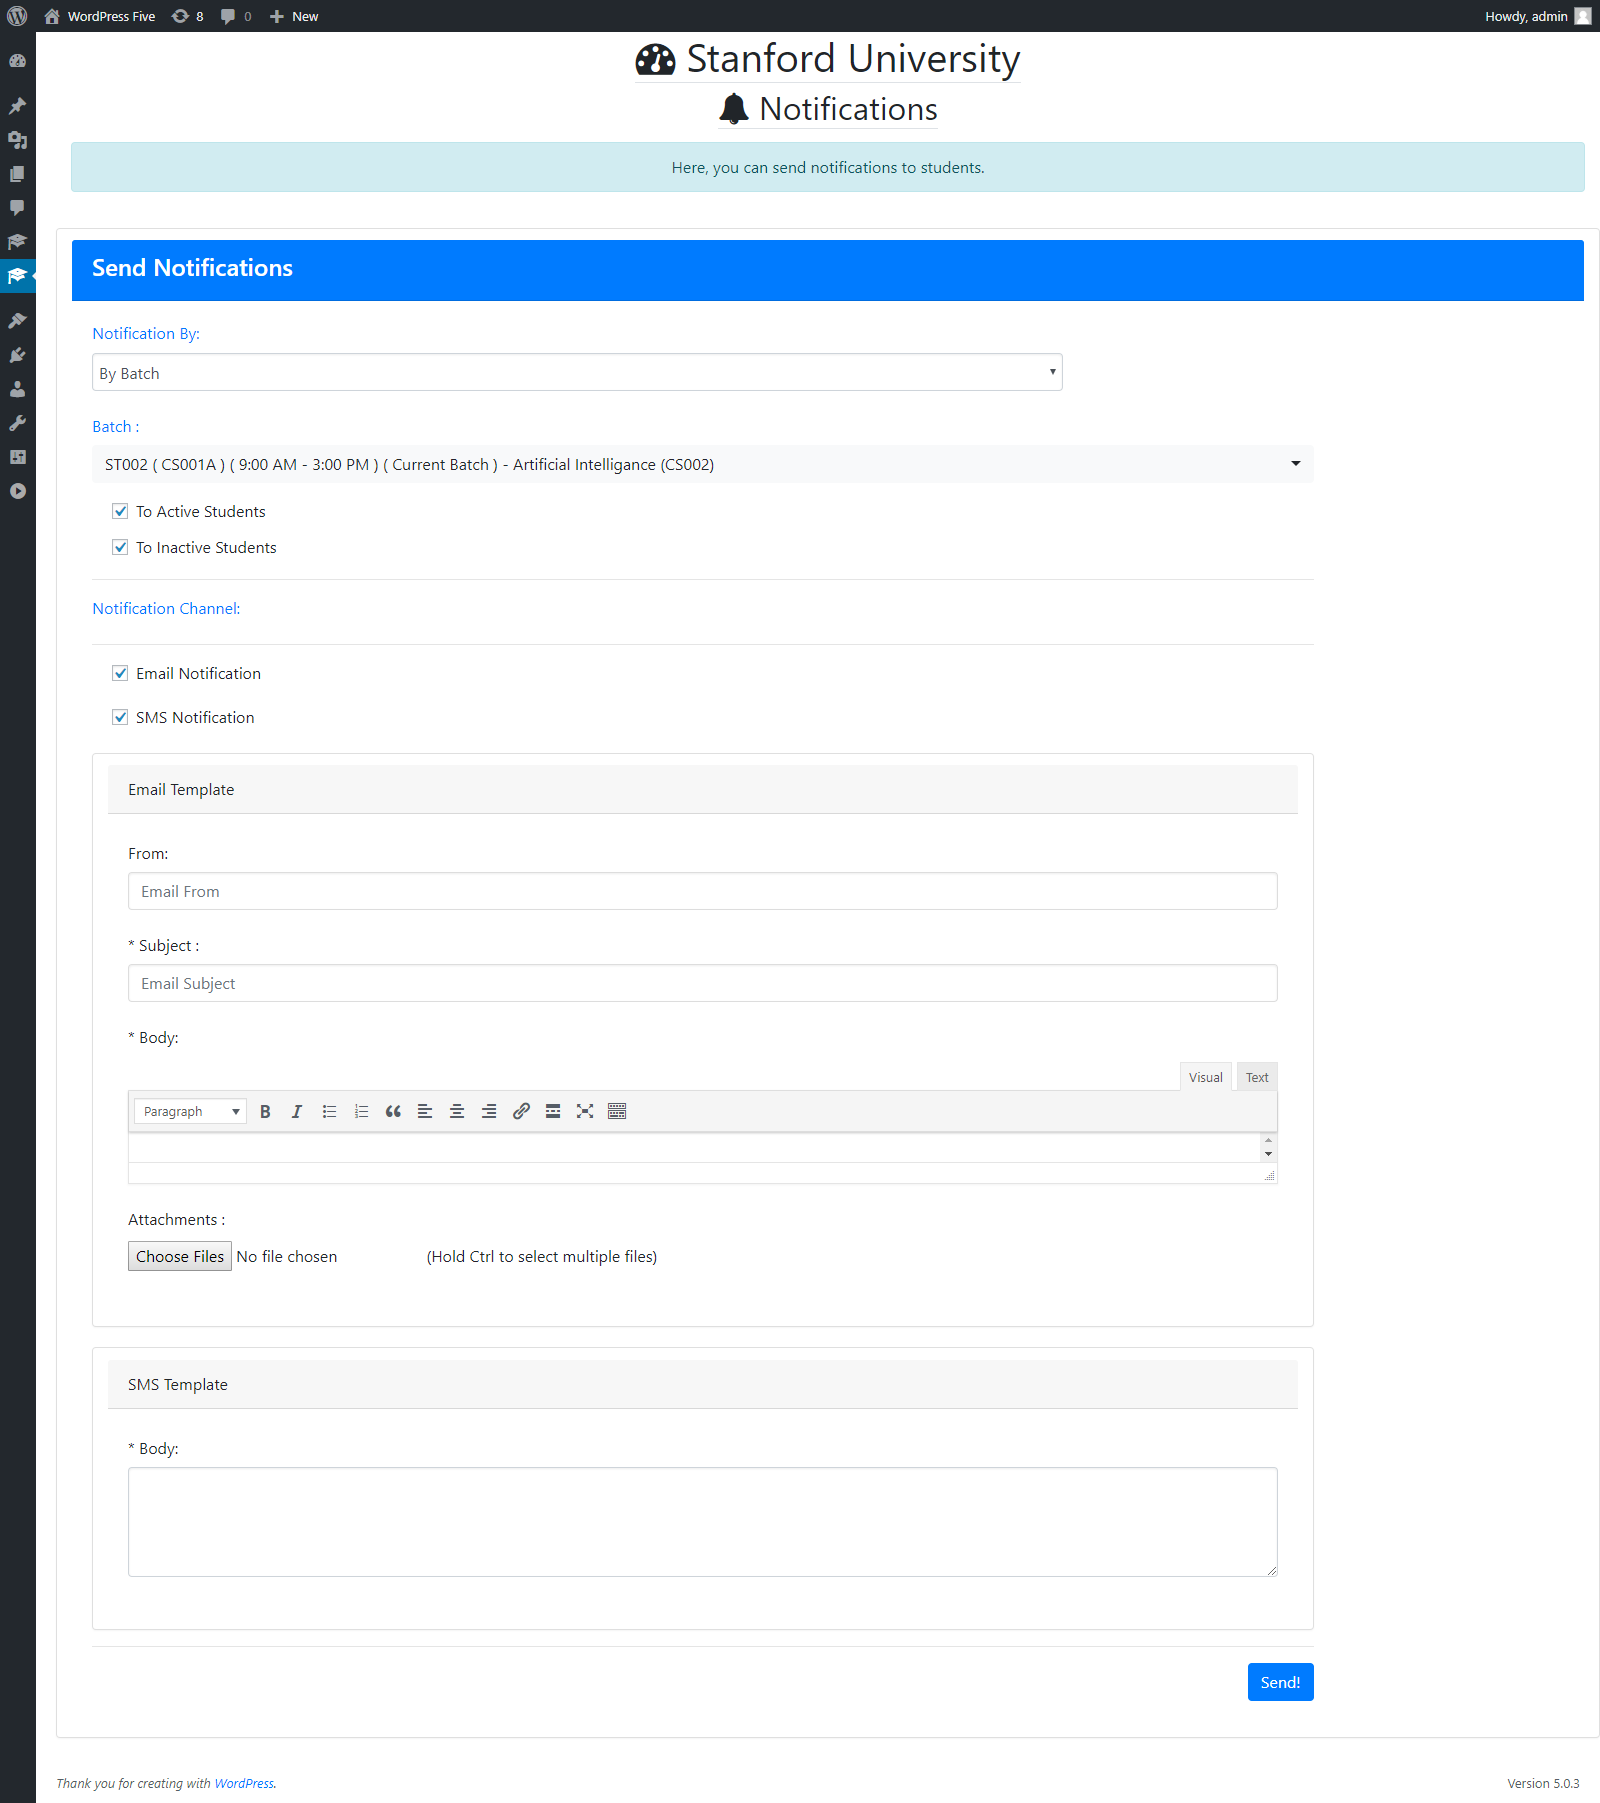
Send Notifications to Students :-
Send notifications to a batch or individual student with attachments (to send notes, time table etc.).
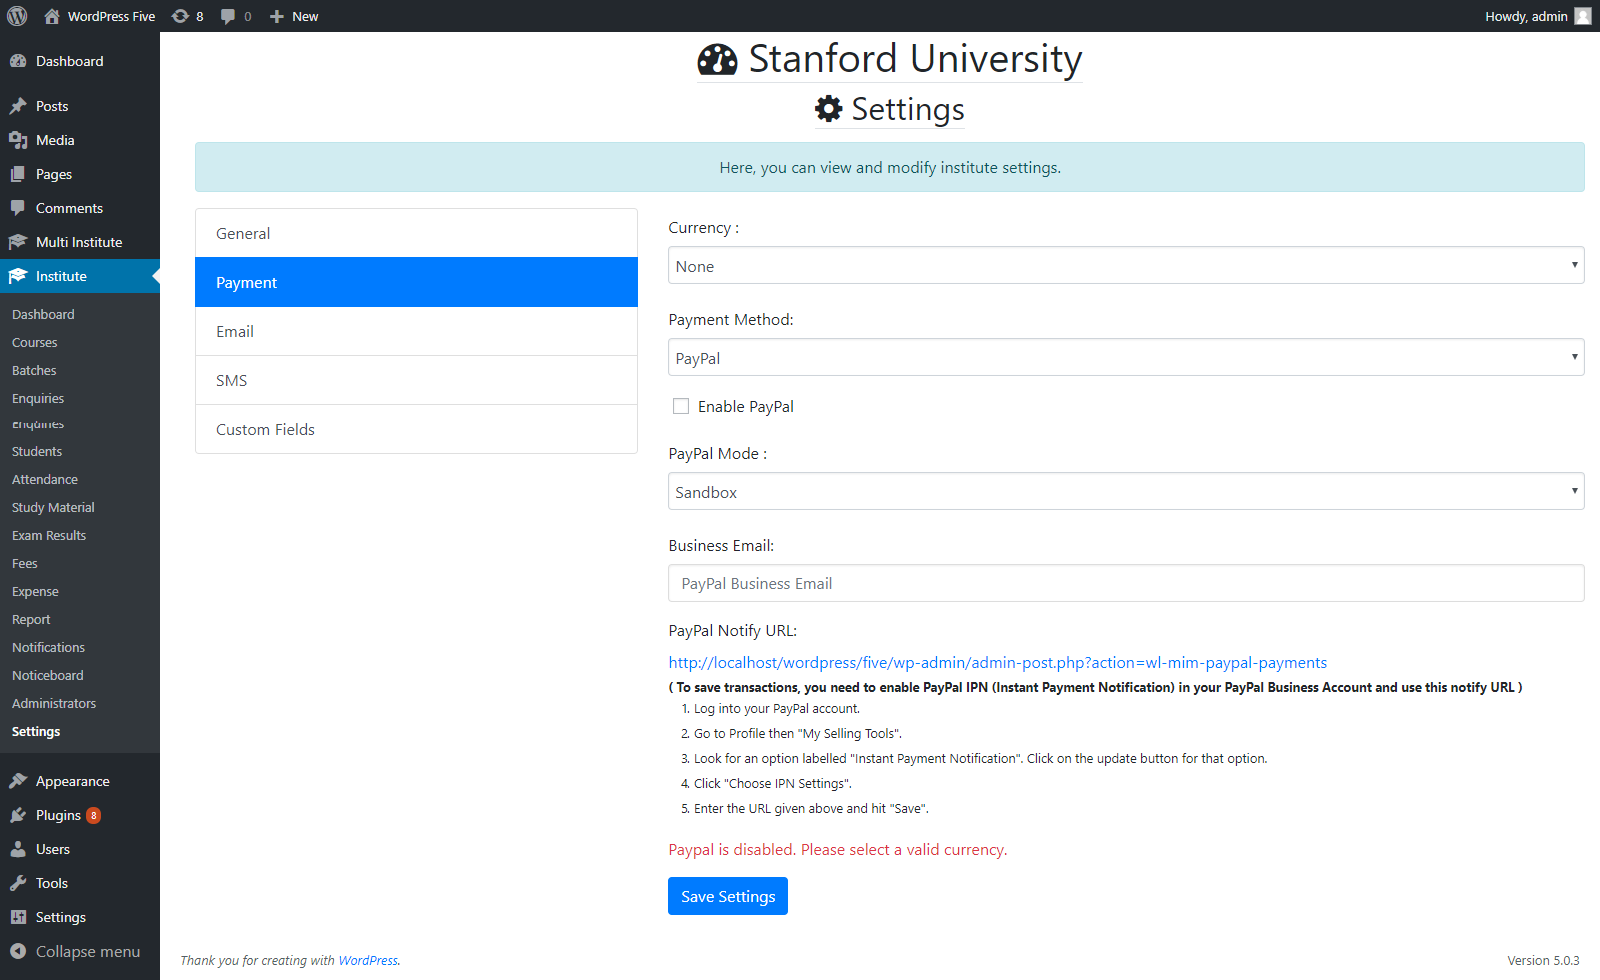
Multiple Payment Methods :-
Students can pay their fees using PayPal or Razorpay payment methods.
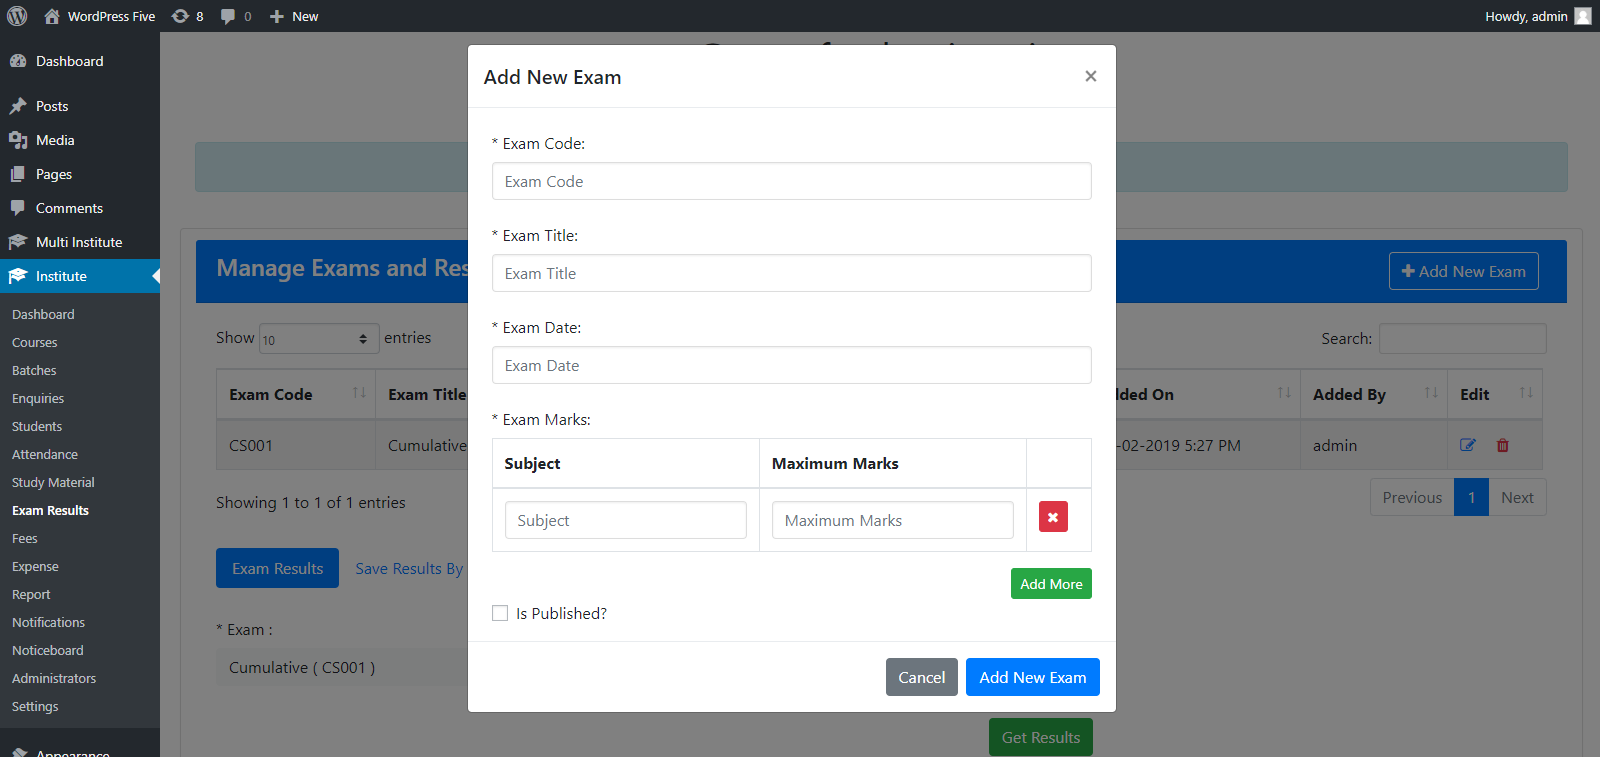
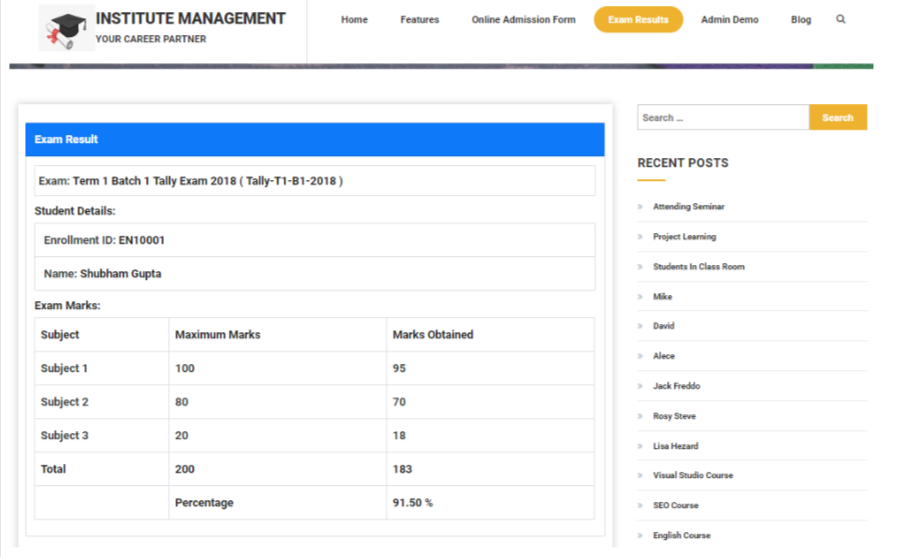
Exams and Results Management :-
Manage exam results and display results form on your website.