Hello Everyone …! Hope you doing well 🙂
Once again i am here to you with a new article Guide For Install and Setup WordPress Multisite Network. In today’s post, I will provide a full guide to installing, activating and using WordPress multisite. After going through this post, you will have a clear idea about multisite, when and how to use it. Before starting the article I wanna give you some overview about WordPress Multisite so that it’s easy to understandable to you that what is WordPress Multisite? and how’s it’s useful to you?
Note: Before installing WordPress Multisite deactivate your all running plugins.
WordPress Multisite is a very useful feature of WordPress. WordPress Multisite that allows you to create multiple virtual sites that share a single WordPress installation. Which means this very useful WordPress feature lets you create and manage more than one WordPress sites from a single dashboard. This allows users to create their own sites as subdomains of your primary site.
By using the multisite feature, you can easily and quickly create separate WordPress installations for each of them. WordPress multisite is especially useful for business, news or magazine sites with various departments, sections, and categories.
Some cautions which are necessary before something is going wrong after the installation WordPress multisite. You can install multisite in your existing WordPress installation. However, if you have never used multisite before, it would be wise to activate multisite in a test site or your localhost which is a WordPress installation on your computer.
If you are planning to enable multisite in your live WordPress website, make sure that you have a full backup of your website files and database. This will allow you to invert to the last working state if anything goes wrong.
Firstly for activating multisite is to add a new line to your wp-config.php file which is in your WordPress folder.
Open the file and search for the line that says: /* That’s all, stop editing! Happy blogging. */
Now add below lines just above it:
/* Multisite */
define( ‘WP_ALLOW_MULTISITE’, true );
And save the wp-config.php file.
After step1, get back to your website dashboard. Hover over the ‘Tools’ menu which is on left side, and you will notice a new sub-menu titled ‘Network Setup’.
Go to Tools -> Network Setup. You will be taken to a page similar to the following –
On this page, you will have two options to customize –
Provide the network title, network email and click ‘Install’. This will start the actual installation process. After a few seconds, you will be shown to a page like the below image –
Here you will show wp-config.php and .htaccessfiles code which you have to add in your wp-config.php and .htaccessfiles.
Get the files. For the wp-config.php file, make sure that you are adding the code before the “/* That’s all, stop editing! Happy blogging. */” line.
Make sure that you are adding the code correctly –
For the .htaccess file, delete the lines between the “# BEGIN WordPress” and “# END WordPress” lines. And paste the lines you are provided with for the file.
After updating the wp-config.php and .htaccess files, reload your website dashboard. You will be asked to log in again.
Once you log in, you will be taken to your regular dashboard, which will have a new top menu titled ‘My Sites‘.
If you hover over the ‘Settings’ menu of your network dashboard, you will find out two new sub-menus – Network Settings and Network Setup.
The Network Setup sub-menu will display the codes you added to the wp-config.php and .htaccess files during activating multisite. This is just a reference page; you will not find any actual option on this page.
All the settings options are located on the Network Settings page. If you go to Settings -> Network Settings from your network dashboard, you will be taken to a page like the following –
You can customize Settings here:
After you have made the necessary changes, click ‘Save Changes’.
After Multisite Settings your network dashboard will be shown like below image –
Here you will show two boxes one is search users and another is search sites. You can find the number of users and sites in your network.
In the network setting, you can view a list of the sites, users, themes and plugins of your network by going to the Network Admin menu from the top navigation bar.
Go to My Sites -> Network Admin -> Sites from the top menu. This will take you to the ‘Sites’ page. From the page, click the ‘Add New’ button. This is the simple step to add a new site in your WordPress.
Fill the site address, title and Admin email in their respective fields. Then, click ‘Add Site’. This will create the site for you.
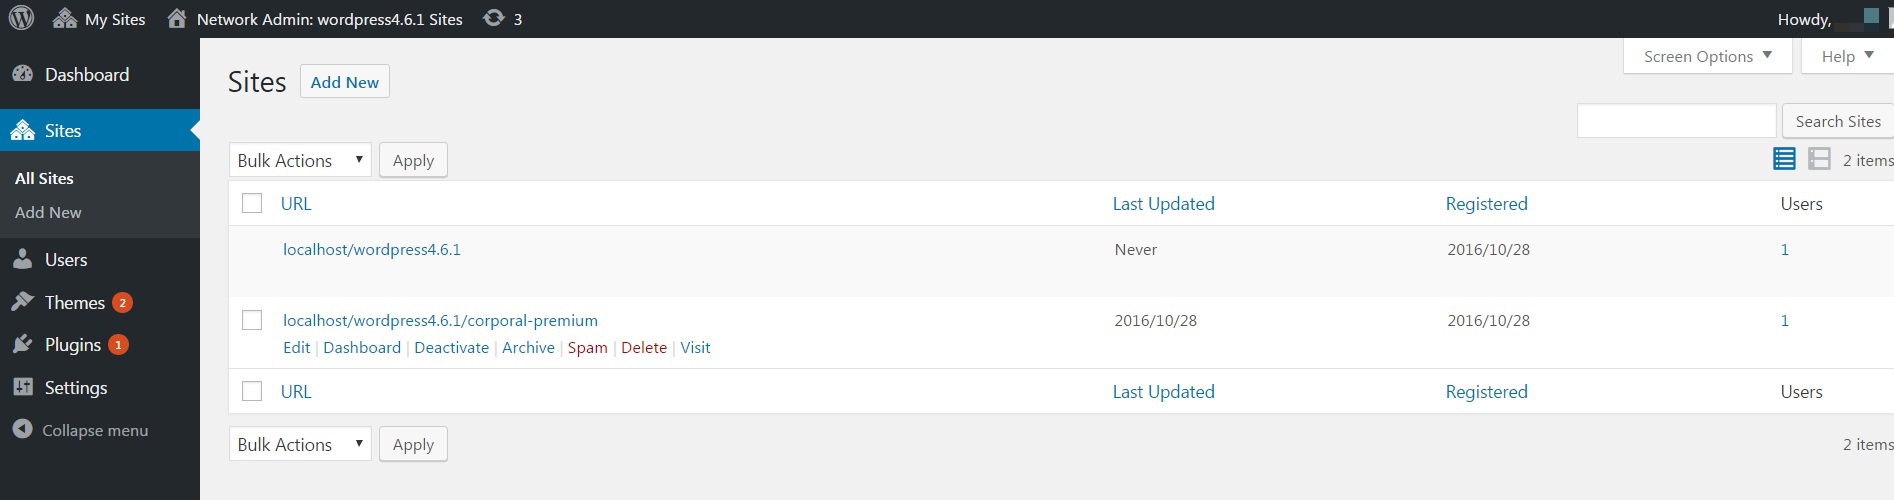
To view a list of all the sites, go to My Sites -> Network Admin -> Sites.
Or, if you are already in the network dashboard, you can only go to Sites -> All Sites.
To activate/deactivate the theme for use on just one site, go to Network Admin > Sites > All Sites.
Hover over the Theme name and Deactivate/Activate. Your Page will look like this –
And your WordPress multisite is ready to use to create new sites and try installing and activating new themes, plugins.
Conclusion –
At the last hope so this post will a perfect Guide For Install and Setup WordPress Multisite Network. Please give your comments and remark below.
Having a blog is a great thing because you can share anything you want there…
Have you recently built a new website? Are you looking for an SEO guy to…
As a blogger or content marketer everyone dreams about making money by sharing knowledge or…
If you want to increase your traffic and user engagement you must think about how…
In today's speedily changing business community, education is vital. Whether you are expecting to hone…
Data room germany is actually a cloud-based platform which offers secure and specialised storage space…
View Comments
hii,, i'm from Indonesia
Thanks for the information so creative and inspiring. Greetings.
Hello,
pulau
Your most welcome and thanks for appreciating.