Newsletter Subscription Form Plugin Documentation

Here we are shared Newsletter Subscription Form Plugin Documentation. We are explaining about installation, configuration and publishing the Newsletter Subscription Form Plugin.
Plugin Standard Features
1. Subscriber Form show from widget and shortcodes:
- [nls_form] shortcode : Show newsletter form with sletected template
- [nls_theme1] shortcode : Show newsletter form with 1st template. this is work with other template like [nls_theme2] for second template
- Go to the ‘Widgets’ menu and picked the Newsletter Form widget form the widget menu and placed it a sidebar where you would like to show.
- Select a template from list.
- and saved.
2. Easy Integrations with Email Marketing Service:
MailChimp and all MadMimi email marketing services
3. Auto & Manual Notification To Subscribers
4. Notify All and selected Subscriber
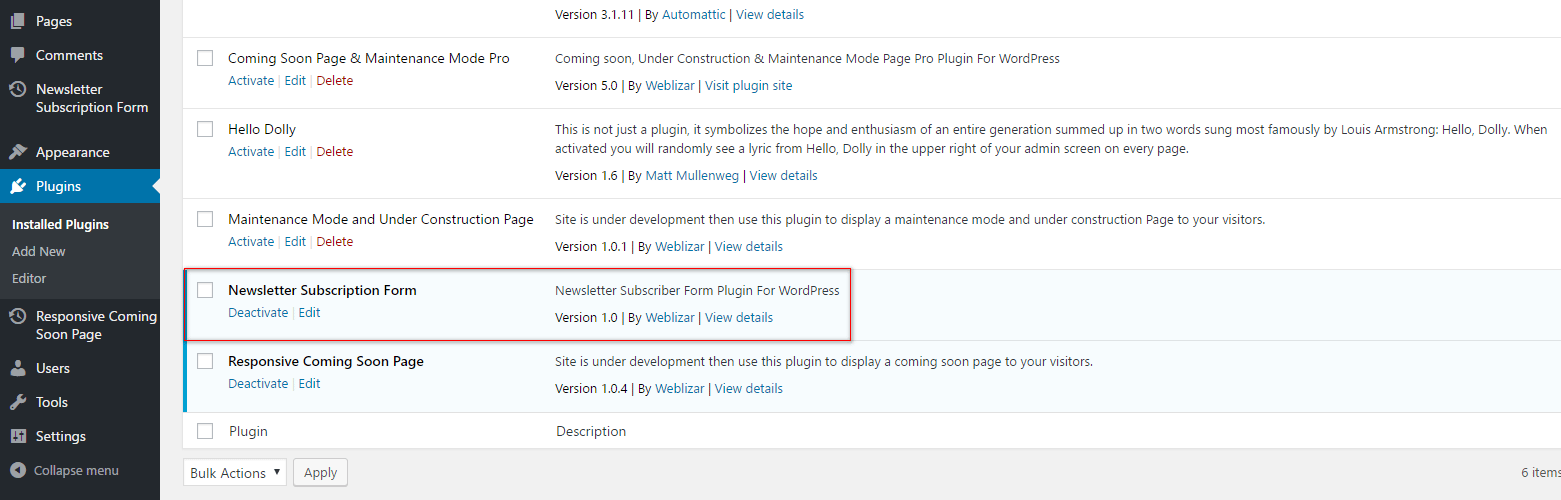
How to install this plugin:
There are 3 ways to install this plugin
- Installation From Plugin Dashboard In your Admin, go to menu Plugins > Add Search for Newsletter Subscription Form Click to install Activate the Newsletter Subscription Form A new menu Newsletter Subscription Form will appear in your Admin
- Upload the plugin Download the plugin (.zip file) on the right column of this page In your Admin, go to menu Plugins > Add Select the tab “Upload” Upload the .zip file you just downloaded Activate the plugin A new menu Newsletter Subscription Form will appear in your Admin
- The old and reliable way (FTP) Upload newsletter-subscription-form folder to the /wp-content/plugins/ directory Activate the plugin through the ‘Plugins’ menu in WordPress A new menu Newsletter Subscription Form will appear in your Admin
Select Theme
1. Select a theme from list ( See Image : Point 1 )
2. Then click on activate button. ( See Image : Point 2 )
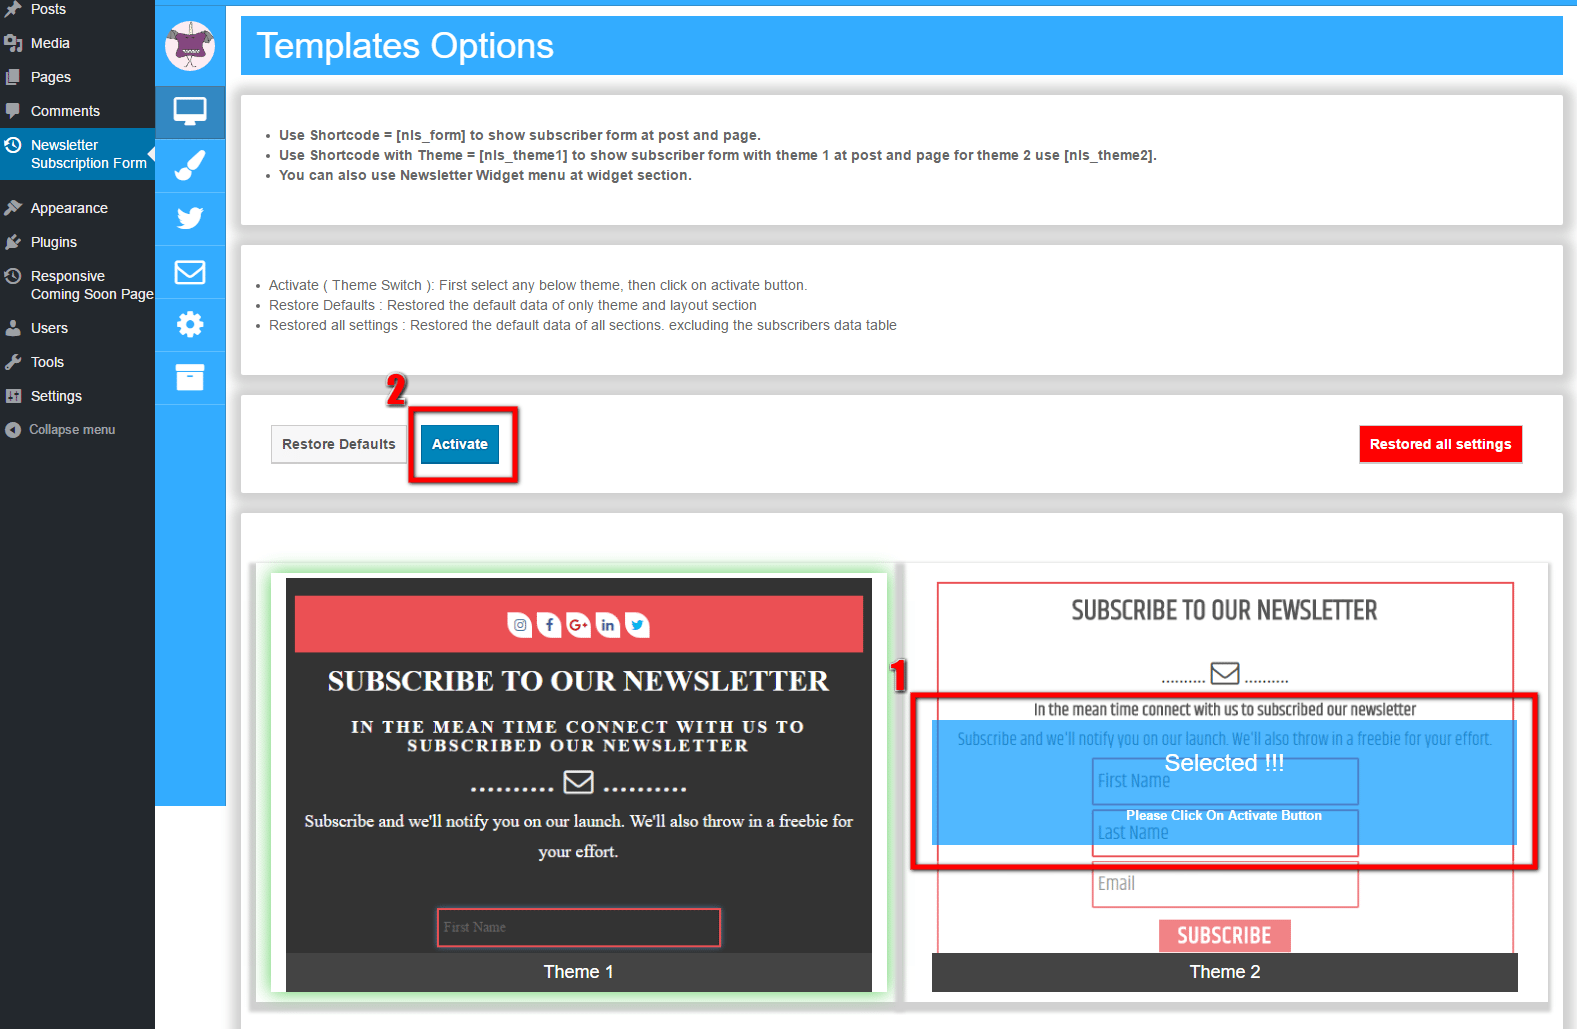
Note : Your selected theme will show by [nls_form] shortcode. Use this shortcode at post and page content area. fore more details go to this link Newsletter Form via Shortcode.
For Showing at widget (Left,right,footer sidebar): go to this link Newsletter Form via widget.
Skin Layout
Skin layout has some theme options
Theme Color Schemes : Change theme color scheme by default and custom color picker option
1. Default color (See below image)

2. Custom color (See below image)

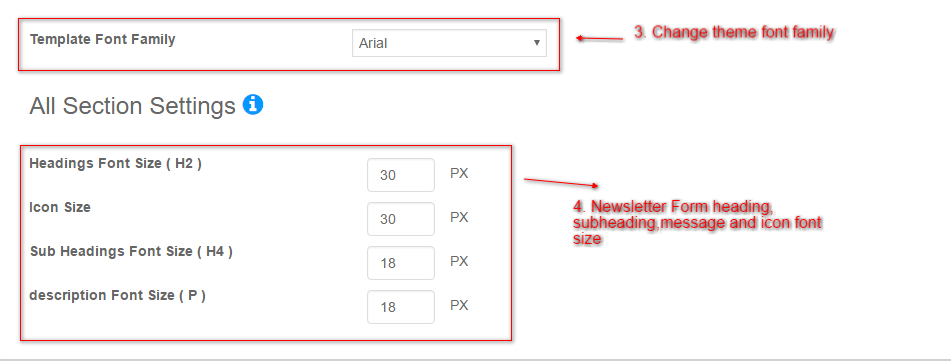
3. Theme Font family : This select drop down box have +500 font family to change font-family of all section coming soon and another page template.
4. Header Content settings : Change font size of logo, header title, Sub title, description
Social Media Options
1. Social Icon On/Off : Show/hide the social icon from the form template. ( See below Image )
2. Open as new tab : social link will open a new tab when you on this setting.
![]()
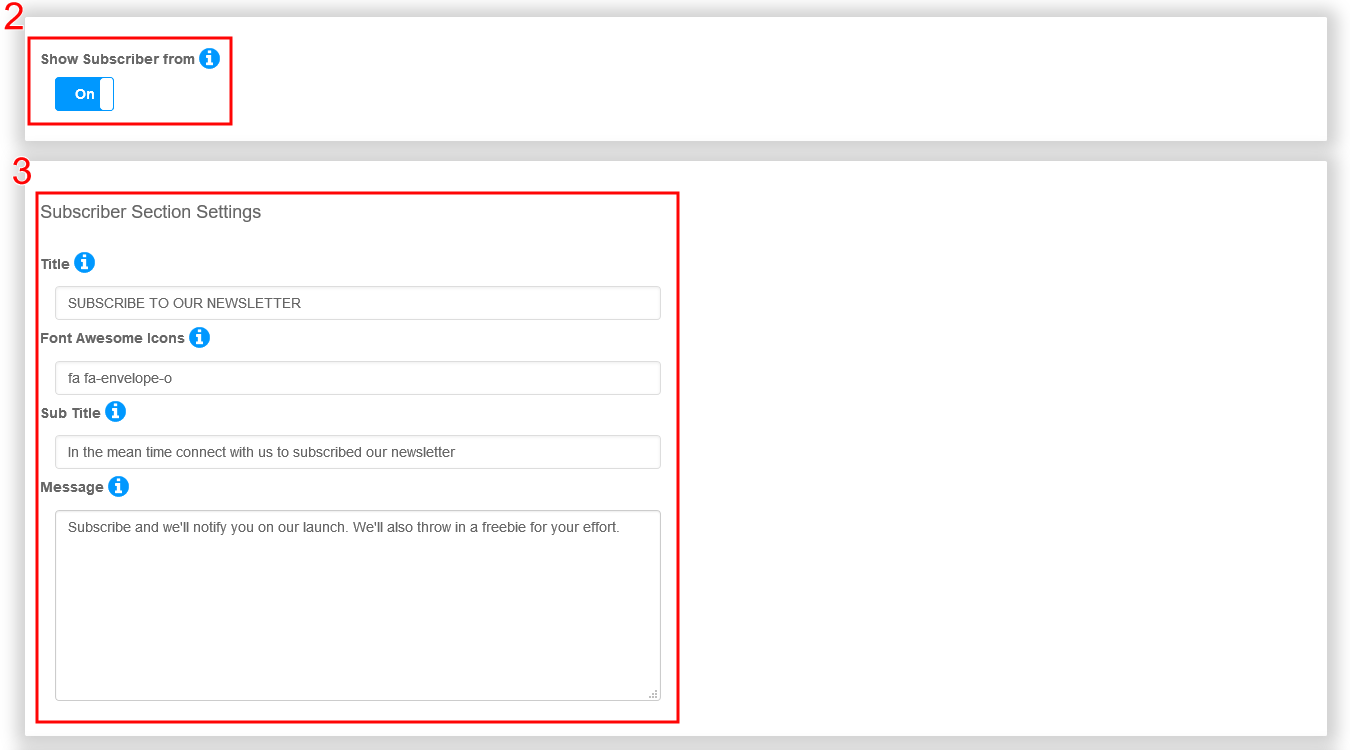
Subscriber Form Settings
General Settings : Select subscriber settings ( See Image : Point 1)
1. Show Subscriber form : Show/Hide the Subscriber form section from page template. ( See Image : Point 2 )
2. Form general settings : Fill all details like Subscriber form section Heading, Sub-Heading, add relative font awesome Icon and description. ( See Image : Point 3 )
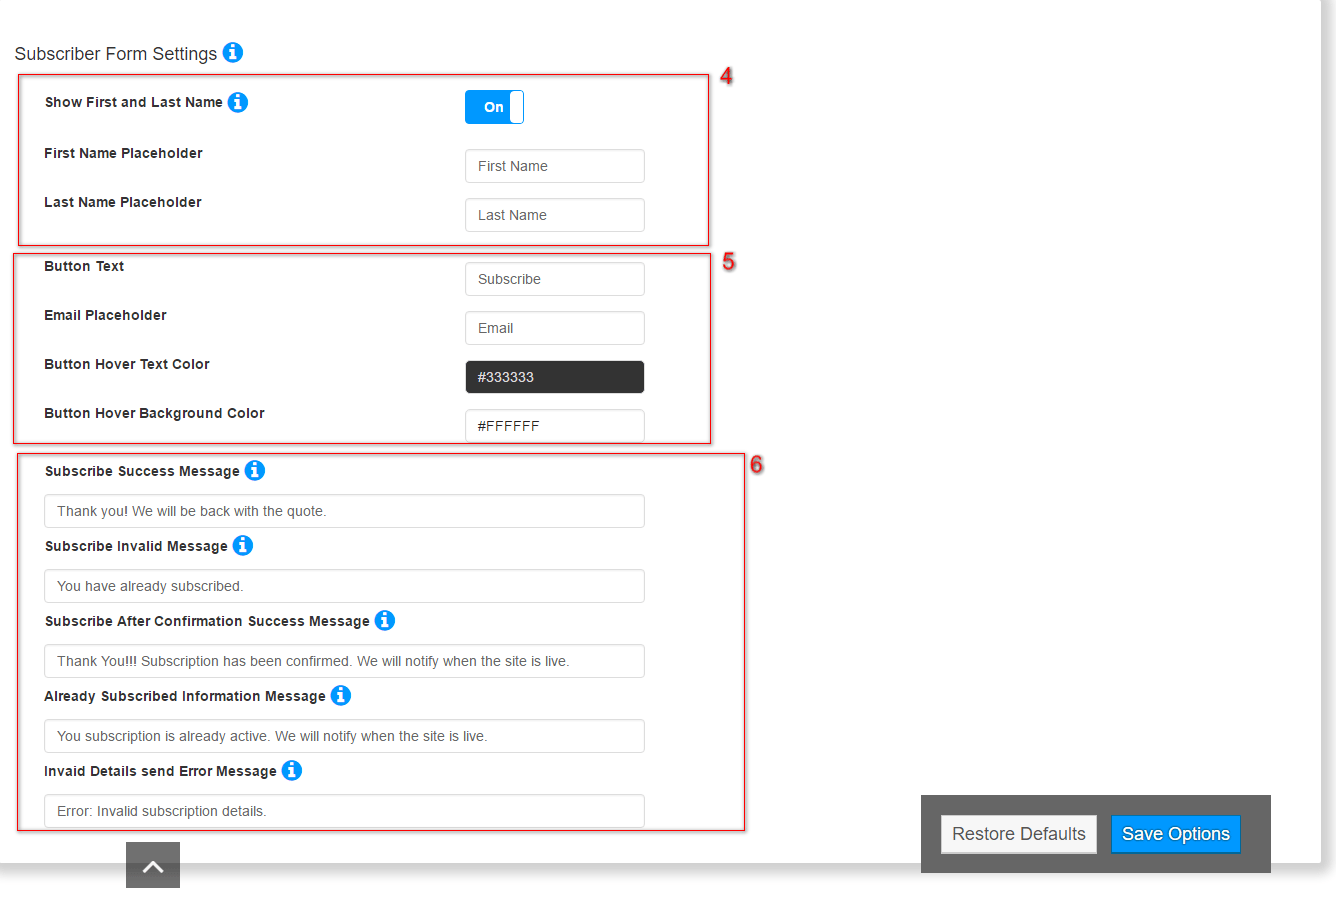
3. Subscriber form settings
1. Add a button text for subscribe button.
2. Add the placeholder of First/last Name, Email box. ( See Image : Point 4 )
3. Add a color for Subscriber Button text Color on hover and Placeholder color. ( See Image : Point 5 )
4. Add some text for subscriber form
1. Subscribe Success Message
2. Subscribe Invalid Message
3.
4. Already Subscribed Information Message
5. Invalid details send error Message. ( See Image : Point 6 )
Subscribers Provider Options
Enable Email Based Subscriber : Enable the option to send a message to Subscriber user to confirm his subscription. ( See Image : Point 2 )
- If Email Subscription is Enable: You have “PHP Mail”, “WP Mail” and “SMTP Mail” option to mail the subscribers and confirm its subscription through email.
- If email subscription option is disabled: Email confirmation process not required. Users/Visitors will be added to subscriber list as the active subscriber. ( See Image : Point 3 )

PHP has a built-in function called mail() that allows you to send the email. The advantage of mail() is that it’s very easy to use. we have two option WP-Mail and PHP-Mail
WP-Mail (WordPress mail function) : Select WP-Mail from option list ( See Image : Point 1 )
Add Mail Id: You just add your mail id to use for sending a message from your mail id to user for getting the confirmation for the subscription. (See Image : Point 2 )

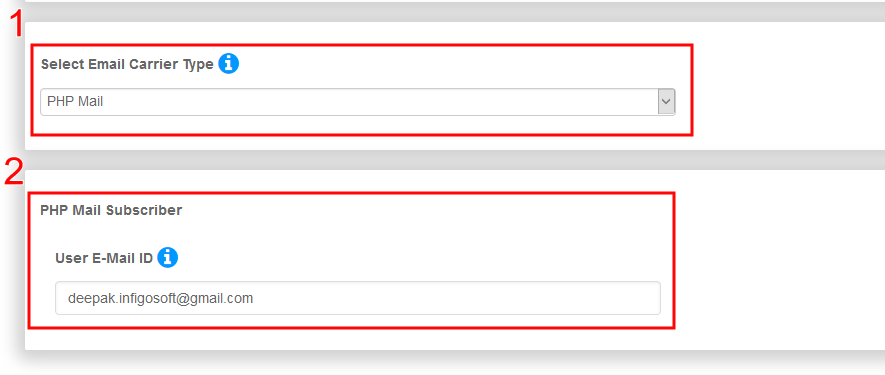
PHP Mail Settings : Select PHP mail from option list ( See Image : Point 1 )
You just add your mail id to use for sending a message from your mail id to user for getting the confirmation for the subscription. ( See Image : Point 2 )
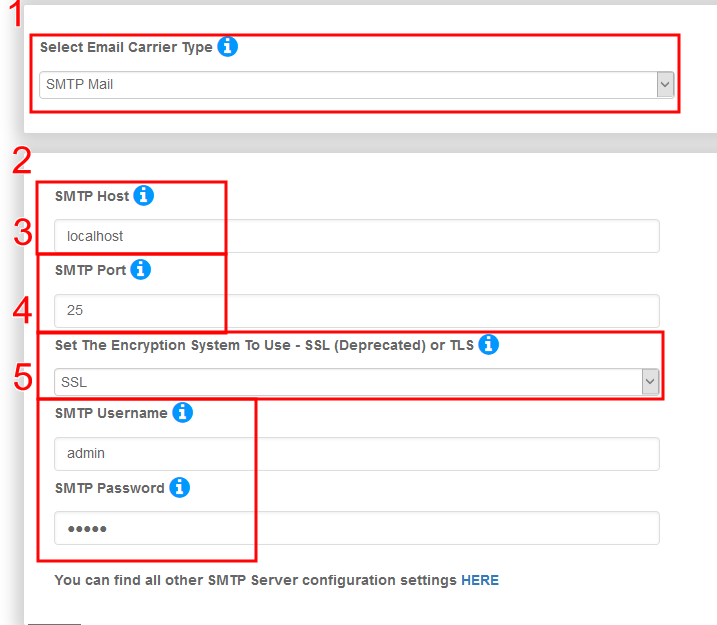
SMTP Mail Settings : Select SMTP mail from option list ( See Image : Point 1 )
SMTP mail needs valid details of SMTP host, port number, Set The Encryption System( SSL / TLS ) username and password. ( See Image: Point 2,3,4,5 )
You can find all other SMTP Server configuration settings HERE
Mail Chimp and Mad Mimi email marketing services : Please check our Mail Chimp and Mad Mimi blog.
Subscribers Options and List
Auto Mail sent : Mail to a user when the site will launch.

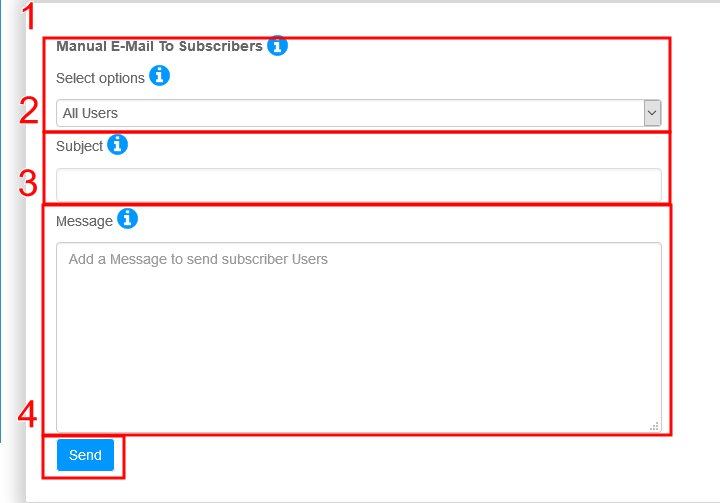
Select Users for manual E-mail :
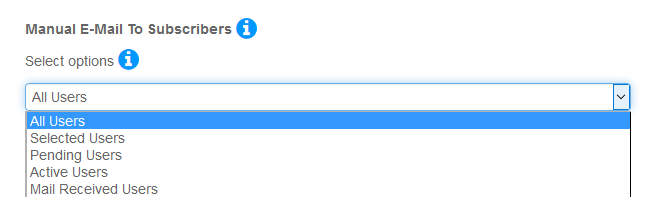
Manual mail form settings :
1. Select users as All Users/Selected Users/Pending Users/Active Users/Already E-Mail Users. ( See Image : Point 1 )
2. Add a subject of sent mail ( See Image : Point 2 )
3. Add a message body of sent mail ( See Image : Point 3 )
4. Click to send Button for mail sent to selected users ( See Image : Point 4 )
Subscriber Users list table :
All users show in table as first and last name, email, date and subscriber status( pending, active, mail sent )and Arrange the table in ascending/descending order
Note : There is two delete button for deleting the data as selected subscriber and all subscriber. they both button will show when data table has at least one user detail.

school management


Leave a Reply