


In this blog, we will help you effectively use the Magento 2 CMS, all you will need is:
With the Magento 2 CMS, we can create new pages, blocks, and widgets for your Magento 2 Store. To create custom static pages that display parts of your catalog or other useful customer information pages, you can easily combine those 3 factors. You can experience and be guided comfortably these 3 steps with our Magento 2 Admin Demo here. With the Magento 2 CMS, we can create new pages, blocks, and widgets for your Magento 2 Store. To create custom static pages that display parts of your catalog or other useful customer information pages, you can easily combine those 3 factors.
1. Add a new Page
- To create a new Page for your Magento 2 Store, you first need to login to your admin area and navigate to the Content>Pages section.
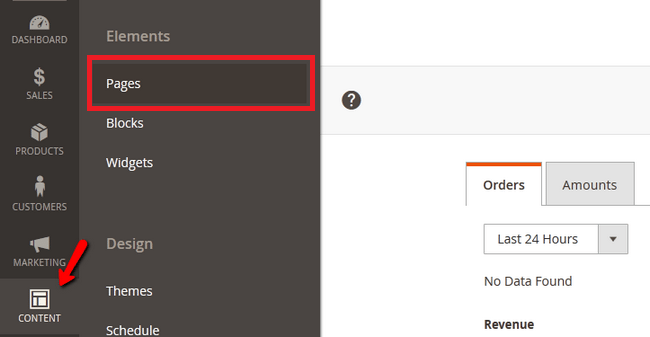

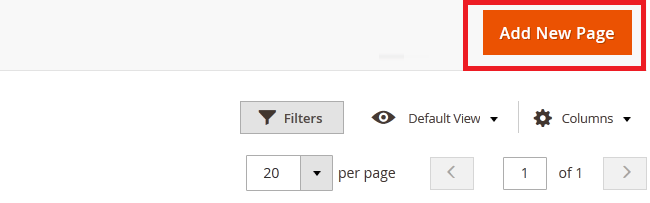
- You will see all pages of your Magento Store. Click on the Add New Page button.
Related Post: Magento 2 is Model View, View Model System and Not MVC – Explained

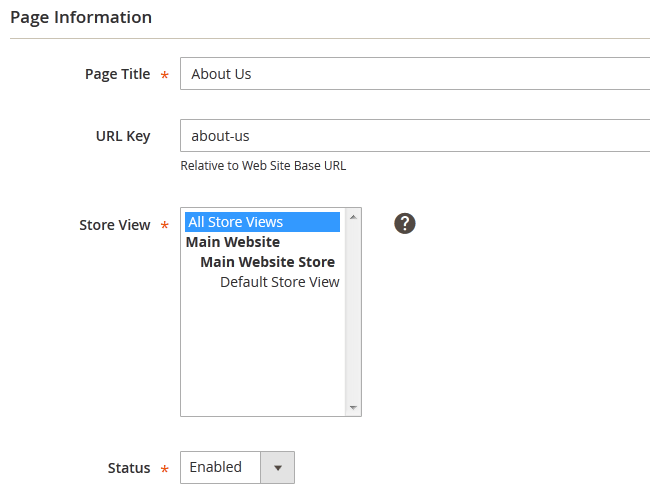
- Here you can Name the page and set a custom URL for the New Page. You can also choose on which store it can be viewed and set its status enabled or disabled (this option will hide this page).

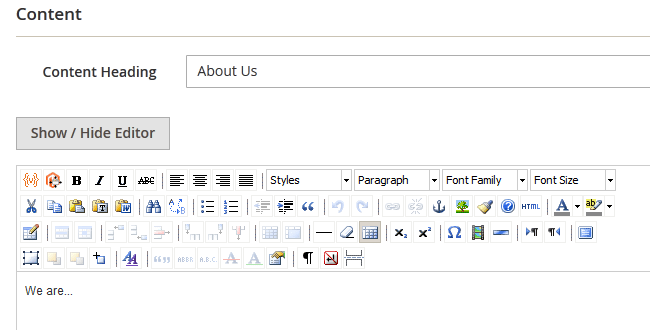
- In Content tab, you can add the heading for the page, the content and any widget you want to be displayed on.

- When you are ready with the configuration of the page, click Save Page to create it.


- Now you can add this new page to any other by using a new link widget.
For example, if you want to add this page as a link on the homepage:
=> get into your Home Page’s edit menu
=> select the Content tab
=> click insert widget button.
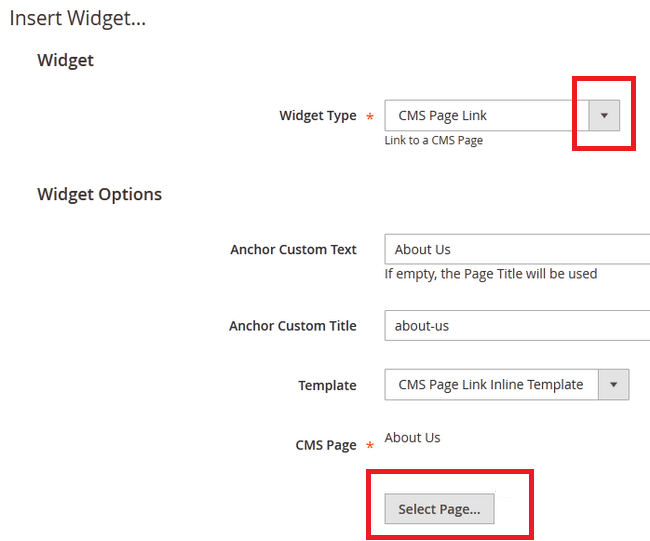

After configured and inserted the widget, remember to save the page and refresh the page cache if necessary.
Suggested Post: How To Edit And Delete Order In Magento 2
2. Add a new Block
- When featuring Products on the Home page, you can use Blocks to separate different categories.
- To create new Block, go to Content>Blocks.


- Add a new block by clicking on Add New Block button and configure the new elements.
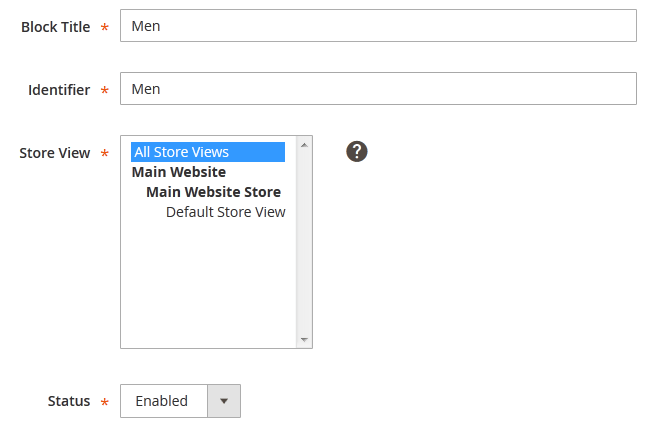

- From the options you have configured, remember the identifier is the most important element as it can be used later for implementing this block into a page via the code of the page.
- When you are done with Config, click on the Save Block to create new Block.
3. Add a new Widget
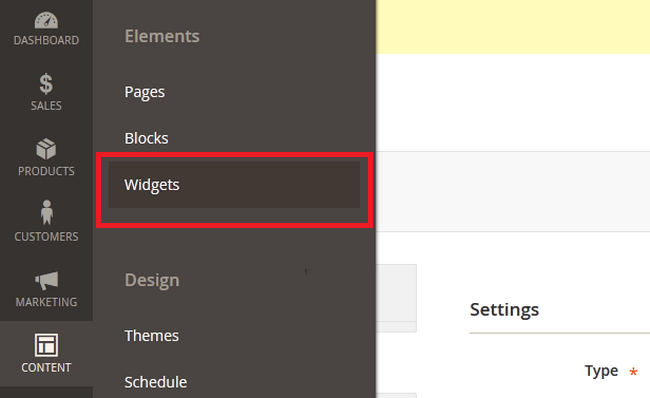
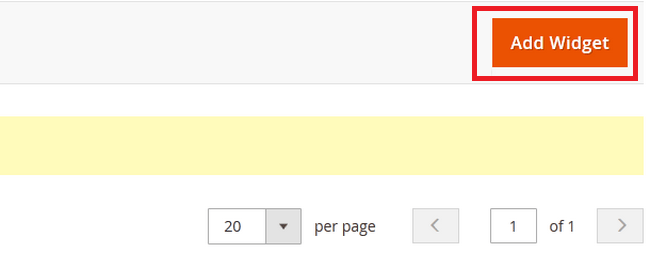
- To access the widget management page, please follow the path Content>Widgets from your administration dashboard.

- Click on the Add Widget to create a new one

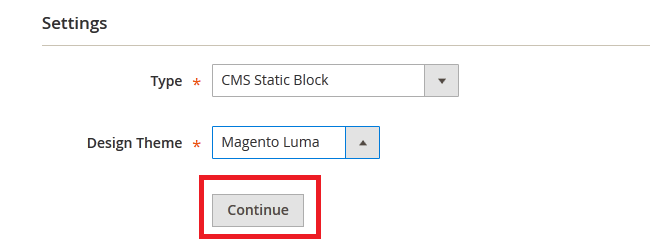
- Select the type of widget and theme for it.
- Click the Continue button to go to the storefront settings.

- Here you can set the Title and Store View for the widget while the Type and Theme are locked and grayed out from editing.
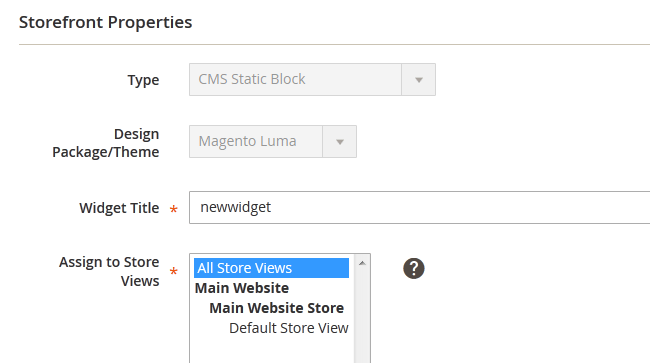

- You can choose a layout for the widget as shown on the storefront.


And then we are done with the basic tutorial in using Magento 2 CMS. We really hope you find it is useful and can now fully manage your Store’s content with it.