How to Setup Virtual Host for Laravel Through Xampp Wamp
- Laravel
- how to setup virtual host, laravel devs, laravel tips, laravel tricks, virtual host, virtual host benefits, virtual host working, virtual hosting for laravel, what is virtual host
How to Setup Virtual Host for Laravel Through Xampp Wamp: The term Virtual Host refers to the practice of running more than one website (such as department1.company.com and department2.company.com) on a single machine. Virtual hosts can be “IP-based”, which means that we have a different IP address for every website, and “Name-based”, which means that we have multiple names running on each IP address.
The fact that they are running on the same physical server is not apparent to the end user.
BUY NOW – Laravel Based – Online exam management WordPress Plugin
How to Setup Virtual Host For Laravel
There are two types of Apache virtual host configurations:
- IP-Based Virtual Host
- Name-based Virtual Host
IP-based Virtual Host:
In this configuration, when you are indicating two websites (with different IP addresses) to the server that runs Apache, that physical server should have two different IP addresses configured.
This means that the server should have two ethernet cards, each one of them configured to the IP address of the corresponding website that the Apache virtual host will be serving. But it’s not practical when you are serving a large number of websites.
Recommended Post: How to Install Laravel – Steps to be Followed
Name-Based Virtual Host:
In this configuration, when the Apache web server receives a request, it looks for the hostname in the HTTP header, and depending on the hostname, it serves different websites. This is very easy, as you need only one IP address on that physical server, but, you update the DNS with multiple website names specifying to the same IP address.
We will read more about Virtual Host in the coming blog because the focus of this blog is how to set up Virtual Host for Laravel.
Also Read: Top 10 Principles of good website design
- To set up the virtual host, we need to configure Apache’s virtual host. We need to edit the “httpd-vhosts.conf” file. Follow these steps to set up the virtual server:
- Navigate to “C:\wamp\bin\apache\apache2.4.23\conf\extra\httpd-vhosts.conf” [ For XAMPP C:\xampp\apache\conf\extra\httpd-vhosts.conf ] and open the file in editor.
Add these lines to the end of the file and save it:<VirtualHost *:80>
DocumentRoot “C:/xampp/htdocs”
ServerName localhost
</VirtualHost><VirtualHost *:80>
DocumentRoot “C:/xampp/htdocs/project-name/public”
ServerName project-name.dev
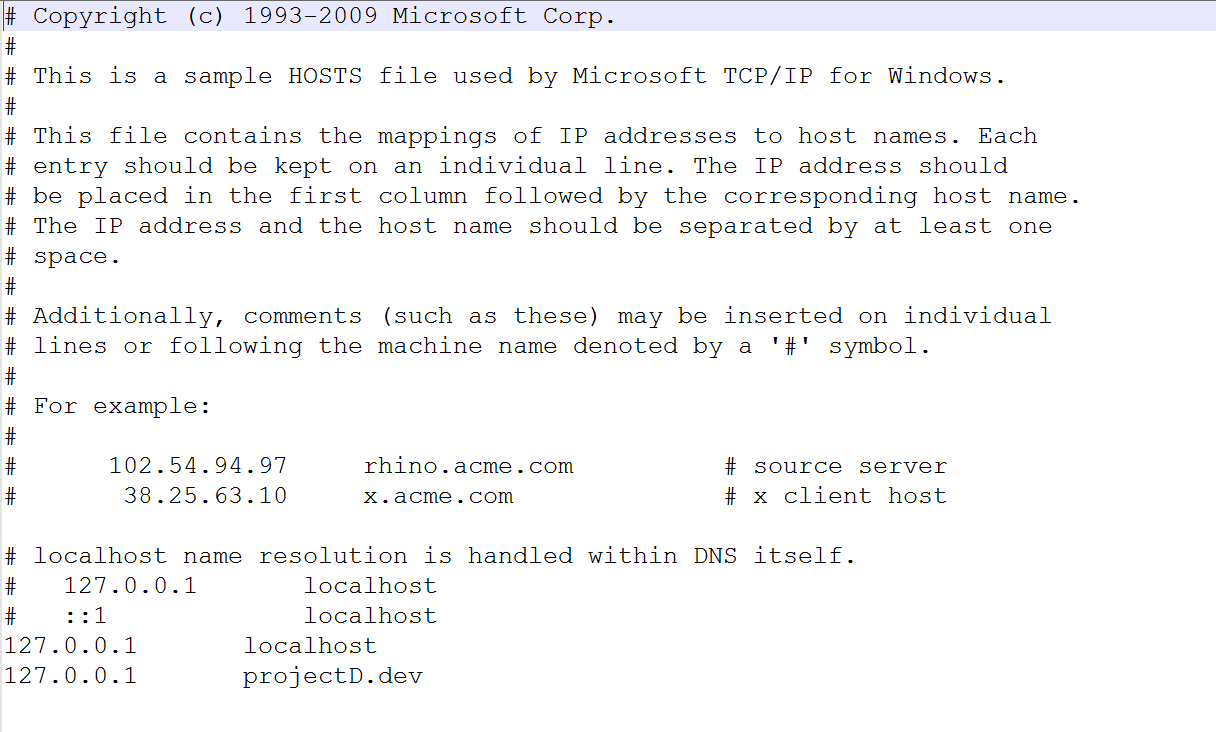
</VirtualHost> - Also, we need to edit “hosts” file. Copy “C:\Windows\System32\drivers\etc\hosts” file to Desktop and open it in your editor. Add these lines to the end and save it:
127.0.0.1 localhost
127.0.0.1 project-name.dev (ex: 127.0.0.1 projectD.dev) - Copy “hosts” file from Desktop and paste it back to “C:\Windows\System32\drivers\etc”.
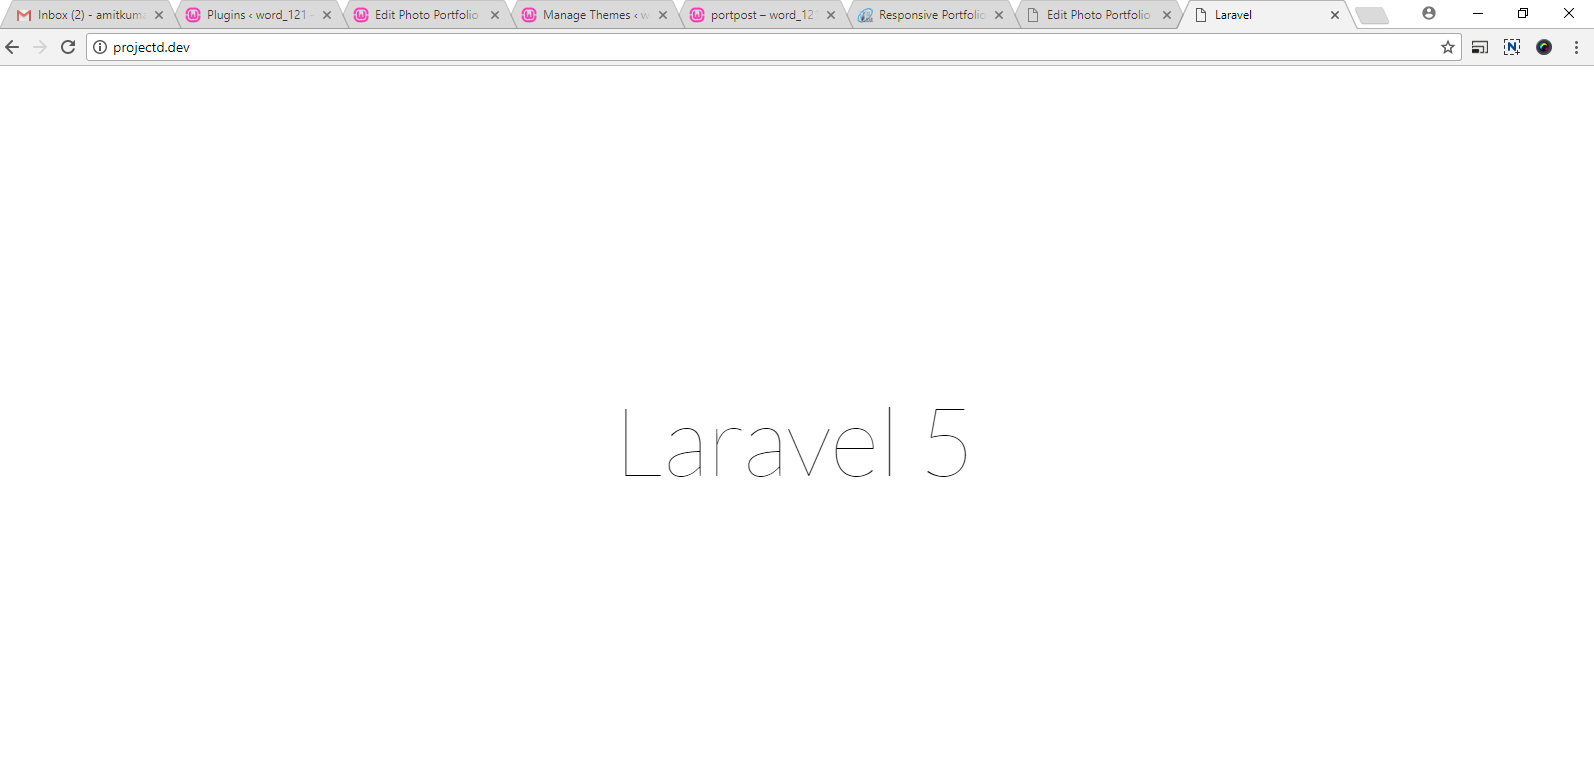
- Now, open WAMPP (XAMPP) and restart Apache server. In your browser, navigate to project-name.dev (ex: projectD.dev)
This is how you can set up a virtual host in your Xamp or Wamp server for Laravel.
I hope you have enjoyed these simple steps and if you have any problems, please feel free to post your queries in the comment section below. [wp-faq-schema title= FAQs”]
school management


Leave a Reply