Author Archives: anjani kumar

Top 5 Blogging Platform 2024: Complete Guide
Having a blog is a great thing because you can share anything you want there are tons of people looking to start a new free blog for the first time or move to a better a platform on the web. Blogs might have fallen out of fashion a touch, due to the onslaught of social networks, but there’s something about having a space that’s properly yours, potentially free from the distractions of a billion adverts and countless competing status updates. And the best thing is, there is a load of free blogs out there to get you started.
we have 5 of the best blogging platforms for newcomers who want to get a free blog up and running.
1. WordPress
WordPress is easy to see on its site wordpress.com, where you can create a new blog entirely , with a reasonable amount of customization. more info on what’s possible there can be you found at WordPress.org. it’s the best free option for anyone wanting a great mix of power, customization, and usability.
Pros: Most mature blog platform, stable and highly customizable .
Cons: Can be complex to configure beyond the basic setup, self-hosting has a high learning curve.
2. Blogger
Blogger can help create a sense of community. A blog is a living archive of personal sources of inspiration. “It’s a place to gather the things that inspire you,” says Henderson, pointing out that, unlike printed photos, blog posts don’t clutter up your desk. And, you can quickly find past posts via Google.
To create your free BlogSpot blog site, head over to BlogSpot.com and log in using your Google account. If you don’t have a Google (Gmail) account, create one for free.
Pros:
Starting a blog is easy. The steps to beginning a blog are dead simple. You can choose a template from websites like Blogger, WordPress, or Tumblr. Adding posts is almost as easy as sending e-mail.
Cons:
the more difficult part is being disciplined enough to stay on it.
Unexpected technical issues can require extra time.
3. Tumblr
Tumblr allows users to post multimedia and other content to a short-form blog. Users can follow other users’ blogs, as well as make their blogs private. Much of the website’s features are accessed from the “dashboard” interface, where the option to post content and posts of followed blogs appear. for more Login you can log in to its website tumblr.com
Pros:
hose 188 million blogs make Tumblr the biggest blog hosting system worldwide, surpassing WordPress’s 60 million.
Cons:
Very Young Community: There are many teens on Tumblr that makes the social network reminiscent of Myspace. I assume that Tumblr’s easy customization and no boundaries approach attracts teens to use it as their personal website.
4. Medium
The medium has one of the most well-designed post editors out there, making it easy to quickly style text, quotes, images and other media in an attractive way. There are no options to customize themes or look and feel of your ‘blog’ but different image layouts, quotes, and text uses can make a big difference.
Medium is a great place to get started because it’s currently very popular. If you write something that gets enough recommendations, it can end up on the homepage or in people’s email inboxes, which drives a significant amount of traffic.
Pros: Instant setup, fantastic editor, easy to use.
Cons: Limited customization, no custom domain support and no self-hosting option.
5. Weebly
On the wide spectrum of website building solutions, Weebly lives on the end that is all-inclusive and provides everything you need to get started and grow your website. It’s in contrast to solutions where you buy, install, and manage all the “pieces” of your website separately.
Using Weebly is sort of like leasing and customizing an apartment in a nice development instead buying and owning your own house. You’re still in control of decor, cleaning, and everything living-wise – but you leave the construction, plumbing, security, and infrastructure to the property owner. That point is key because there’s usually a direct tradeoff between convenience and control.
Pros:
Very User-Friendly, Drag & Drop Website Builder, Mobile Responsive Templates, Pre-Designed Page Layouts
Cons:
Apps & Extensions, Content Management System.

How to submit a Magento 2 extension to the marketplace?
Magento is well known for its feature-rich eCommerce platform, whereas the latest version i.e. Magento 2 is equipped with more advanced features.
The latest edition is announced with mega changes to improve the performance of online shops and storefronts and allow merchants to expand their businesses beyond any barrier.
The big change in Magento is now attracting more and more merchants to move and experience the brilliant innovation.
But, to move, they will be required to have compatible versions of all the plugins, themes, and extensions they have already installed in their store. This is where they need to visit the official marketplace and find relevant solutions.
Despite the latest version, Magento 1 is still in use by thousands of online stores worldwide, because they are not yet ready to migrate a great amount of data about their products, categories, customers, orders, sales, and a well-established online presence.
This is the reason that merchants still using the tools for the foreseeable future, and until they are ready to revamp the website with Magento 2.
The plugins and modules they were using on the previous version are still working fine just like the Rich Snippets Magento extension that is recommended for showcasing additional product information in the SERPs and making the search robots know more about the landing pages.
The programmers are developing tools for both versions so that the end users can avail the applications suitable for the version they use.
How can developers benefit from Magneto Marketplace?
The launch of Magento 2 has created a lot of opportunities for professionals and web development agencies.
The official marketplace has become a hub of top-notch extensions where individuals and companies are given the right to publish their valuable applications to the enormous community of sellers, merchants, and fellow developers.
The latest Magento version is a hallmark of quality, high performance, and increased online reach that is making the marketplace a mature and authentic place to display themes and extensions.
The Marketplace is created to focus on delivering quality to the end consumers. It allows developers to publish their extensions on 30:70 revenue sharing. A product that is sold through this platform splits the revenue, so 30% goes to Magento, and 70% is paid to the developer or publisher.
The marketplace takes complete care of the payment procedures to let the individual develop innovative solutions for the community members. The sale of free products will surely generate zero in revenues.
The developers are required to comply with the defined rules of the marketplace, whereas Magento helps them with different tools to refine their skills and proceed further in their careers.
How can you publish the Magento 2 extension on the marketplace?
Following is a step-by-step guide to submitting a Magento 2 extension to the marketplace. It may start with a simple submission process but requires you to be patient with the different review processes. Here’s the entire process.
Log into marketplace
Visit the link https://marketplace.magento.com/, create an account if you don’t have yet, and log in to your account. Complete your profile by adding your skills, expertise, experience, and affiliation with a web agency or company.
A company that aims to publish extensions and themes on the marketplace is required to maintain a single profile.
Add your extension
Once you log into the account, you can add work as products. It can either be a theme or an extension. It is time to put your useful extension on the official store of Magento products and earn money as a reward for your hard work.
It is fast and reliable to sell your extension rather than owning and managing a storefront separately and entertaining clients.
To add an extension, navigate to the My Account section; click Developers Portal / My Products / Add Extension. Here, you will arrive at a form that requires details about the extension you need to submit.
The primary buttons of the form include Magento 1. x and Magento 2. x which asks you to clarify whether your extension is for the previous version or purpose-built for Magento 2.
Proceed with the form filling by adding the title of the extension. It can be an appealing name that clarifies all about the extension in a word or phrase. Further, you can have the option to offer services along with a product.
For this, you can select either Yes or No for offering additional services. Continue answering the questions with an acceptable and fair reason. The questions are
- Why is This Extension Not in the Marketplace?
- What is the Functionality of Your Extension?
- What Makes Your Extension Unique?
The replies to these questions depend on the product you develop. There is no defined answer for suits every extension. Once, you fill in all the details, review them again and continue to enter the review process.
Move to the Review Process to get your extension published
After submission of an extension, it has to go through a review process before finally being published. Following are the different review steps involved.
Business Review – It takes into consideration the information you provide about the extension. This review is conducted to evaluate whether the product is of any help to the community and is saleable in the marketplace.
Technical Review – In this process, the developers review the entire product package (either theme or extension) and compare it against the required coding standards. It evaluates the technical aspects of a product that’s why it is recommended to ensure your project qualifies for the validation step. There are tools to verify it before submission.
Marketing Review – Approval from the technical review leads to marketing review. In this stage, the content, user guides, screenshots, pricing, and installation manuals are examined. It is recommended to keep the prices and features consistent in the content across the submission and your website.
QA Review – The Quality Assurance review starts with the installation of your extension by the Magento team. The product with smooth and bug-free installation is successful in meeting the required standards and expectations.
The product that passes successfully throughout the review process is approved and made live at the Magento marketplace.
Conclusion
The Magento Marketplace is a useful platform for freelance developers and well-established companies to boast their expertise by publishing valuable extensions. Merchants now avoid purchasing plugins from websites other than the official ones.
So, it makes the conventional methods of promoting products on different platforms obsolete. With the above step-by-step guide, you can easily submit an extension, get it published, and add a source of income to your profile.
Article By – Paul Simmons

How To Get Paytm QR Code
With the use of Paytm, you can pay autorickshaw drivers also. Even in any business like grocery stores, paan wallas, stationery you can pay amount via paytm. In your small business, you can now receive money in your bank account via the Paytm Wallet.
But first important to know – what is a QR Code?
The full form of QR code is – Quick Response Code. QR code is a popular type of a two-dimensional barcode that can store a lot of information. It is encoded with alphanumeric information and can be decoded using a QR Code scanner or a QR Code scanning application on a smartphone. QR Codes are so easy to use so anybody can create and use them for their benefit.
Getting a QR Code –
Just follow the steps below.
1. If you are a new user then Download Paytm app on your smartphone & sign up using your mobile number.
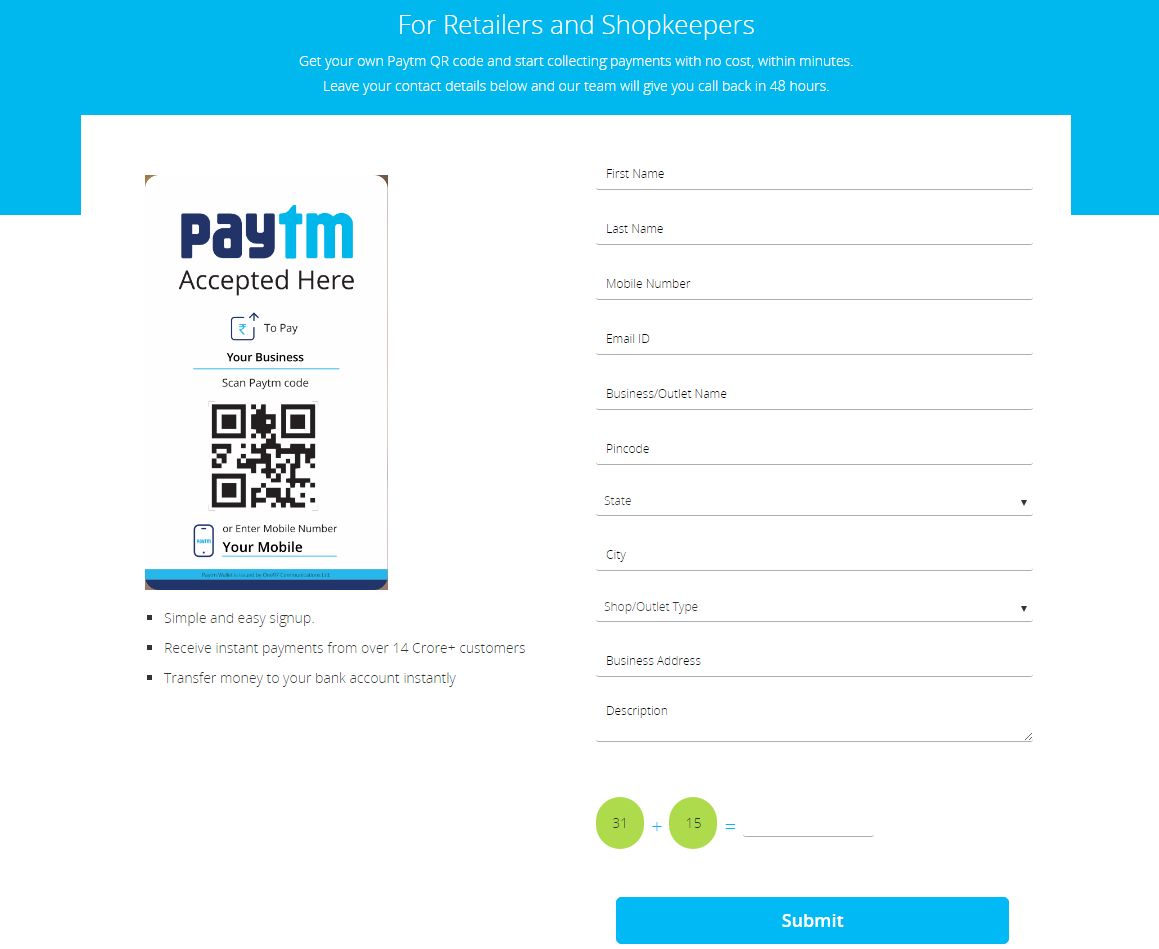
2. Visit this page and click on Get your QR code instantly.
3. Log in to your account and click on “Start Application.”
4. On the account activation page, Select “I want to accept payments in my shop/retail store”.
5. You have to fill all the details which are required. After filling form click on Submit button.
6. After submitting this form you will receive a call from the Paytm team regarding your shop Paytm QR code.
7. After generating your Paytm QR Code Instantly.
8. Print and Paste your QR Code at your counter.
9. Ask your customers to tap Pay or send button, scan your QR Code, enter amount and Pay.
You will receive the Payment to your Paytm Wallet Instantly.
Note : Paytm recently announced that its customers will now be able to transfer money from Paytm to their bank account at 0% fee till 31st December 2016.
Receiving cash in your Payment Account is free of cost. Also, Till 31st December all KYC merchants can transfer money to their Bank account without any charges. Non-KYC merchants will be charged 1% on the Total amount transferred to their bank account.
Investor: online loans

How You Can Boost Your Video Rankings on Search Engines
Online videos have emerged as one of the most powerful marketing mediums we have today. From increasing user understanding of products and services to driving increased organic traffic to websites, videos have been proven to bring marketers solid returns of their investments.
However, it is safe to say that the popularity of videos also poses a challenge for businesses that are new to enter this space. With hundreds of thousands of videos already out there in the virtual world and hundreds more being added with every passing second, beginners can find it difficult to make sure that their video stands out from all the competition.
Provide exceptional value
People love to share great videos with their friends or on social media, but they are not going to like, share or link to any video they find on the web. They need content that provides exceptional value, inspires them, or touches an emotional chord.
So basically, the first things you need for video marketing success are unique content that your audience can’t find elsewhere and attracts and holds their attention and, of course, a carefully planned and executed marketing strategy. When your video is endorsed by more people or gets more shares, likes, and tweets, it pushes search engines to boost your site’s ranking in their results, leading to more views.
Don’t forget video SEO
However, don’t forget that you also need to optimize your video for search engines like you would do a normal web page if you want your videos to rank higher in search engine results.
To start with, video SEO is different from normal SEO because the search engines are not going to be able to “watch”, search, or index the actual video. They can only index the text content on your page, which is why you need to use descriptive text and keywords while coming up with titles, tags, file names, and so on for your videos. With proper utilization of these video SEO components, you will be able to give your videos the advantage it requires to edge out the competition in the virtual world.
For example, closed captions, which are indexed by search engines like Google, have been proven to increase YouTube views by 13.48% in just a couple of weeks. In addition, captions make your video understandable to millions of viewers who have hearing disabilities. A lot of people who don’t have any trouble hearing also used closed captions when they want to enjoy videos in unfavorable surroundings like a quiet doctor’s office or when they are at home with a sleeping baby.
Search engines also use transcripts for indexing multimedia content, which means that you can increase search traffic to your website by adding transcripts to your videos. In addition, transcripts provide a useful reference for people who want to use the video for reference or as a guide, not to mention the millions of people out there with hearing disabilities.
Considering that more than half of YouTube views come from non-English speaking countries, you may also want to consider adding subtitles to your videos. In addition to improving SEO, subtitles in multiple languages also increase your video’s reach and accessibility and give people the freedom to watch your videos from any part of the world at any time. Subtitles have also been shown to increase engagement time by more than 40%and increase the number of people who watch a video till the end by 80%.
For more in-depth information about how you can make your videos popular and search engine friendly and some useful marketing stats and data, check this new infographic from Taking 1 Transcription!
Thanks
This blog contributed by Jessica Morgan.
Newest Template Flagships and Best-Sellers
We always strive for something new. We keep a close eye on the last-generation gadgets and devices that are being presented in the contemporary world. We want to look trendy and purchase an outfit of the latest fashion collections. The same deals with web design. We want our sites to look remarkable and up-to-date. A modern-looking design appeals to a contemporary user better than an outdated, poorly built one. And it’s clear why. A modern user has become very picky and demanding. We leave websites that take too long to load. A 3-seconds page loading time is an unattainable luxury. In order to be in demand among clients, we need to optimize our sites for speed yet keeping them eye-catching. This is one of the effects that you can attain with the help of the following flagship templates that we have chosen for this compilation.
Many of the themes like Monstroid, Storeflex, Explora, Corporal, Agriculture, Bellaina, Enigma Advance and MotoCMS are presented here by Weblizar. All of them saw the light of the day in the second half of 2016. Unparalleled functionality and straightforward designs are intended to appeal to a wide audience. The business niches that these themes will fit include real estate, restaurant, fashion, agriculture, industrial, financial, and scientific projects. A number of templates given below are suited for multiple purposes. Several templates feature GPL license. This gives webmasters a possibility to install one and the same template on an unlimited number of web projects. Their code can be also tweaked in any way necessary so that you customize a selected theme to match your brand identity at its best. Here are the Newest Template Flagships and Best-Sellers Themes –
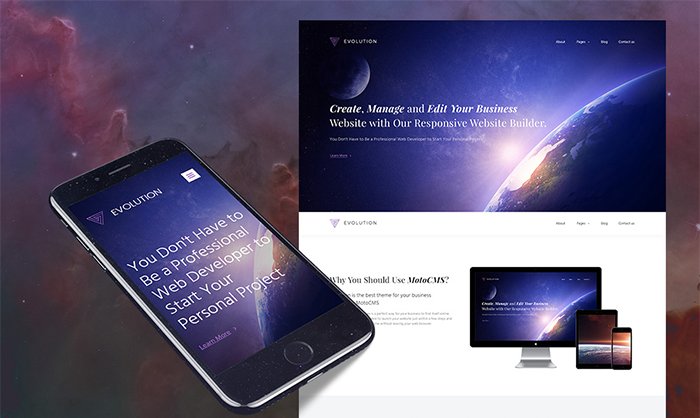
1. Evolution Business MotoCMS Template
Evolution Business MotoCMS is a great template with the wonderful website builder and beautiful designed. The template matches every business owner who runs a serious company. You can create a modern, good-looking and responsive website without hiring programmers. With Evolution, you can build your website really fast and get it launched even faster. Great template for a website with 10+ pages. The system is amazing. Different types of animations used in this template. HTML plus JS, Lazy Load Effect and it is coded with CSS 3, Html 5, Jquery, LESS, AngularJS, Sass. The layout is totally Flexible.
2. Business Website Template
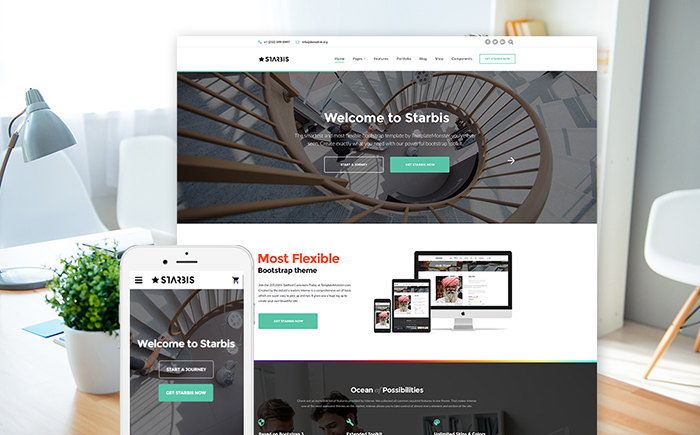
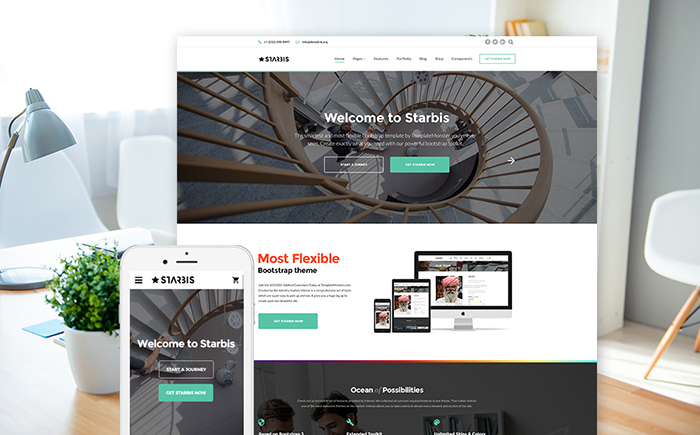
Starbis is a multipurpose responsive website template that can be used for a variety of business purposes. Its sleek and trendy design will add more elegance and professionalism to your web page. Fully editable, it is pre-loaded with an ultramodern Novi Builder that allows you to edit and create new pages at the site’s front end, without any coding skills required. The theme is packed-full with an array of options letting you create versatile layouts by tweaking header, footer and different pages of your site with the help of a rich UI kit. A number of pre-designed blog, portfolio, and eCommerce page templates allow you to get started with your web project on the fly. Stunning animation and visual effects will spice up your online presentation.
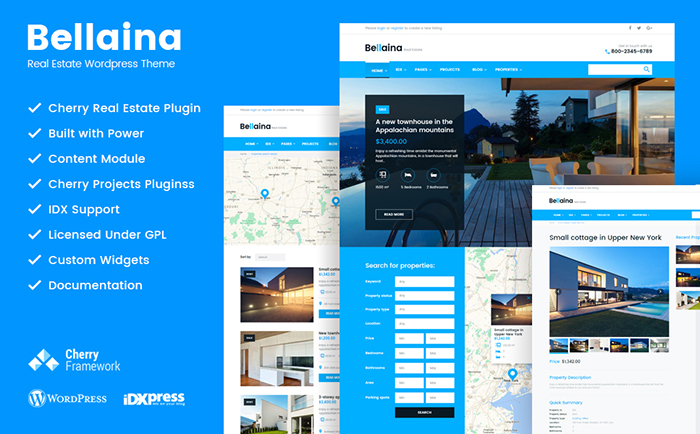
3. Bellaina – Real Estate Responsive WordPress theme
A proper real estate website should make a customer’s search as easy as possible. The design should be intuitively understandable, it should have a simple search box, showcase a wide range of the real estate items available and, equally important, it should prove to the customer that your agency is trustworthy. Have a look at the image-oriented design which allows you to place the best houses or apartments to grab a viewer’s attention.
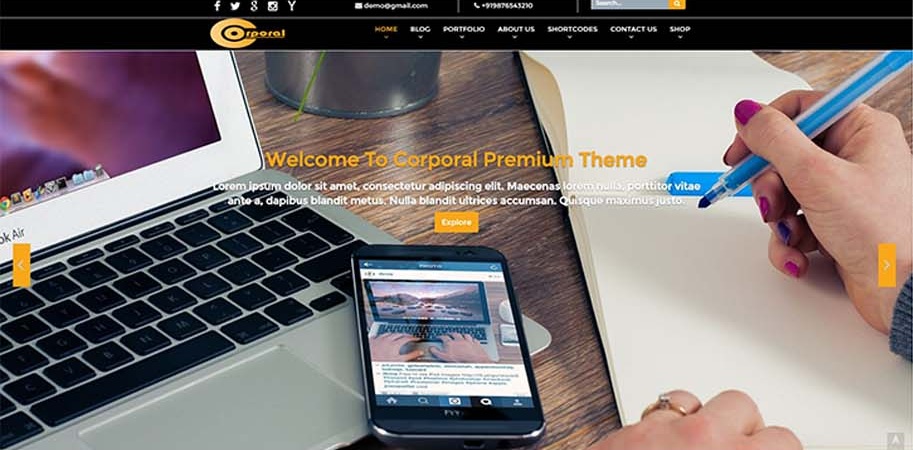
4. Corporal Premium
Corporal Premium is a responsive and fully customizable template for Business and Multi-purpose theme. The Theme has You can use it for your business, portfolio, blogging or any type of site. Custom menus to choose the menu in Primary Location that is in Header area of the site. which is ideal for creating a corporate / business website.
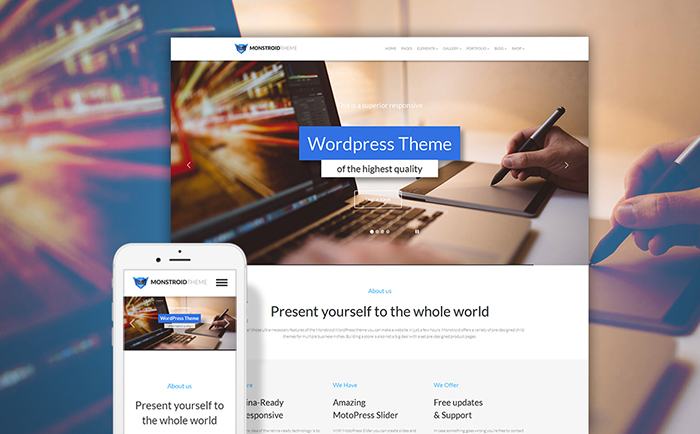
5. Monstroid WordPress Theme
Building a site is not an easy task unless you are armed with a multipurpose WordPress theme that can be adjusted to any possible online resource. Here comes Monstroid – a WordPress theme that has everything you ever dreamed about: starting from the great number of predefined pages, up to the dozen of child themes and 23 built-in plugins that provide extensive customization options. Visual tweaks allow you to make your Monstroid-powered website look, unlike anything, build previously.
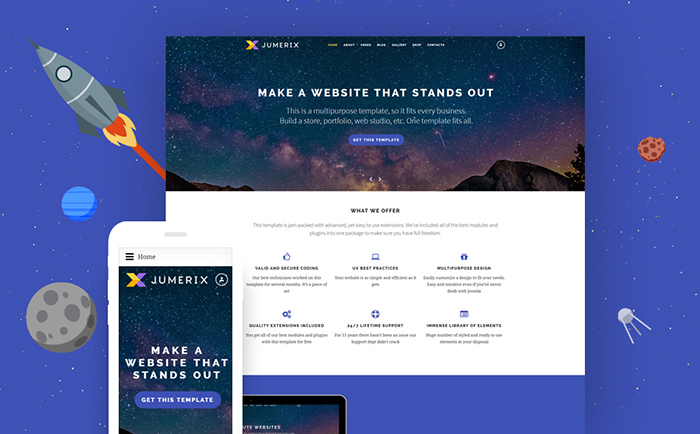
6. Jumerix Multipurpose Joomla Theme
Jumerix Multipurpose Joomla Theme is packed-full with an array of features that will match blogs, portfolios, business or corporate projects, as well as eCommerce sites of different niches. Developed with the best design practices in mind, the theme includes a host of UI elements to personalize and spice up your web resource. A set of Template Monster’s custom modules and extensions is included into the theme for free. Also, the pack included pre-designed layouts that are ready to go live out of the box. It goes without saying that the theme is responsive and retina-ready. Live chat, commenting system, and built-in forum are available as well. MegaMenu and Ajax-based search allow the users to come across the desired content in an instant.
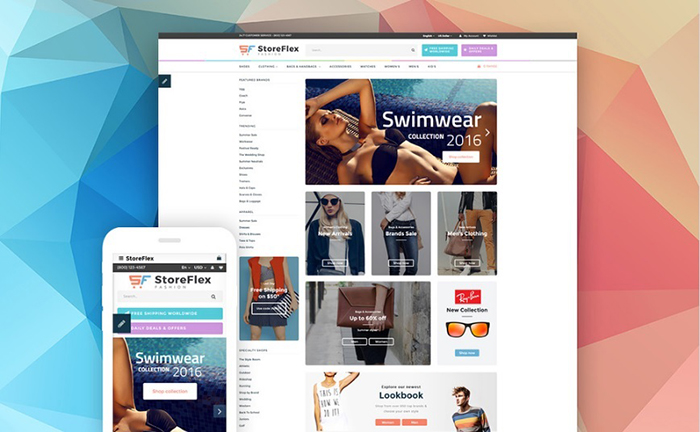
7. StoreFlex Multipurpose OpenCart Template
StoreFlex is responsive, visually stunning, and feature-rich OpenCart theme suited for any eCommerce site you have on your mind. It includes clipart for 20 product types, which means that you will have access to ten different topics in one pack. StoreFlex is pre-loaded with multiple skins and ready-made page layouts that are ready to go live out-of-the-box. An intuitive layout builder makes it possible to come across a versatile presentation of eCommerce projects on the fly.
8. Environmental Biotechnology Website Template
GreenTech is a responsive Solar Power System Website Template, which offers you a new way to look at business website designs. Designed specifically for ecology-oriented websites, it has a green color palette with minor blue and purple details. It is packed with progressive visual effects and animations intended to make your website look contemporary and dynamic. GreenTech boasts a rich UI kit, which includes lots of professionally designed components: buttons, tabs, accordions, graphs, progress bars, and much more.
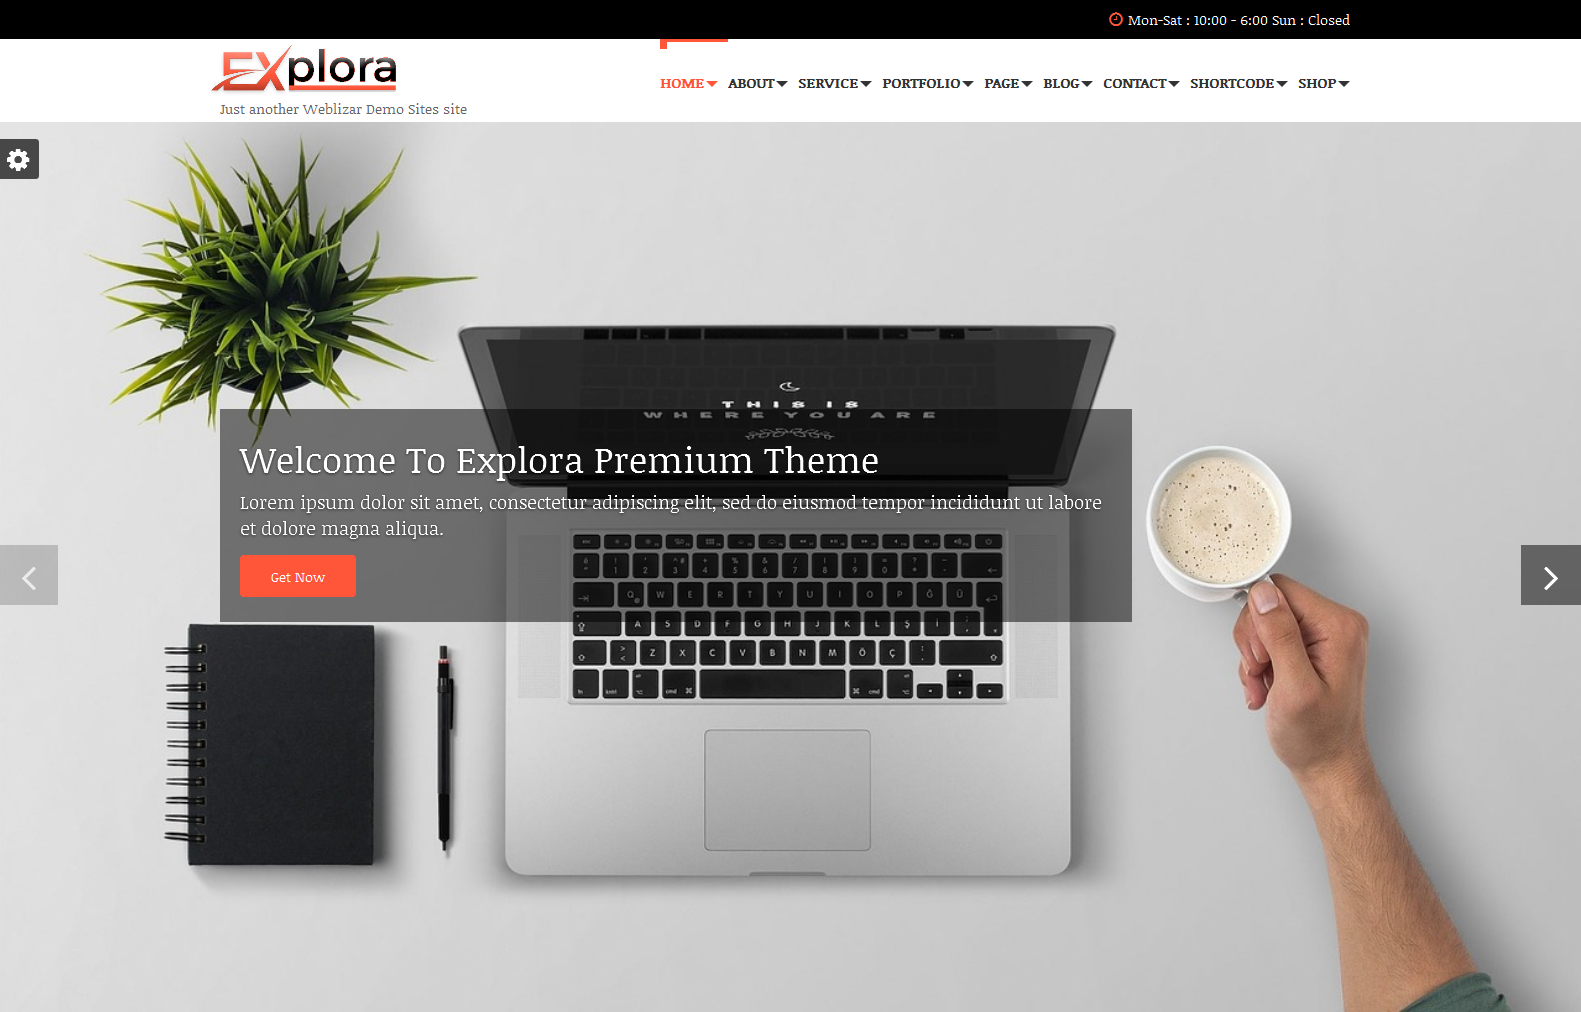
9. Explora Premium
Explora Premium is a multi-purpose responsive theme coded & designed with a lot of care and love. You can use it for your business, portfolio, blogging or any type of site. Explora is Responsive and flexible based on BOOTSTRAP CSS framework that adapts your website to mobile devices and the desktop or any other viewing environment.
Explora focusing on the business template, awesome Caroufredsel slider, Powerful but simple Theme Options for full CMS control option to match your logo & website, wide layout, light & dark color skin, translation ready and much more. Explora is Woo-commerce Ready theme.
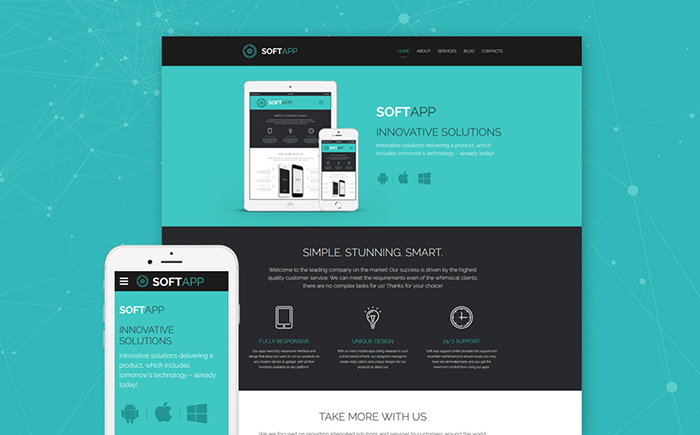
10. Software Company Website Template
Soft App is a responsive website template for a software company. It features a sticky menu for easier navigation. Even if visitors reach the bottom of the layout, they can access it without scrolling back to the header. The template comes packed with a library of Google fonts providing readability. To present your pricing packages, you can use tables. With their help, prospects will see what each package offers and easily compare them.
11. Construction WordPress Theme
Responsive Construction WordPress Theme is just what you need. Designed using dark colors and large images, it will become a perfect background for any architecture or construction company or an industrial blog. With a choice of blog layouts and post formats, and a number of pre-designed UI elements, it will be easy for you to build a unique, multifunctional business website.With this theme, you can display the list of your contractors on one of the available pre-designed pages and present your services in a professional way.
12. Science Lab Responsive WordPress Theme
Science Lab Responsive WordPress Theme which possesses all the required features which a website of this kind needs. Strict shapes in design, reserved colors, drop-down menu, back-to-top button, Google map, neat program sections – you’ll enjoy each and every feature present in this HTML template. Remember, that a website based on this template, will look perfectly on any screen, as it is responsive. A clean contact us form will fetch you more customers.
13. Cakes & Bakery Responsive WordPress Theme
Chateau is a well-coded bakery WordPress template licensed under GPL v3.0. The theme is built with Power, i.e. TemplateMonster’s custom drag-and-drop page builder pre-loaded with 25+ modules, a library of presets, and more features providing for a seamless customization of the layout. Bold, mouthwatering images of pastry lure the attention of the true gourmets.
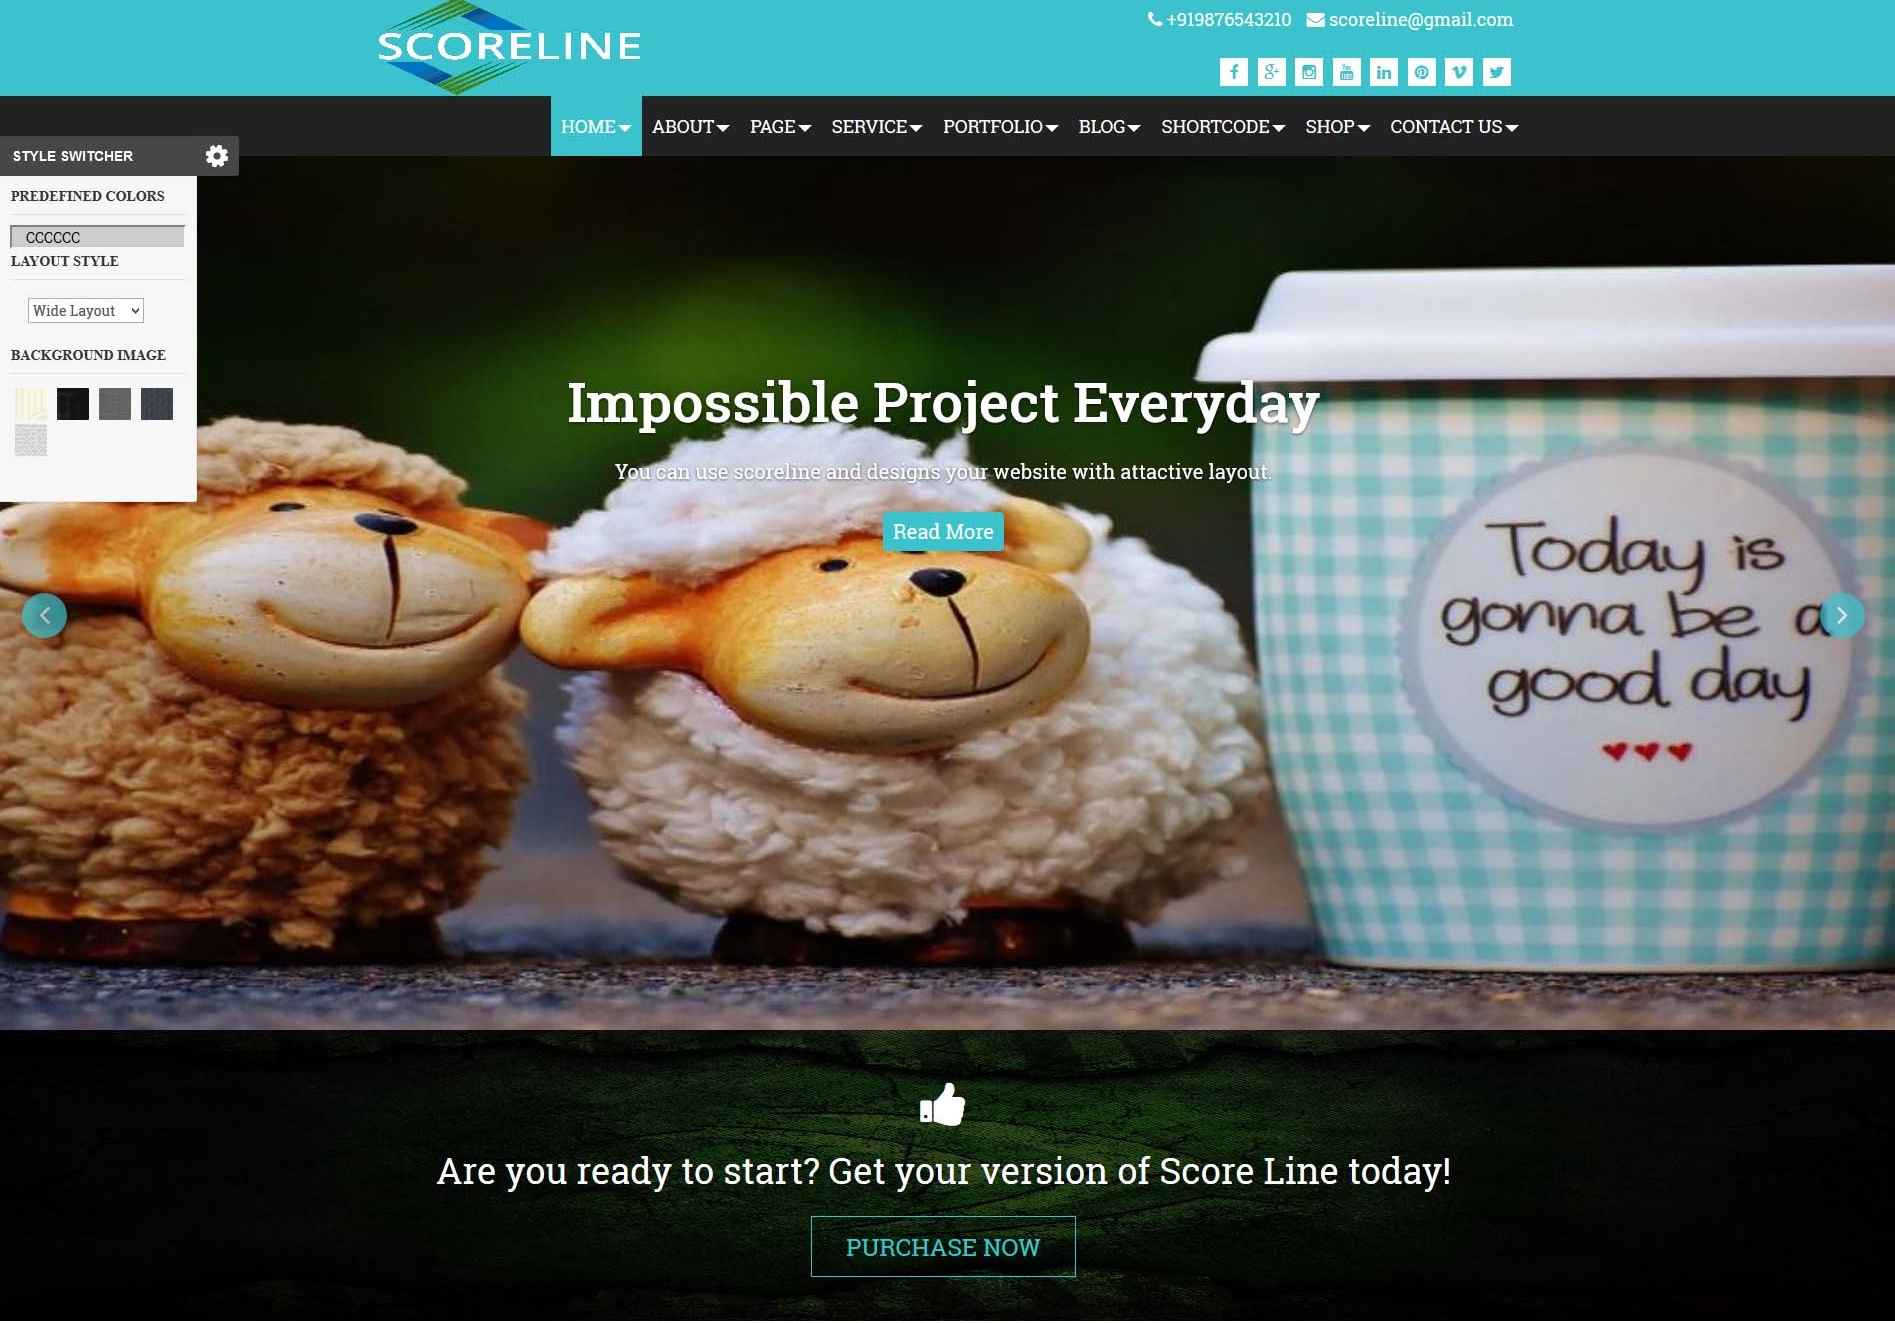
14. Scoreline Premium
The Scoreline is a responsive and fully customizable template for Business and Multi-purpose theme.The Theme has You can use it for your business, portfolio, blogging or any type of site.Custom menus to choose the menu in Primary Location that is in Header area of the site. which is ideal for creating a corporate / business website.
Scoreline is Retina ready.We focused on usability across various devices, starting with smartphones.scoreline is a Cross-Browser Compatible theme that works on All leading web browsers.In footer area theme offer the Social Media Links to add your Social Links here. translation ready and much more.
15. Business Blog Joomla Template
Business Blog Joomla Template offers a full-screen slider, stick-to-top menu, recent works gallery. The latter is presented in a grid. Each image of the gallery can be enlarged. Three pricing plans are presented right on the home page. They appear simple and trustworthy to the user. Company advantages are highlighted in the infographic style. You can change your theme color with the help of simple color picker tool placed on the left hand.
16. Agriculture WP Theme
Harvest is a ready-made Agriculture WP Theme that can give you an opportunity to promote your business online effectively. With its help, you can provide your product or service details, share your company story, provide users with important information about new technologies via blog, etc. The layout features a grid-based structure, which allows you to organize plenty of data on one page.
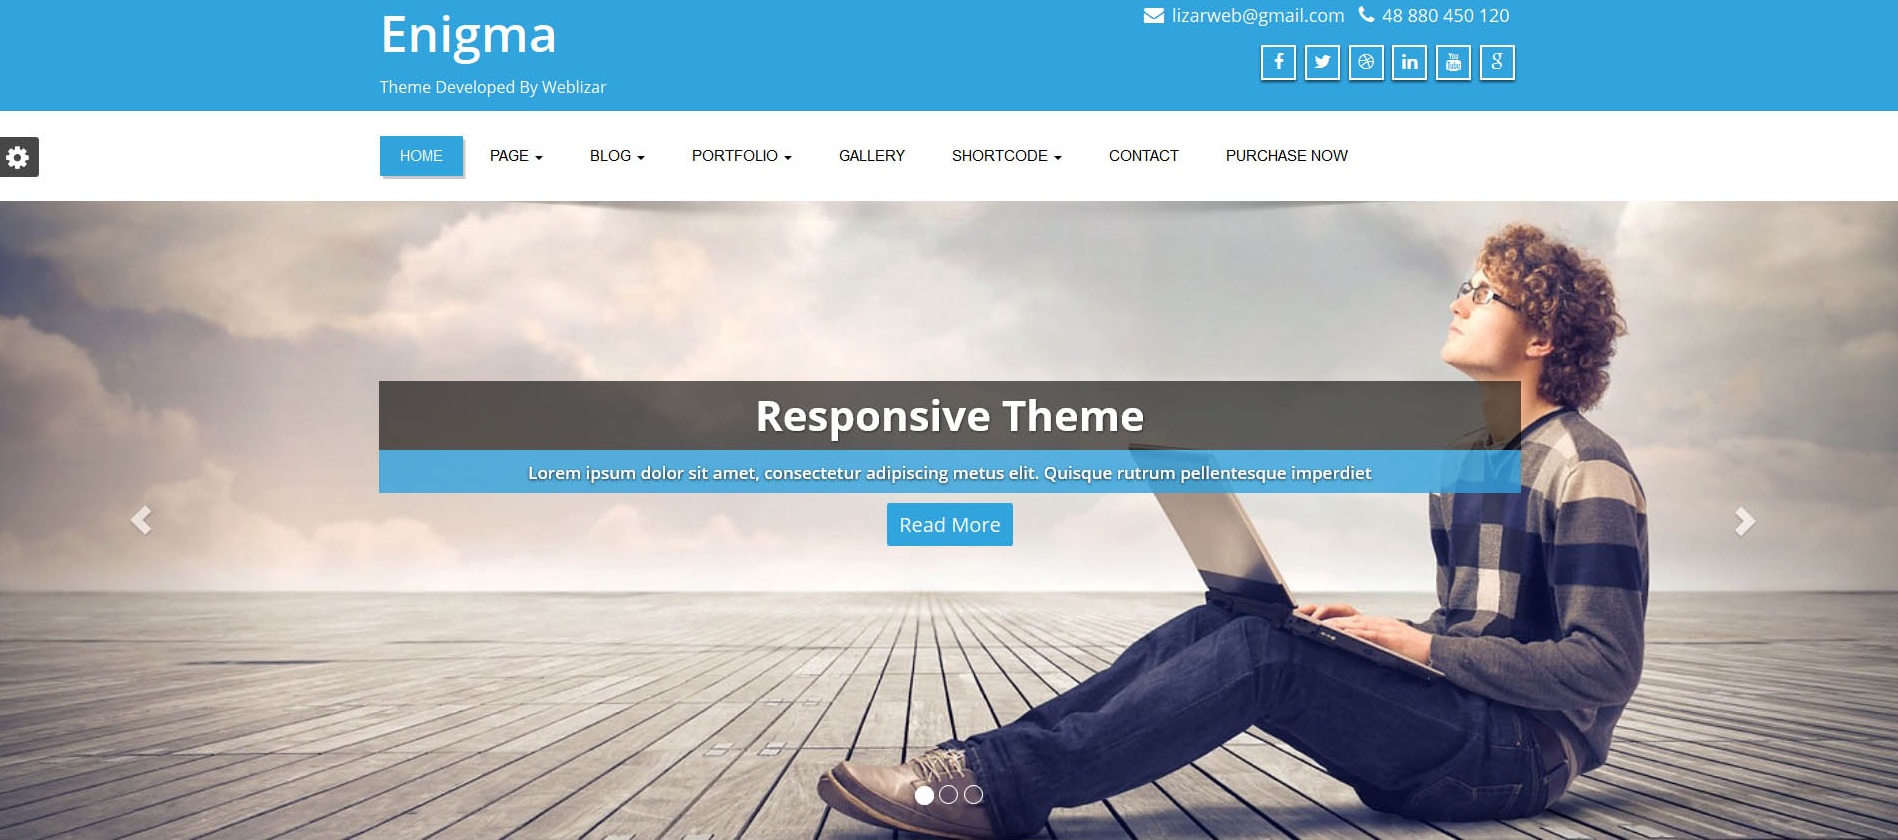
17. Enigma Advance
Enigma Advance theme is a super professional one page WordPress theme for modern businesses. Ideal for creative agencies, startups, small businesses, and freelancers and best of all it’s so easy to use that you can have your website up in minutes. Perfect to promote your work or your creative business. It is cross-browser compatible, fully responsive, and retina ready.Creative is one of our most customizable and flexible themes, you can create practically unlimited versions of your website, your imagination is the only limit. It includes an awesome slider, filterable portfolio, beautiful galleries, different background patterns, rich color changer, light/dark color skins, boxed/wide layout styles, additional page options and much more. Compatible with WPML & Woo Commerce Plugin.
18. Magento spice shop theme
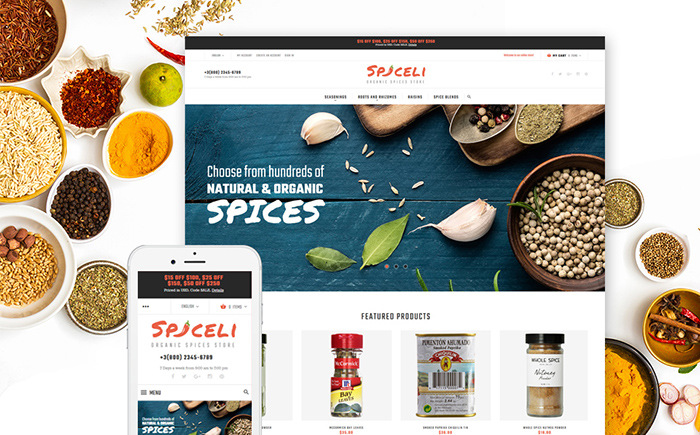
Magento spice shop theme have lots of the features as a drop down menu, contact information at the left top of the template, a neat image slider with full-width images make this theme beautifully designed and functional at the same time. The visitors of your website will be able to reach it from all types of devices because it is responsive and fits any screen size. You’ll be able to promote products or brands in your “Features Products” and “Features Brands” section and get more attention to some items.
19. Fashion Boutique PrestaShop Theme
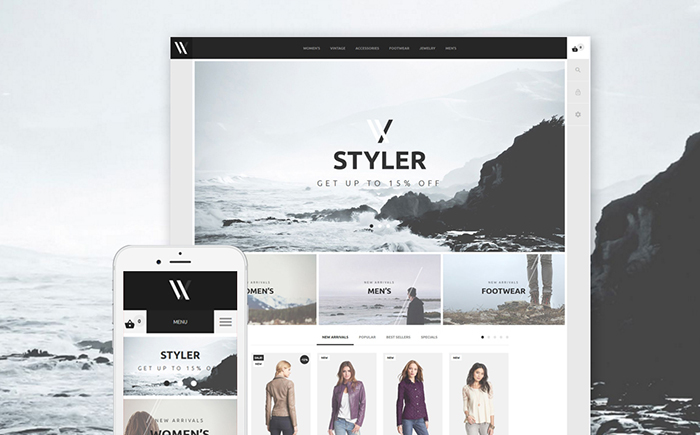
The most important factor of this template is simplicity, clear arrangement, look and price of course. Very best responsive template. This template support multilingual. It supports different type of color scheme, changes the palette of your website interface with only one click. This customization tool will let you keep your site inline with your corporate identity.
20. Responsive WordPress Theme
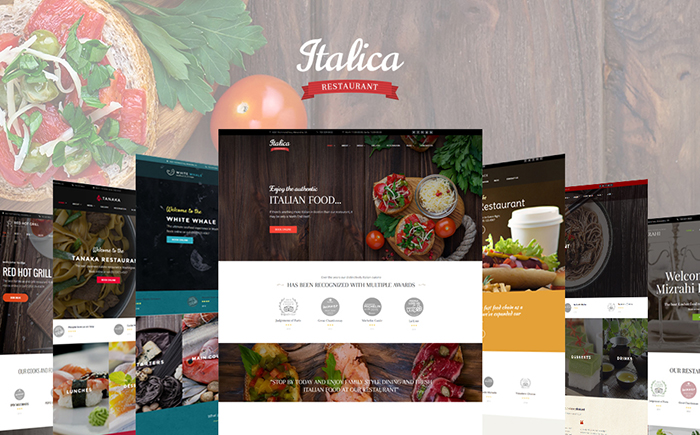
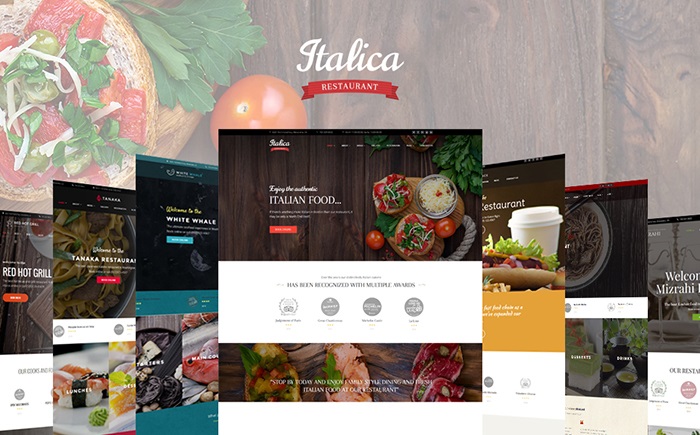
The package includes themes for Italian, Chinese, Japanese, seafood, Kocher, barbecue, and fast food restaurants. The themes are carefully built and designed, have a clean uncluttered layout and readable typography. Let your visitors reserve tables at your restaurant directly on your site thanks to Restaurant Menu Plugin. Create and edit page layouts easily with a drag-and-drop page builder Power, that also comes with the themes free of charge. In case of any questions or difficulties our 24/7 support chat would be ready to solve your issues.

Encode Email Address For WordPress Site
For a businessman, an email address is a valuable piece of information for sending or receiving important information, it becomes valuable for your business, whether you are networking with other businesses or communicating with customers and clients.
So it’s important to encode an email to prevent external spammers. You can encrypt your email with two-way.
- By Code Method
- By Plugin Method
1. By Code
Encode Email Address For WordPress Site. It’s very simple to encode an email just with few simple steps.
In your theme folder, open header.php search your Email code. Your code will look like of this type –
<?php echo get_theme_mod(‘contact_mail’, ‘[email protected]’); ?>
you just have to add md5 in i this code –
After adding md5 your code will look like this –
Save and run your theme. Your mail looks like this in your front end.
2. By Plugin
Many Plugins that provide a human-friendly solution that protects any emailto: links of plain email addresses inside posts and as a theme function, or Email Address Encode which converts all plain email addresses and emailto: links into decimal and hexadecimal entities.
1. Email Encoder Bundle – Protect Email Address -: for more details click here
2. Email Address Encoder -: for more details click here
We hope after reading this blog post you will get your encrypted email. Please give your comments and remark below.

15 Best HTML Templates of this Fall
Establishing an online presence can be quite a tricky task, especially if you don’t know where to start. It requires time and patience to discover all possible ways of creating a website. Depending on your starting budget, you can hire a designer and get a ready-made product, to design a website from scratch or customize a website template easily and get a result within hours. Today we want to pay your attention to a sleek collection of 15 Best HTML5 Templates of this Fall worth to start your next business project with. In fact, HTML5 is the most innovative option for creating a fully functional website. Truly, there is more than one reason why you should start using it right now without any further regrets.
In other words, HTML5 is a simplified feature, which allows you to do complex things without worrying about it. Taking into account, that mobile devices became more popular choice when browsing the Internet nowadays, HTML5 is the most advanced tool to set up mobile-friendly websites. HTML5 is going to strength its position even further, so you should get it right now to provide your audience with the best user experience ever. It can help you shorten your time and build a website interesting for your targeting audience to interact with. HTML5 boasts two graphic additions, geo-location capabilities, Database and App Cache storage options, more cross-browser friendly option, ability to develop interactive games and more interactive and fancier animation possibilities to create a better experience for those who browse your website. Another great feature is a semantic markup, which makes the web more useful and able to understand your queries and deliver more accurate information.
So, when starting a new business project online consider all the needed features you want and how they can help your business to grow. Remember on your targeting audience and their requirements, make your website accessible for them. HTML5 is able to create incredibly complicated apps to engage your visitors. Keep in mind, whether they need it or not.
Below you will find the collection of 15 Best HTML Templates of this Fall, which can help you to set up a website with better web standards, improved performance and more efficient content. Indeed, it would load faster and function better. HTML5 is built to make the things easier and simpler for you. It has the power to create a website, which delivers the needed information in a proper way. Find more useful information here and establish your online presence efficiently.
1. Starbis – Business Website Template
Starbis is a multipurpose responsive website template that can be used for a variety of business purposes. It’s sleek and trendy design will add more elegance and professionalism to your web page. Fully editable, it is pre-loaded with an ultramodern Novi Builder that allows you to edit and create new pages at the site’s front end, without any coding skills required. A number of pre-designed blogs, portfolio, and eCommerce page templates allow you to get started with your web project on the fly. Stunning animation and visual effects will spice up your online presentation.
2. Garden Design Responsive Website Template
Garden is a responsive theme, which can easily adapt to any screen size. Website slider is a great thing in terms of presenting important information. There you can place your custom slides with promos, new products, or any other things you need to highlight. This theme has a contact form by this built-in web form, customers can easily get in touch with you, inquire more information about your services and give their feedback on using them. There is no need to manually test anything in different browsers because it is already perfect in all browsers.
3. Intense – Multipurpose Website Template
Intense is a fully featured, multi-purpose responsive website template that comes loaded with literally everything you may think of when launching or upgrading your blog, portfolio, business website, corporate web page or an online shop. It’s trendy layout was made highly flexible and dynamic so that you can tweak it in a way that will perfectly match your brand identity. The theme is pre-loaded with a host of pages that are ready to go out of the box (like 20 Portfolio pages, 23 Blog pages, 11 Shop pages, 55 pages for components, etc.). In addition to the rich variety of smart customization options, social media integration, rich UI kit and loads of other options, Intense includes child themes, which all of its owners can access for free. Regular updates, 24/7 free support, RTL support and an array of other features were included into the pack.
4. SEO Website Responsive Website Template
SEO Website Responsive Website Template is quick and easy to scan. Built with Bootstrap 3.3, it is intended to adjust to any screen size flawlessly. Multiple headers and footer variations, as well as a rich UI kit, make the theme’s customization easier and speedy. More than 50 ready-made HTML5 pages are ready to go out of the box. In addition to a selection of pre-design blog layouts, the theme includes several gallery types, which allow you to organize visual data in a grid list, masonry or cobbles gallery.
5. Doctors Office Website Template
This theme with snow-white layout was created specifically for dental clinics. Having Bootstrap in its core, Doctors Office Website Template is responsive, so it will quickly adapt to any gadget with any screen size the user has at hand right now. Text and images are also flexible, so they will be rendered correctly. The slider will let you present your important information like promos, new products, and many other things you need to highlight the memorable way. The theme supports Google fonts, which gives you a chance to create a unique look of your site.
6. Facilis – Business Bootstrap Template
Facilis Website Template can become a rock-solid foundation of a business website. Running on Bootstrap framework, it ensures seamless adaptation of your site’s pages to any screen size. The main navigation panel is presented with a sticky drop-down menu. Advanced live search is also available. Multiple page layouts, blog, and eCommerce functionality are integrated into the theme’s pack. A variety of working forms, a rich UI kit, and several gallery types are added to help you build a web page that converts.
7. Photographer Site Template
The Theme layout is built in black-and-white colors, guiding the users’ eye to creative photo galleries. The main navigation bar is minimized and presented by means of a hamburger icon, which stays in a sticky position in the top left corner of the theme. Integrated with social media options, it provides the users with the possibility to share their preferred content with a click. Contact details and a pre-designed contact page are available as well. Running on a fully responsive framework, the templates automatically adjusts to any screen size it’s being viewed on.
8. Gym Equipment Website Template
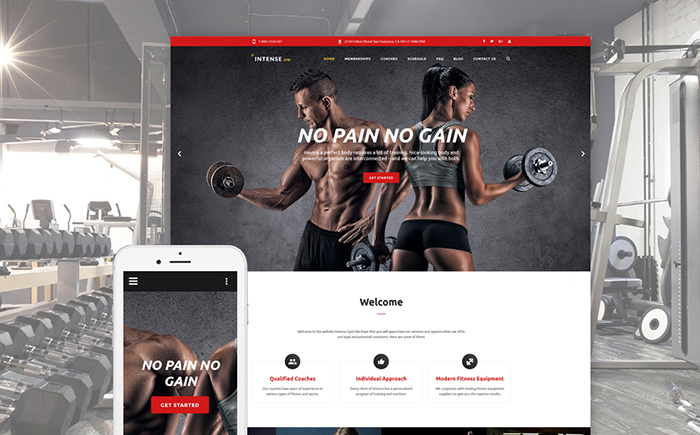
The Gym Equipment Website Template is fully responsive one of the numerous child templates of Intense. Its design is featured by the extensive usage of black and red colors, which grant it a powerful and energetic look. In the top of its layout resides a sticky menu, which remains visible while the page is being scrolled down, thus improving the usability of your website. There are many other visual improvements in this template: the image blocks on the homepage are gingered up with modern parallax effect, and the buttons are beautifully animated using pure CSS. The footer contains Flickr and Twitter social feed widgets, social buttons and a newsletter form.
9. Apartment Rent Web Template
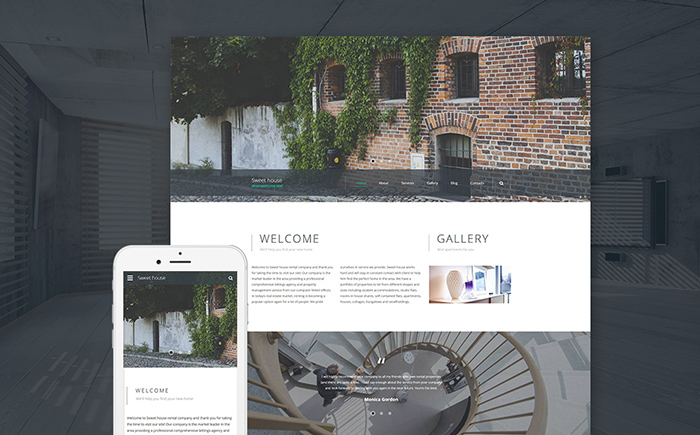
Sweet House is a sleek and modern Apartment Rent Web Template that is focused on the effective presentation of your offers on the web. It runs on a fully responsive framework, ensuring that all of your site’s content will be displayed properly across a variety of devices. To provide the users with a seamless and intuitive browsing experience, the theme’s header is pre-loaded with a customizable MegaMenu, which remains fixed to the top of the page. The theme’s layout is simple and spacious. Latest news and featured properties are organized into carousel sliders. At the bottom of the page, the users will find a built-in Google map and a set of social sharing options, guiding them to your official social media profiles.
10. Cafe And Restaurant Site Template
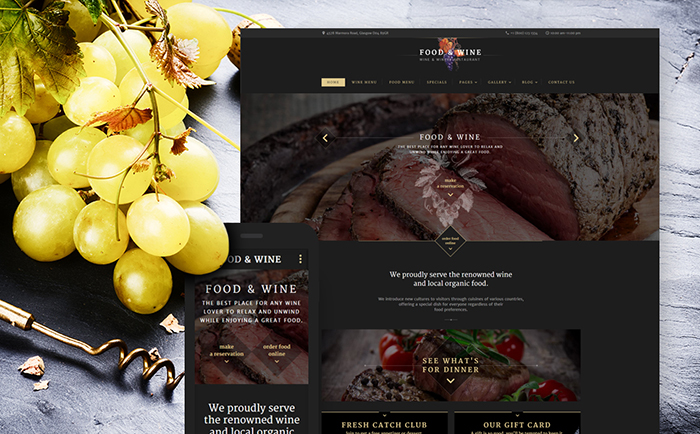
This Cafe And Restaurant Site Template is a great way to present your cozy public place on the web. It is a multipurpose HTML template designed to bring joy to your visitors. They can reserve the best table at your restaurant online right from the homepage, and with Google Map integrated into the theme, they won’t have any problems with finding the place later. In addition, the template features 35 extra HTML5 pages and 13 different blog layouts that will suit the most exquisite taste – a great deal of choices to make. Don’t forget that to stimulate your customers’ appetite, it is important to showcase your restaurant’s food in the best light. That is why this theme offers various gallery types such as the carousel, slider, isotope, etc.
11. Law Firm Responsive Website Template
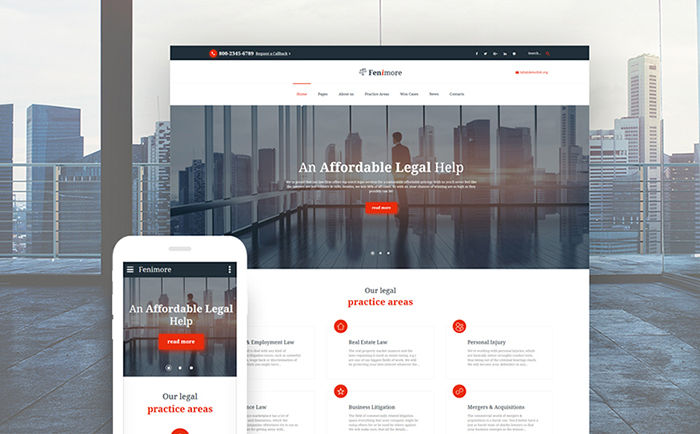
Law Firm is a responsive multipurpose website template. This template made with 20 ready-made HTML5 templates, multiple headers and footer layout, live search and contact forms, W3C valid well commented and SEO friendly code, back to top button, calendar etc many more features are available. This is compatible with all browsers.
12. Charity Responsive Website Template
Open Heart is a responsive website template for a charity organization. It provides sticky navigation, which means the bar with a mega menu always stays in view. To attract the audience to your message, you can use a slider. As for content presentation, there is a rich library of Google fonts. The theme also comes packed with font icons to support your content. These graphic elements look pixel-perfect on screens of any resolution. With contact and newsletter forms, visitors can reach you and subscribe to your news. To edit the theme design, you can access PSD files in its package.
13. Solar Energy Responsive Website Template
GreenTech is a responsive Solar Power System Website Template, which offers you a new way to look at business website designs. Designed specifically for ecology-oriented websites, it has a green color palette with minor blue and purple details. It is packed with progressive visual effects and animations intended to make your website look contemporary and dynamic. GreenTech boasts a rich UI kit, which includes lots of professionally designed components: buttons, tabs, accordions, graphs, progress bars, and much more. It is also equipped with a live chat module, a grid blog layout, 3 homepage variations and e-commerce functionality.
14. Ice Cream Website Template
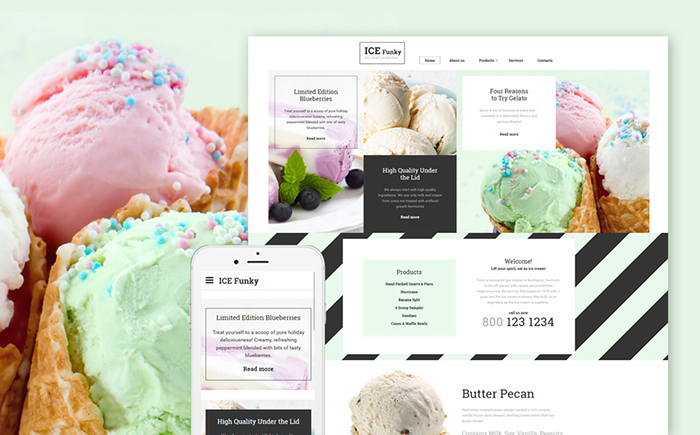
An appetizing, modernly designed ice cream website template, which is created to convert website visitors into business customers, may be a brilliant option for you. Have a look at an unusual design which helps the template be that memorable. The CTA-buttons at the bottom of the template let you put any business proposition so that it will be noticed. The asymmetry of the banners scattered all over the web design attracts and eye and engages you to click. Don’t overlook a possibility to create one of your best-designed projects which will also look perfectly on any screen size due to template’s responsivity.
15. Car Company Website Template
CARS is a dynamic and visually rich website template for a car company. Its intro block is composed of full-screen slides to engage visitors with your content. You can also show off your autos in a gallery with a quick view option. To add a touch of depth to the page, the template makes use of a parallax effect. By means of progress bars, you can present your autos in the percentage ratio. Whenever visitors need your menu, they can always access it in a sticky navigation bar.
Thanks for reading this post. Hoping this post will help you to select a Best HTML Templates of this Fall.
Please give your comments and remark below.

SEO Images Optimizer Pro
SEO images Optimizer pro Plugin is one important aspect of overall Search engine optimization. There are many things to take into consideration for your website to make it more SEO friendly and to rank higher in search engines.
Many Site owners may not realize this, but images can generate the traffic from image-based search engines (Google Images for example). If your images do not have ALT and TITLE already set, SEO image Optimizer prowill add them according the pattern you set.you can ALT and TITLE tag set for Woo commerce product image and also set for featured images of post and pages.
ALT attribute is important part of search engine optimization And the best thing about images, is that they can be used to bring in organic traffic via search engine image results.
When optimizing images for the web, your goal is to reduce the file size to boost your site speed.SEO image Optimizer pro build the new Optimizer images with reduce site which is plays an important role in your overall SEO.
Now main Question is… How this plugin will add Alt and Title tag to WordPress images… How to reduce and make SEO Friendly Images. But Our SEO images Optimizer Pro is one useful WordPress image SEO plugin, which quickly adds ALT and Title tag to your images and resize and compress your all WordPress images. You can visit documentation link of plugin SEO images Optimizer Pro documentation.
In this article we will discuss the main featured and key points of SEO images Optimizer Pro plugin.
SEO Image Optimizer is a seo friendly plugin. This plugin dynamically replaces title and alt tag of images. All changes will done without effecting the database. Plugin also resized and compressed the images to boost your site speed. So activate the plugin, give a pattern and you are ready to go.
There are many useful featured will be added with pro plugin. Which is make your site seo friendly and It describes your images to search engine and when a user searches for a certain image this is a key determining factor for a match.
SEO Image Optimizer pro plugin coming with some extra and useful featured for them who wants to dynamically insert SEO friendly title and alt tag in images. It’s also Resize and Compress the images to boost your site speed.
Main Features Of SEO images Optimizer Pro Plugin
- If title and alt is blank Insert dynamically title and alt tag
- Custom title and alt tag for all images
- Work with Woo Commerce Product Images
- Work with Post Featured Images
- Insert custom title, description and caption in each single Image
- Magical reset button to restored default data
- Remove delimiter characters (like dot dash etc) from the title and Alt tag
- Compress the image size to boost site load speed
- Also Compressed the old WordPress images
- Resized New images with Default Dimensions
- Also Resized the old images and create new URL.
Key Point Of SEO images Optimizer Pro Plugin
- SEO friendly Image Optimization
- Dynamically Insert and Replace title and alt tag of images
- Work with Post Featured Images and Woo commerce images
- Resize and compress the all new and old WordPress images
- Remove delimiter characters (like dot dash etc) from the title and Alt tag
- Insert Custom title, description and caption in each single Image
- Image library with Easy user friendly interface
- Reset and get old data of images
Complete Plugin Documentation
- You can find more details about our plugin in our plugin documentation link
- SEO images Optimizer Pro documentation
Priority Support To Paid Customers
- IMPORTANT: If you found a bug in SEO images Optimizer Pro plugin or have any problem/question concerning the plugin, please post your query into SEO images Optimizer Pro Support Forum here in our Forum. If you do not find a solution here, do not hesitate to contact us at lizarweb (at) gmail (dot) com.
Thanks For Reading This Document

Enable Cross-Origin Resource Sharing
What is Cross-Origin Resource Sharing (CORS) –
Cross-origin resource sharing is fundamental that can make visible the resources which are hidden. Cross-Origin Resource Sharing (CORS) is a specification that enables truly open access across domain boundaries. CORS allows web scripts to interact more openly with content outside of the original domain, leading to better integration between web services. Cross-origin resource sharing allows blocked resources just like – fonts, on a web page to be requested from another domain outside the domain from which the resource originated.
CORS defines a way in which a browser and server can interact to determine whether or not it is safe to allow the cross-origin request. It allows for more freedom and functionality than purely same-origin requests but is more secure than simply allowing all cross-origin requests.
Why is CORS important?
JavaScript and the web programming has grown by leaps and bounds over the years, but the same-origin policy still remains. This prevents JavaScript from making requests across domain boundaries and has spawned various hacks for making cross-domain requests.
CORS introduces a standard mechanism that can be used by all browsers for implementing cross-domain requests. The spec defines a set of headers that allow the browser and server to communicate about which requests are (and are not) allowed. CORS continues the spirit of the open web by bringing API access to all.
Enable Cross-Origin Resource Sharing –
1. CORS on Apache
To add the CORS authorization to the header using Apache, simply add the following line inside either the <Directory>,<Location> <Files> or <VirtualHost> sections of your server config (usually located in a *.conf files, such as httpd.conf or apache.conf), or within a .htaccess file:
Header set Access-Control-Allow-Origin "*"
To ensure that your changes are correct, it is strongly recommended that you use
apachectl -t
to check your configuration changes for errors. After this passes, you may need to reload Apache to make sure your changes are applied by running the command
sudo service apache2 reload
or
apachectl -k graceful
Altering headers requires the use of mod_headers. Mod_headers is enabled by default in Apache, however, you may want to ensure it’s enabled by run
a2enmod headers
Note: you can also use add rather than set, but be aware that add can add the header multiple times, so it’s likely safer to use set.
2. CORS on App Engine
For Python-based applications in Google App Engine, the self.response.headers.add_header() method can be used, such as:
class CORSEnabledHandler(webapp.RequestHandler):
  def get(self):
    self.response.headers.add_header("Access-Control-Allow-Origin", "*")
    self.response.headers['Content-Type'] = 'text/csv'
    self.response.out.write(self.dump_csv())
For Java-based applications, use resp.addHeader():
public void doGet(HttpServletRequest req, HttpServletResponse resp) {
  resp.addHeader("Access-Control-Allow-Origin", "*");
  resp.addHeader("Content-Type", "text/csv");
  resp.getWriter().append(csvString);
}
And for Go-based applications, use w.Header().Add():
func doGet(w http.ResponseWriter, r *http.Request) {
  w.Header().Add("Access-Control-Allow-Origin", "*")
  w.Header().Add("Content-Type", "text/csv")
  fmt.Fprintf(w, csvData)
}
3. CORS on ASP.NET
If you don’t have access to configure IIS, you can still add the header through ASP.NET by adding the following line to your source pages:
Response.AppendHeader("Access-Control-Allow-Origin", "*");
ASP.NET Web API
ASP.NET Web API 2 supports CORS.
To enable CORS support, add the Microsoft.AspNet.WebApi.Cors NuGet packages to your project.
Add this code to your configuration:
public static void Register(HttpConfiguration config)
{
    // New code
    config.EnableCors();
}
To enable cross-origin requests, add the [EnableCors] attribute to your Web API controller or controller method:
[EnableCors(origins: "http://example.com", headers: "*", methods: "*")]
public class TestController : ApiController
{
    // Controller methods not shown...
}
Enabling Globally
The method described above can also be used to enable CORS across the API without annotating each controller:
public static void Register(HttpConfiguration config)
{
    var corsAttr = new EnableCorsAttribute("http://example.com", "*", "*");
    config.EnableCors(corsAttr);
}
4. CORS on AWS API Gateway
Amazon API Gateway adds support for CORS enabling through a simple button in the API Gateway console. Unfortunately, that button has a partial behavior, thus setting CORS correctly only for 200 answers (so not other HTTP status codes) and ignoring Jquery header support. The best solution considered so far is about avoiding to use the CORS button and set configurations manually.
This can be achieved in a couple of steps:
1. Log into API Gateway console
2. Create all the REST resources that need to be exposed with their methods before setting up CORS (if new resources/methods are created after enabling CORS, these steps must be repeated)
3. Select a resource
4. Add OPTIONS method, choose as integration type “mock”
5. For each Method of a resource
6. Go to Response Method
7. Add all the response method that should be supported (i.e. 200, 500, etc.)
8. For each response code set Response Headers to
X-Requested-With
Access-Control-Allow-Headers
Access-Control-Allow-Origin
Access-Control-Allow-Methods
9. Go to Integration Response, select one of the created response codes, then Header Mappings
10. Insert default values for headers
example:
X-Requested-With: ‘*’
Access-Control-Allow-Headers: ‘Content-Type,X-Amz-Date,Authorization,X-API-Key,x-requested-with’
Access-Control-Allow-Origin: ‘*’
Access-Control-Allow-Methods: ‘POST,GET,OPTIONS’
This operation has to be repeated for each method, including the newly created OPTIONS
11. Deploy the API to a stage
12. Check using http://client.cors-api.appspot.com/client that CORS requests have been successfully enabled
5. CORS on Caddyserver
To add the CORS authorization to the header using Caddy, simply add the following line inside your caddyfile:
cors
This will allow all resources to be accessed from every domain.
You can also be more specific, i.e. allow specific resources to specific domains:
cors /foo http://mysite.com http://anothertrustedsite.com
There are many more options you can use, here is a full example, as shown in the caddyserver docs:
cors / {
  origin            http://allowedSite.com
  origin            http://anotherSite.org https://anotherSite.org
  methods           POST,PUT
  allow_credentials false
  max_age           3600
  allowed_headers   X-Custom-Header,X-Foobar
  exposed_headers   X-Something-Special,SomethingElse
}
6. CORS in CGI Scripts
Just output the line:
Access-Control-Allow-Origin: *
.. as part of your CGI script’s headers, for example, in Perl (using CGI.pm):
print header(
  -type => 'text/turtle',
  -content_location => 'mydata.ttl',
  -access_control_allow_origin => '*',
);
7. CORS in Perl PSGI scripts
The module Plack::Middleware::CrossOrigin provides a complete CORS server side implementation. To allow any request from any location, just add this to your builder:
enable 'CrossOrigin', origins => '*';
8. CORS in Python
print "Content-Type: text/turtle"
print "Content-Location: mydata.ttl"
print "Access-Control-Allow-Origin: *"
9. CORS on ExpressJS
In your ExpressJS app on node.js, do the following with your routes:
app.use(function(req, res, next) {
  res.header("Access-Control-Allow-Origin", "*");
  res.header("Access-Control-Allow-Headers", "Origin, X-Requested-With, Content-Type, Accept");
  next();
});

app.get('/', function(req, res, next) {
  // Handle the get for this route
});

app.post('/', function(req, res, next) {
 // Handle the post for this route
});
10. CORS on IIS6
To CORS-enable Microsoft IIS6, perform the following steps:
- Open Internet Information Service (IIS) Manager
- Right-click the site you want to enable CORS for and go to Properties
- Change to the HTTP Headers tab
- In the Custom HTTP headers section, click Add
- Enter
Access-Control-Allow-Originas the header name - Enter
*as the header value - Click Ok twice
11. CORS on IIS7
For Microsoft IIS7, merge this into the web.config file at the root of your application or site:
<?xml version="1.0" encoding="utf-8"?>
<configuration>
 <system.webServer>
   <httpProtocol>
     <customHeaders>
       <add name="Access-Control-Allow-Origin" value="*" />
     </customHeaders>
   </httpProtocol>
 </system.webServer>
</configuration>
If you don’t have a web.config file already, or don’t know what one is, just create a new file called web.config containing the snippet above.
12. CORS on Meteor
To add CORS authorization to a Meteor application, use the webapp package’s WebApp.connectHandlers to customize HTTP headers.
// Listen to incoming HTTP requests, can only be used on the server
WebApp.rawConnectHandlers.use(function(req, res, next) {
  res.setHeader("Access-Control-Allow-Origin", "*");
  return next();
});
Use the optional path argument to only call the handler for paths that match a specified string.
// Listen to incoming HTTP requests, can only be used on the server
WebApp.rawConnectHandlers.use("/public", function(req, res, next) {
  res.setHeader("Access-Control-Allow-Origin", "*");
  return next();
});
13. CORS on Nginx
The following Nginx configuration enables CORS, with support for preflight requests.
#
# Wide-open CORS config for nginx
#
location / {
     if ($request_method = 'OPTIONS') {
        add_header 'Access-Control-Allow-Origin' '*';
        add_header 'Access-Control-Allow-Methods' 'GET, POST, OPTIONS';
        #
        # Custom headers and headers various browsers *should* be OK with but aren't
        #
        add_header 'Access-Control-Allow-Headers' 'DNT,X-CustomHeader,Keep-Alive,User-Agent,X-Requested-With,If-Modified-Since,Cache-Control,Content-Type';
        #
        # Tell client that this pre-flight info is valid for 20 days
        #
        add_header 'Access-Control-Max-Age' 1728000;
        add_header 'Content-Type' 'text/plain charset=UTF-8';
        add_header 'Content-Length' 0;
        return 204;
     }
     if ($request_method = 'POST') {
        add_header 'Access-Control-Allow-Origin' '*';
        add_header 'Access-Control-Allow-Methods' 'GET, POST, OPTIONS';
        add_header 'Access-Control-Allow-Headers' 'DNT,X-CustomHeader,Keep-Alive,User-Agent,X-Requested-With,If-Modified-Since,Cache-Control,Content-Type';
     }
     if ($request_method = 'GET') {
        add_header 'Access-Control-Allow-Origin' '*';
        add_header 'Access-Control-Allow-Methods' 'GET, POST, OPTIONS';
        add_header 'Access-Control-Allow-Headers' 'DNT,X-CustomHeader,Keep-Alive,User-Agent,X-Requested-With,If-Modified-Since,Cache-Control,Content-Type';
     }
}
14. CORS in Perl PSGI scripts
The module Plack::Middleware::CrossOrigin provides a complete CORS server side implementation. To allow any request from any location, just add this to your builder:
enable 'CrossOrigin', origins => '*';
This module is also available in Debian and Ubuntu as libplack-middleware-crossorigin-perl.
15. CORS on PHP
If you don’t have access to configure Apache, you can still send the header from a PHP script. It’s a case of adding the following to your PHP scripts:
<?php
 header("Access-Control-Allow-Origin: *");
Note: as with all uses of the PHP header function, this must be before any output has been sent from the server.
16. CORS on ColdFusion
If you don’t have access to configure you web server, you can still send the header from a Coldfusion script. It’s a case of adding the following to your Coldfusion scripts:
Tag Based File
<cfheader name="Access-Control-Allow-Origin" value="*">
Script Based File
var response = getPageContext().getResponse();
response.setHeader("Access-Control-Allow-Origin","*");
Note: This needs to be set before any output has been sent from the server.
17. CORS on Tomcat
Apache Tomcat includes support for CORS (Starting from Tomcat version 7.0.41).
Here is an example from those docs that demonstrates a minimal CORS configuration:
<filter>
  <filter-name>CorsFilter</filter-name>
  <filter-class>org.apache.catalina.filters.CorsFilter</filter-class>
</filter>
<filter-mapping>
  <filter-name>CorsFilter</filter-name>
  <url-pattern>/*</url-pattern>
</filter-mapping>
18. CORS on Virtuoso
These instance/server-level settings require OpenLink Virtuoso Open Source (VOS) 6.1.3 or later, or Virtuoso Commercial Edition 06.02.3129
- In the Virtuoso Conductor, go to Web Application Server → Virtual Domains & Directories.
- Expand the default Interface store.
- Click New Directory.
- Specify the desired Virtual Directory Type, or choose an existing virtual directory to use as a template.
- Click Next.
- Specify the Directory Path value.
- Set the CORS options.
- Cross-Origin Resource Sharing – contains a single wildcard asterisk, i.e.,
*or an origin, such ashttp://example.com:8080orhttp://foo.example.com. Scripts are authorized to retrieve a resource if that resource either uses the wildcard or lists the origin of the script. For this example, enter the following single URI:http://demo.openlinksw.com - Reject Unintended CORS check-box – when ticked and the application does not overwrite headers, unmatched Origins will be rejected by sending an empty response.
- Cross-Origin Resource Sharing – contains a single wildcard asterisk, i.e.,
- Click Save changes.
For older versions of Virtuoso, any of the Web Application-level instructions below may be used. Any Virtuoso-based application can implement CORS checking through well-known HTTP functions http_request_header() and http_header(), for example:
<?vsp
IF (http_request_header (lines, 'Origin', NULL) = 'http://host.org')
{
  http_header ('Access-Control-Allow-Origin: http://host.org\r\n');
}
ELSE
{
  RETURN;
}
-- Additional code here ---
?>
19. CORS on WCF
For WCF service you have to develop new behavior and include it in the endpoint configuration:
Create Message Inspector
 public class CustomHeaderMessageInspector : IDispatchMessageInspector
            {
                Dictionary<string, string> requiredHeaders;
                public CustomHeaderMessageInspector (Dictionary<string, string> headers)
                {
                    requiredHeaders = headers ?? new Dictionary<string, string>();
                }

                public object AfterReceiveRequest(ref System.ServiceModel.Channels.Message request, System.ServiceModel.IClientChannel channel, System.ServiceModel.InstanceContext instanceContext)
                {
                    return null;
                }

                public void BeforeSendReply(ref System.ServiceModel.Channels.Message reply, object correlationState)
                {
                    var httpHeader = reply.Properties["httpResponse"] as HttpResponseMessageProperty;
                    foreach (var item in requiredHeaders)
                    {
                        httpHeader.Headers.Add(item.Key, item.Value);
                    }
                }
            }
Create Endpoint Behavior and use Message Inspector to add headers
  public class EnableCrossOriginResourceSharingBehavior : BehaviorExtensionElement, IEndpointBehavior
            {
                public void AddBindingParameters(ServiceEndpoint endpoint, System.ServiceModel.Channels.BindingParameterCollection bindingParameters)
                {

                }

                public void ApplyClientBehavior(ServiceEndpoint endpoint, System.ServiceModel.Dispatcher.ClientRuntime clientRuntime)
                {

                }

                public void ApplyDispatchBehavior(ServiceEndpoint endpoint, System.ServiceModel.Dispatcher.EndpointDispatcher endpointDispatcher)
                {
                    var requiredHeaders = new Dictionary<string, string>();

                    requiredHeaders.Add("Access-Control-Allow-Origin", "*");
                    requiredHeaders.Add("Access-Control-Request-Method", "POST,GET,PUT,DELETE,OPTIONS");
                    requiredHeaders.Add("Access-Control-Allow-Headers", "X-Requested-With,Content-Type");

                    endpointDispatcher.DispatchRuntime.MessageInspectors.Add(new CustomHeaderMessageInspector(requiredHeaders));
                }

                public void Validate(ServiceEndpoint endpoint)
                {

                }

                public override Type BehaviorType
                {
                    get { return typeof(EnableCrossOriginResourceSharingBehavior); }
                }

                protected override object CreateBehavior()
                {
                    return new EnableCrossOriginResourceSharingBehavior();
                }
            }
Register new behavior in web.config
<extensions>
              <behaviorExtensions>
                <add name="crossOriginResourceSharingBehavior" type="Services.Behaviours.EnableCrossOriginResourceSharingBehavior, Services, Version=1.0.0.0, Culture=neutral" />
              </behaviorExtensions>
            </extensions>
Add new behavior to endpoint behavior configuration
 <endpointBehaviors>
            <behavior name="jsonBehavior">
                <webHttp />
                <crossOriginResourceSharingBehavior />
            </behavior>
            </endpointBehaviors>
Configure endpoint
<endpoint address="api" binding="webHttpBinding" behaviorConfiguration="jsonBehavior" contract="Service.IServiceContract" />
APIs that support CORS
- Amazon S3
- DBpedia Spotlight
- Dropbox API
- Facebook Graph API
- Flickr API
- FourSquare API
- Google APIs
- Google Cloud Storage
- GitHub v3 API
- MediaWiki API
- prefix.cc
- PublishMyData
- sameAs
- SoundCloud API
- Spotify Lookup API
- Sunlight Congress API
- URIBurner
- YouTube API (blog post)
- doctape API
Libraries for implementing CORS
- CORS Filter, for Java Web applications
- cors-python, for Python web apps
- Enable CORS on static content in Google AppEngine.
- RDF::LinkedData version 0.16 and later
- cors-filter: A Java Servlet Filter implementation of server-side CORS for web containers, by eBay Software Foundation
- add-cors-to-couchdb: CLI to add CORS support to CouchDB, for use in client libraries like PouchDB.
Thanks for reading this post. Hoping this tutorial will help you to Enable Cross-Origin Resource Sharing.
Please give your comments and remark below.

Guide to add video WordPress theme
Hello Guys :
In your WordPress theme, you have lots of the options for customization of slider, testimonial, header, menu, service etc much more. In some themes, the slider is of two types one is image slider and another one is video slider. It’s easy to customize an image slider with compression to a video slider because in video slider sometimes you are confused while changing the video URL.
So don’t be confused we have some easy step to sort out your problem. just read this post Guide to add video WordPress theme.
Step1 –
Get YouTube Link
Just go to the video site (YouTube) or any another. Search the video which you want to add in your slider. Then follow the steps :
Click the Share button under the video itself. This will give you a shortened link to the video.
After clicking the share button click on Embed button to get your embed code.
You were required to use the embed code from the video site. So copy the embed code which in box area only.
Step2 –
Go to your theme Admin Dashboard -> Add New Slider -> Youtube video URL box and paste the embed code into the content area. All you need to make sure is that the Code is on its own line and not clickable (hyperlinked).
Follow the below image –
After that save the changes.
Hoping that you will get your video by this post. Thanks for reading Guide to add video WordPress theme post.
Please give your comments and remark below.


