Get Instagram Client Id

Get Instagram Client Id
Instagram is an online photo, video sharing, and social networking service that enables its users to take pictures and videos, and share them on a variety of social networking platforms, such as Facebook, Twitter, Tumblr, and Flickr.
What is Instagram Client Id?
Instagram Client Id is an encrypted key which is generated from Instagram developer center using the Instagram account. Client id usages by application software which is installed on your website or mobile devices.
Why we need Instagram Client Id?
Client Id usages via different apps, plugins, software extensions to authenticate application request on the Instagram server. These application usages your client id to fetch your Instagram account details like photos, video, account information. When an application request to Instagram server then server validate the client id and send all the requested information to an application which is installed on your site.
Next, we are explaining to generate your own Client Id from using own Instagram account.
Just simply follow the step by step tutorial to get your own Instagram client id
Step 1
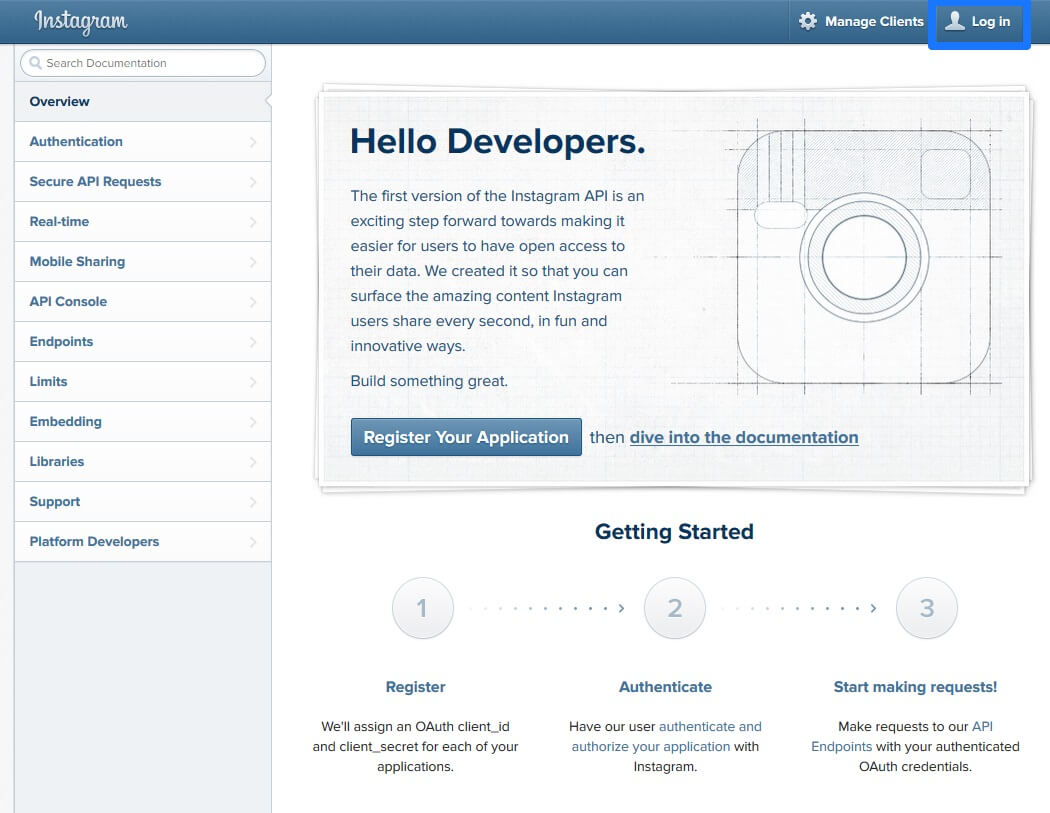
First, go to Instagram developer center. Click Here to open URL.
Step 2
After URL opened into new tab you will see the same screen as below screenshot. Click on Login menu which is highlighted in the screenshot.
Step 3
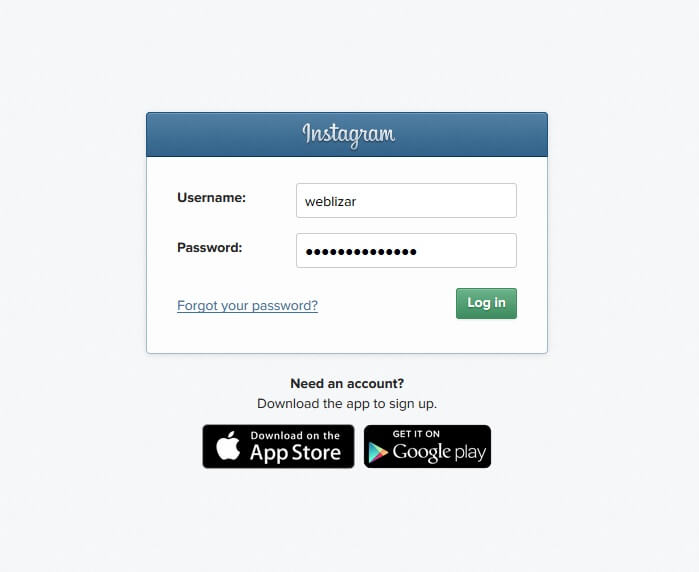
After clicking on login link in the menu you will be redirected to the login page. Fill your account credentials and click on login button.
Step 4
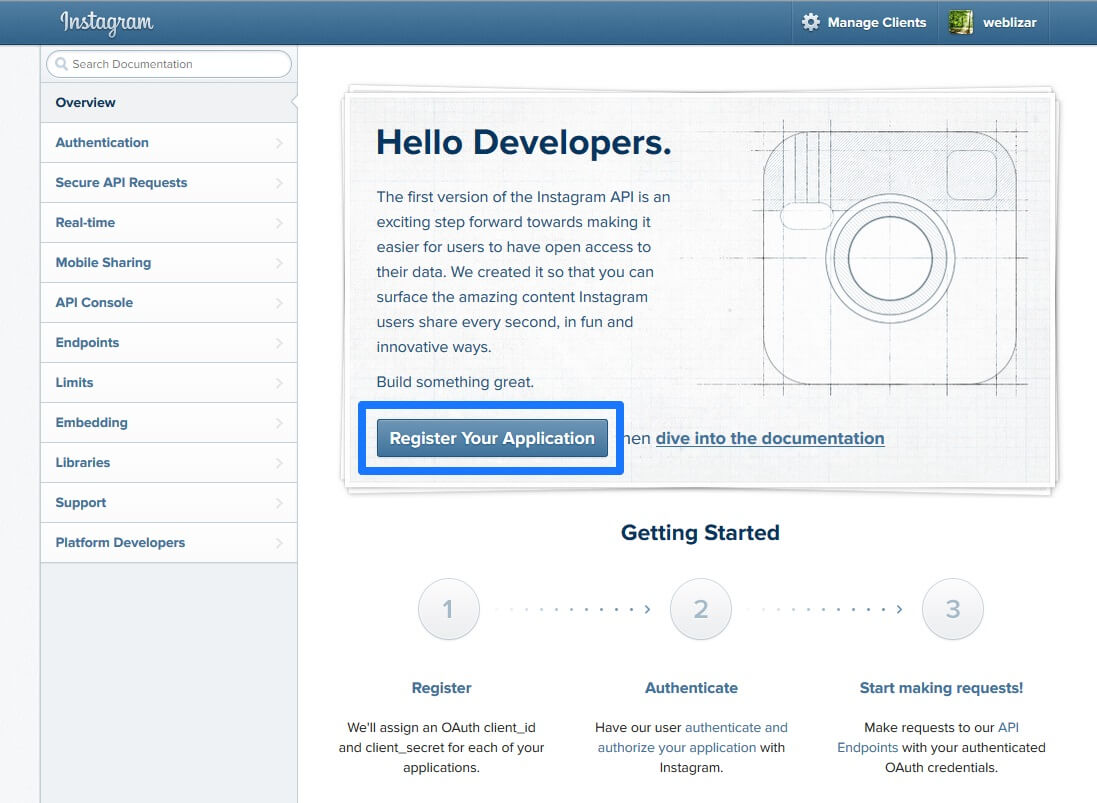
After successful login, you will see Instagram developer client dashboard. Now, click on Register Your Application button which is highlighted in below screenshot.
Step 5
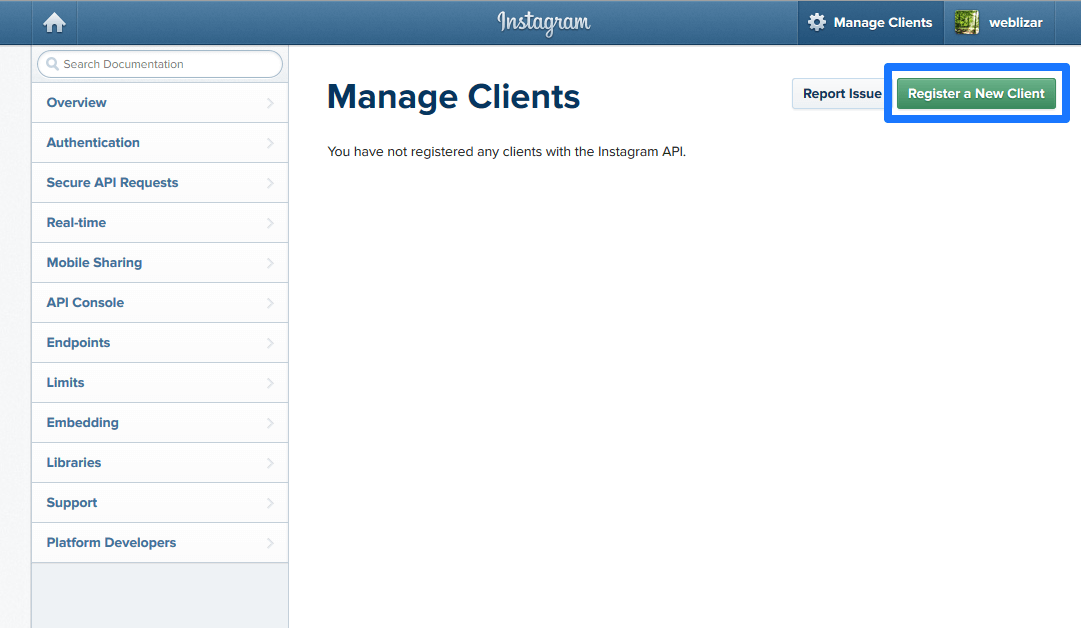
Now you will be redirected to Mange Clients page. Here you will find a green color button Register a New Client. So, click on it same as a screenshot.
Step 6
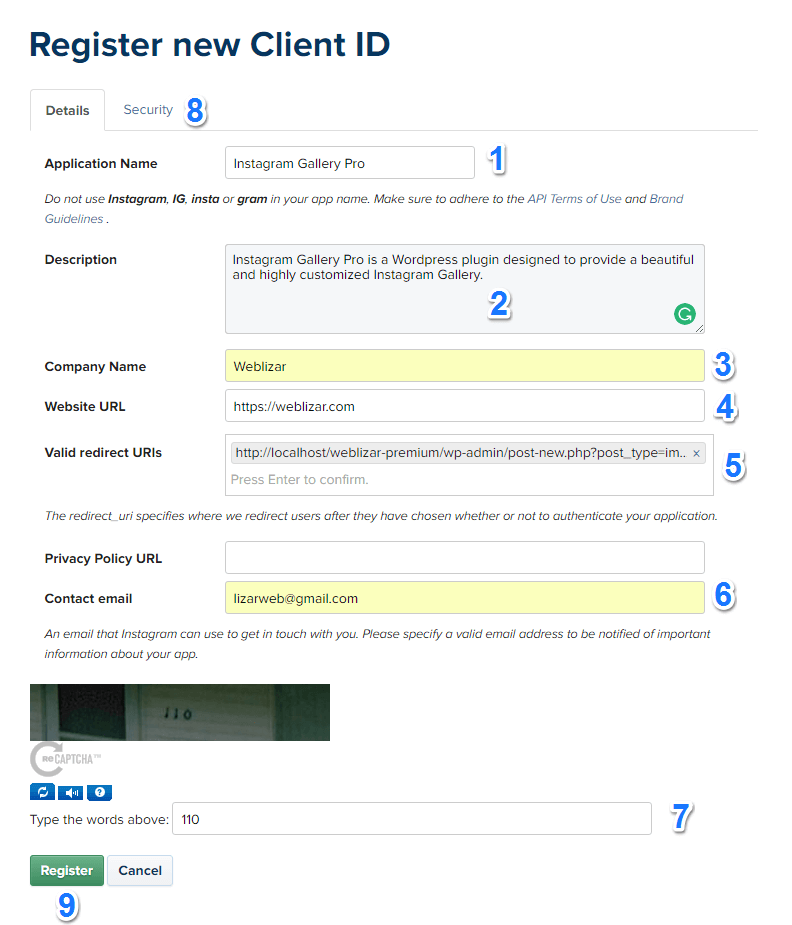
A Register a New Client Id form page will open on the same screen. Fill the form details according to your application needs. In this tutorial, we are filling the details according to Instagram Shortcode & Widget WordPress plugin. And the sample details as below:
1) Application Name – WordPress Plugin (Do not use Instagram, IG, insta or gram in your app name.)
2) Description – Instagram WordPress plugin to display your Instagram photos on WordPress blog site. (define your app basic working details here)
3) Company Name – Type the company name here
4) Website URL – https://weblizar.com/ (you can provide your site domain URL in this field where you using this app)
5) Valid Redirect URIs – http://localhost/weblizar-premium/wp-admin/post-new.php?post_type=imgp_instagram (This is the same URL of your plugin or application dashboard where the requested data will be posted. This is exactly Add New Instagram page URL of plugin)
6) Contact Email – provide your email address in this field
7) ReCaptcha – enter the captcha code value in this field for secure registration procedure by Instagram.
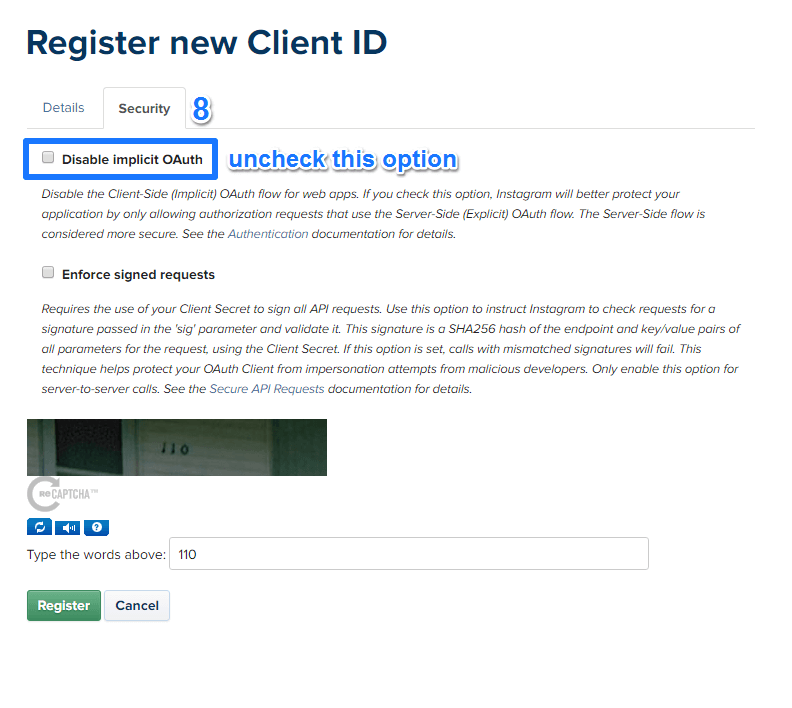
8) Disable implicit OAuth – Go to security tab above the page, and uncheck the disable implicit OAuth option.
9) Register – Finally after filling all valid details in form click on the register button to complete register.
Screenshot A
Screenshot B
Step 7
After successful registration completion, you will find your client id as marked in bellow screenshot.
Now you can copy and use Client ID in any application. Thanks for reading this article & your feedback and suggestions are appreciated to improve this article.
Kind Regards
Weblizar Team
Leave a Reply
You must be logged in to post a comment.

8 Comments
RickC June 20, 2015 at 7:45 am
This process seems to have changed since the instructions above do not match what is asked for on the Instagram signup. I am unable to get an ID. Can you update these instructions? Thanks.
Christian August 16, 2015 at 7:20 am
Thank you for this tutorial. This was the clearest one yet.
I’m confused with two parts. 1) What do I put in for the Redirect URI(s). 2) What do I do after I have the client id?
Sandro September 14, 2015 at 10:49 pm
This is just the tutorial I was looking for. So easy, even a caveman could do it!
I’ve been using the weblizar plugin on my blog and its great.
Thank you.
Sandro
Eagle Design Inc
http://www.EagleDesignInc.com
Patrick April 9, 2016 at 10:34 am
Hello, i would ask you, that this function is for free?
I don’t have to pay for this developer account?
weblizar April 11, 2016 at 1:05 am
Hi Patrick,
Yes! this is free.
Thanks
Adrian May 29, 2016 at 10:50 am
Hi Weblizar,
I am unsure what you mean by the Redirect URI(s). I’m confused upon who is the user? Is this instagram them selves as you mention authorising my app, is this my visitors, who would be the ones using my services? Looking at your example URL, it’s an address within wordpress, of a post where you want the instagram images to be, thus where the ‘fuser’needs to be redirected to? Please help.
Adrian
Axel June 21, 2016 at 5:11 am
Hello,
I just noticed my plugin is broken “Error: Access Token is not valid”, even tough i did not change anything. I also tried to delete the cliend_id and obtain a new one … same result.
Might it be the case that Instagram changed it’s API and this plugin needs an update?
Another Instagram Plugin (The Instagram Feed) states as newest changes: “Compatible with the June 1st Instagram API changes”
thanks,
Axel
Bikramjeet Singh October 18, 2017 at 9:37 am
Hello Sir,
I am trying to create register new client on Instagram and I am unable to do this because now we get two captura code and every time I got failed . Please help me.